Black Beauty Bra View B Sew-Along // Part Twelve: Bonus – Fit & Pattern Adjustments
Hello beautiful bra peeps, and welcome to the final installment of this Black Beauty Bra View B Sew-Along with Joy (@byjoymao)! Thank you so much for following along all the way until the end.
Today, I’ll be sharing with you how I fit and made pattern adjustments to my Black Beauty Bras, covering the following topics:
- Pattern Size
- Underwire Size
- Pattern Adjustments
Please note that these fit adjustments are specific to my body. I am a beginner bra maker and am still learning about bra fitting, but I hope these fit adjustments are applicable to some of you fellow bra makers out there!
Updated 1/31/21: Polished a few things! <3
Pattern Size
Fitting is undoubtedly one of the most complicated parts of bra-making!
The first step to achieving a good fit is to choose the right pattern size to start with. In Part 1 of this series, I talked about how I chose my starting size based on my measurements. The recommended size by the pattern maker is a good place to start, but more often than not, you’ll need to make adjustments to achieve your desired fit.
For this pattern, it took me three tries to arrive at a comfortable fit. It may take well more than three tries to arrive at a comfortable fitting pattern. Or it may even only take one.
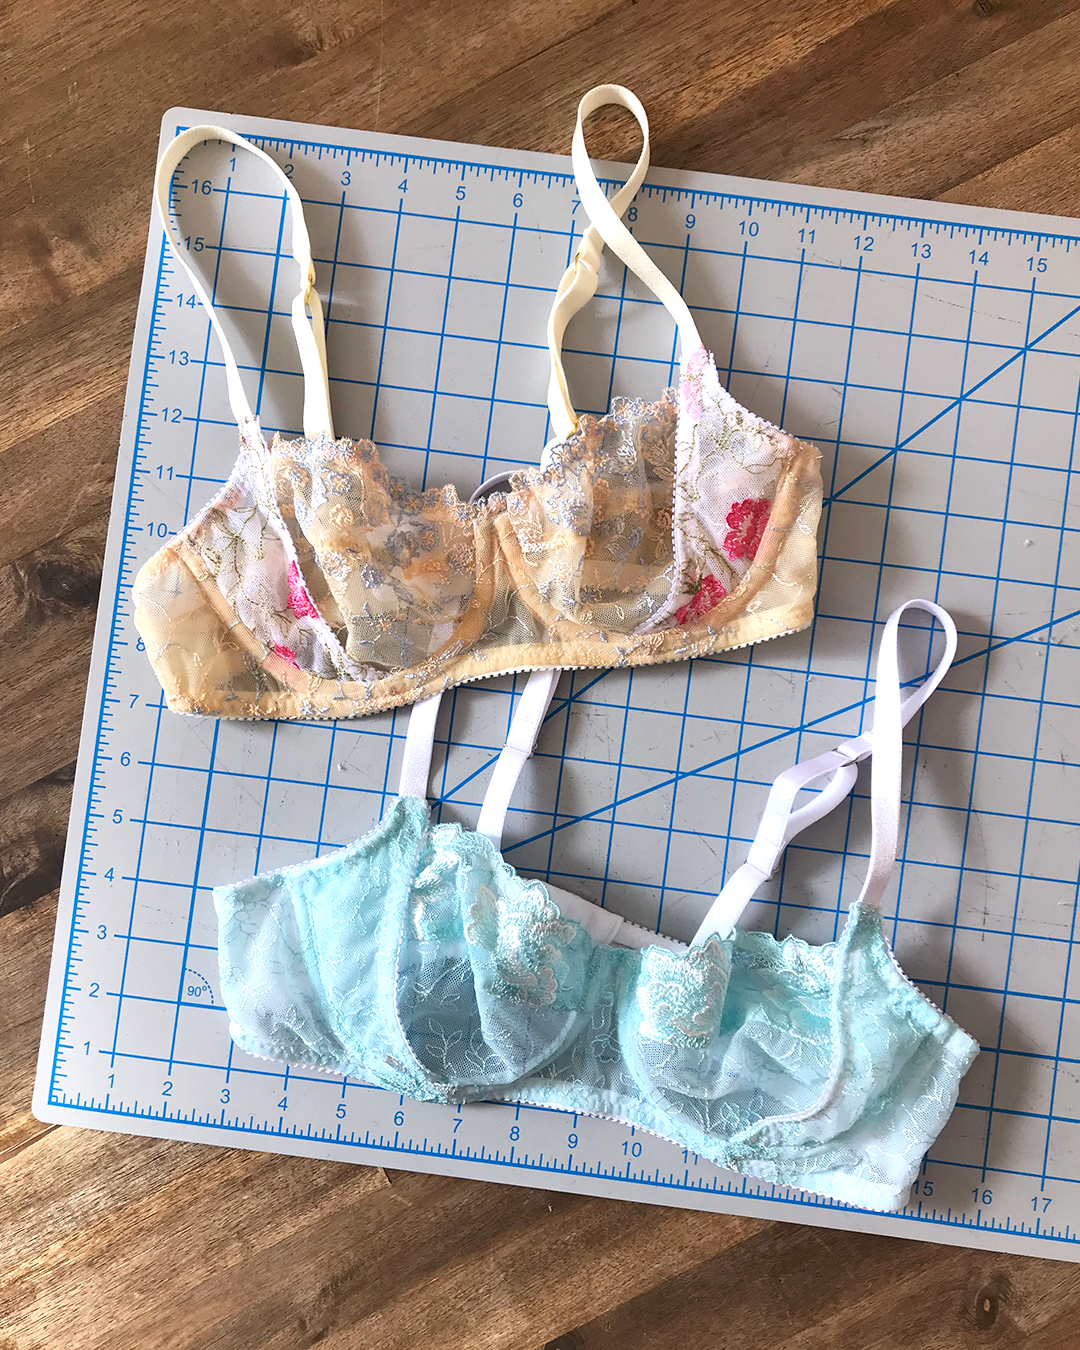
Pictured here are the first two Black Beauty Bras that I made. The yellow one (top) was my very first iteration, which I made in size 30D based on the measurements that I took in Part 1.
First Iteration
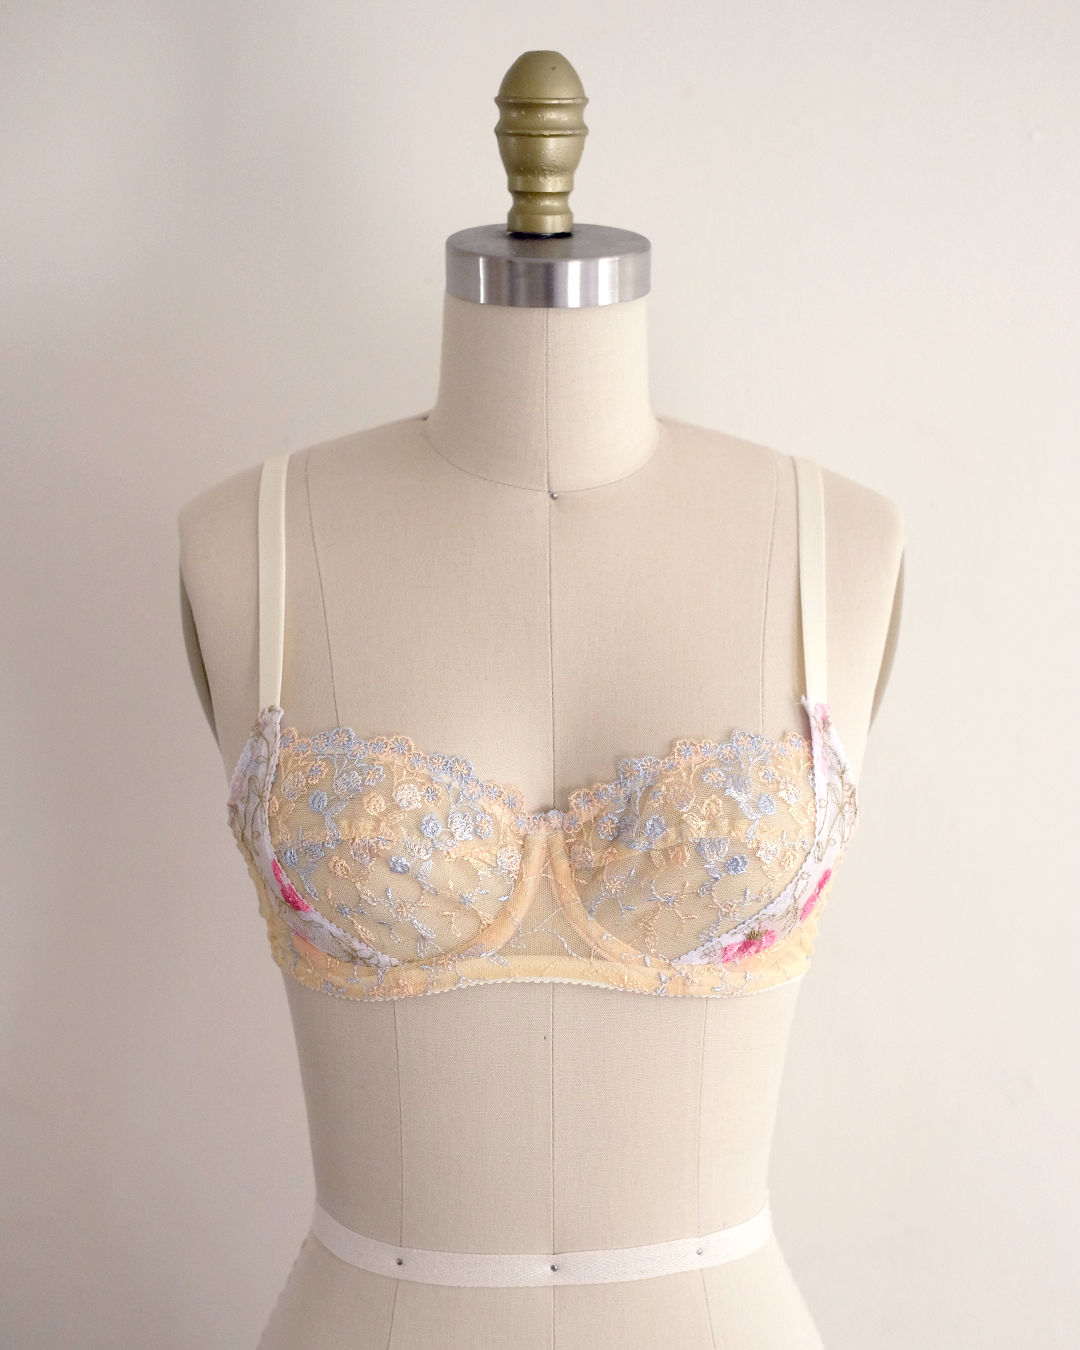
For this iteration, I used a lovely combo of Tailor Made Shop laces, as well as a size 34 underwire per the pattern maker’s instructions.

Although the cups on my first iteration fit pretty well, the band felt a bit tight and I noticed that the side seam was riding towards the front, meaning that the front frame was a bit narrow for me. The underwire was also pinching a little bit. I figured that I’d probably need to go up in both band and underwire size, but somehow without changing the cup size too much.
This is where “sister sizing” comes in!
What is Sister Sizing?
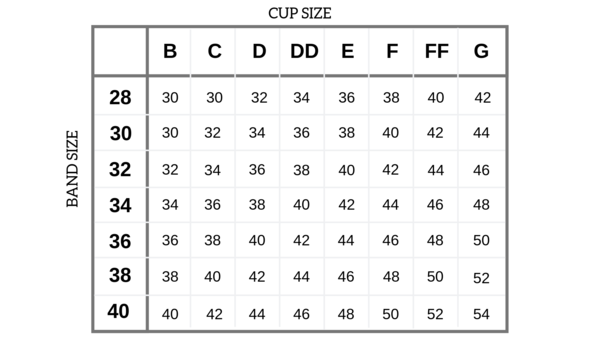
In sister sizing, bra cup volume stays the same even as band and cup letter size change. For example, if you look at Emerald Erin’s underwire size chart, sizes 28DD, 30D, 32C, and 34B all utilize a 34 wire and have the same cup volume and are considered sister sizes.
In general, when you go up a band size, you go down a cup letter size. If you go down a band size, you go up a cup letter size.
Here are a few more resources about sister sizing:
- Bra Making: What is Sister Sizing?
- Demystifying Sister Sizes: How to Expand Your Pattern’s Size Potential
- How to Sister Size Your Bra Pattern
- The Secret to Finding Hidden Bra Sizes
Because I needed to maintain cup volume but require a wider frame and larger band, I decided to go up to size 32C, which is a sister size for 30D. I compared the 30D pattern with 32C to see how they were different.

As expected, the cup pieces are exactly the same (because they are sister sizes), but there was a little more room in the Frame, Outer Cradle, and Back Band pieces for size 32C.
I decided to make my second iteration in size 32C, and to adjust the pattern so I could increase my underwire size to a 36 (more on this later).

Second Iteration
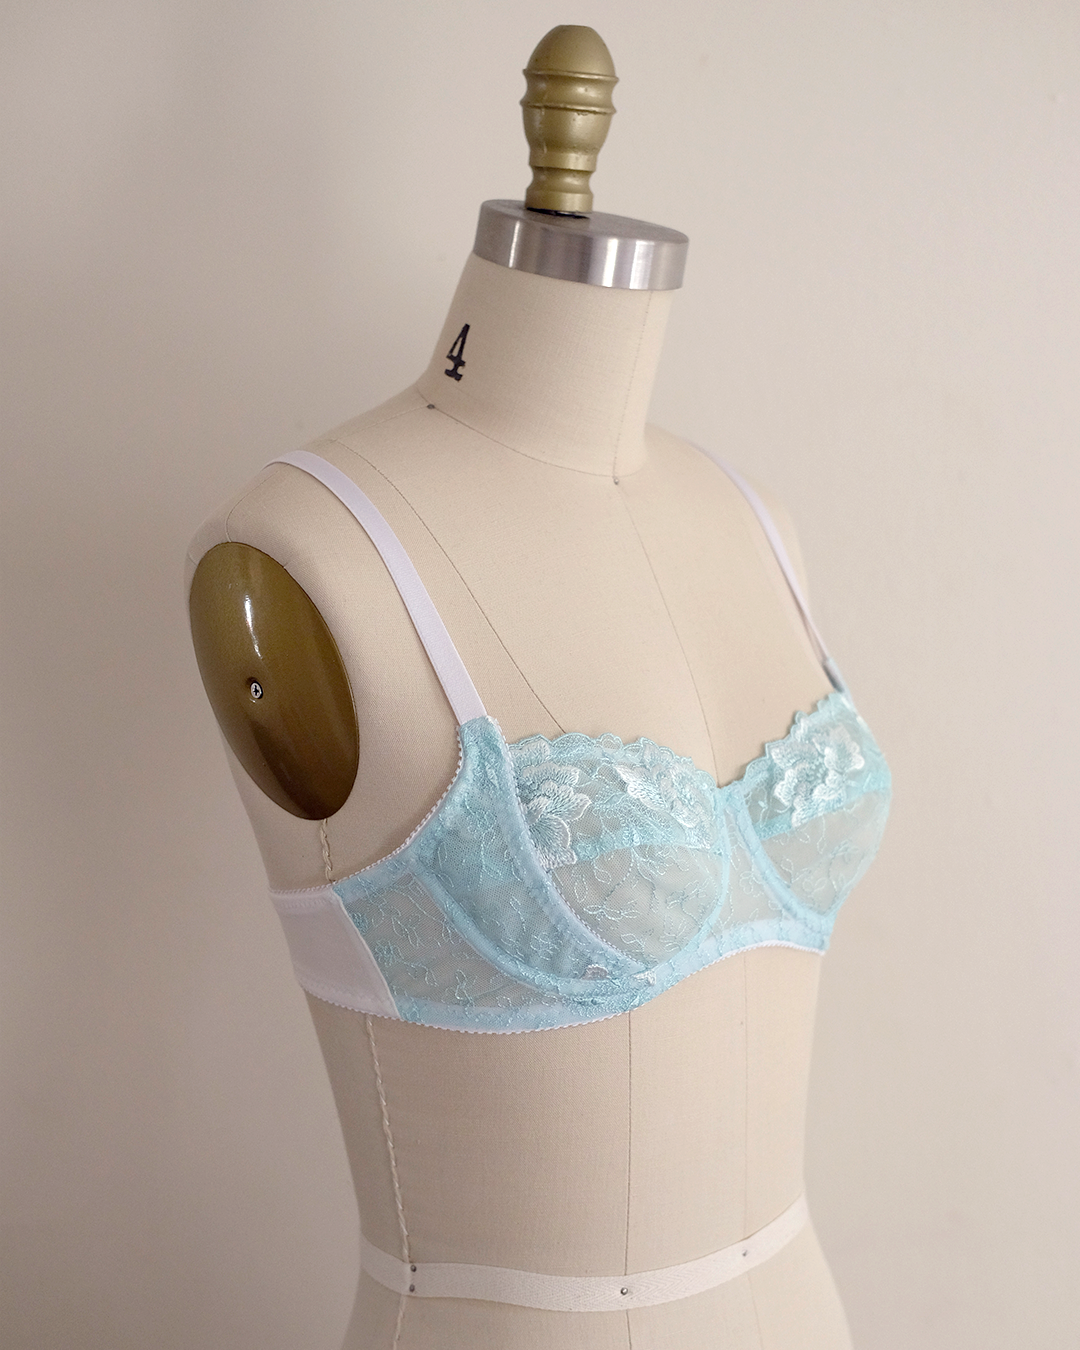
I made my second iteration in a lovely aqua lace from Tailor Made Shop.
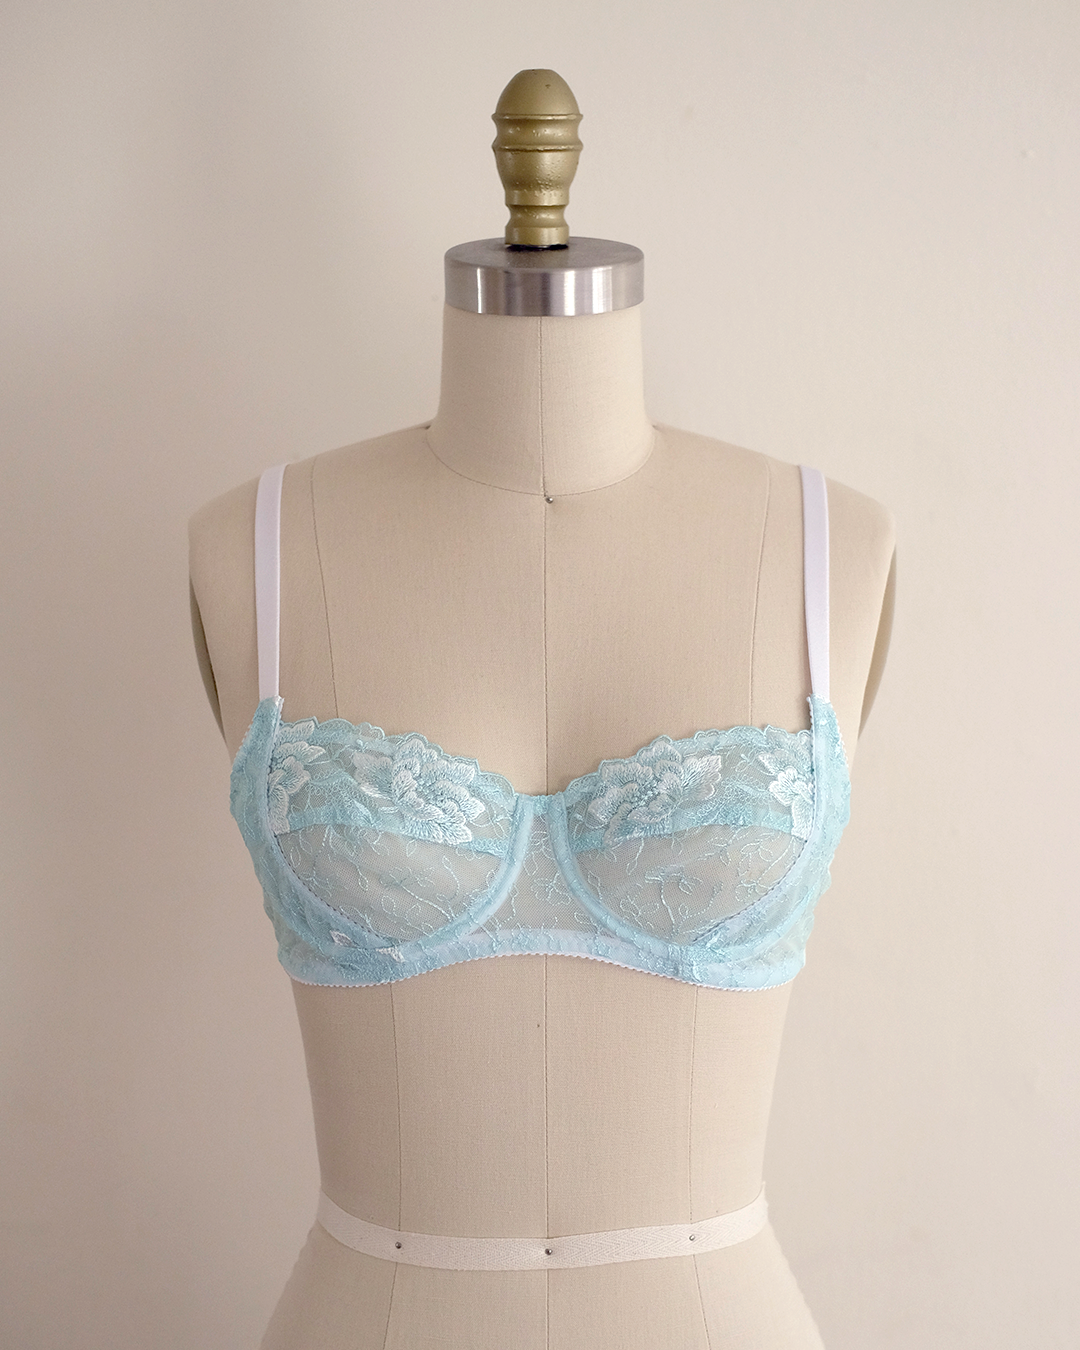
The second iteration ended up fitting better, but still had a few minor issues:
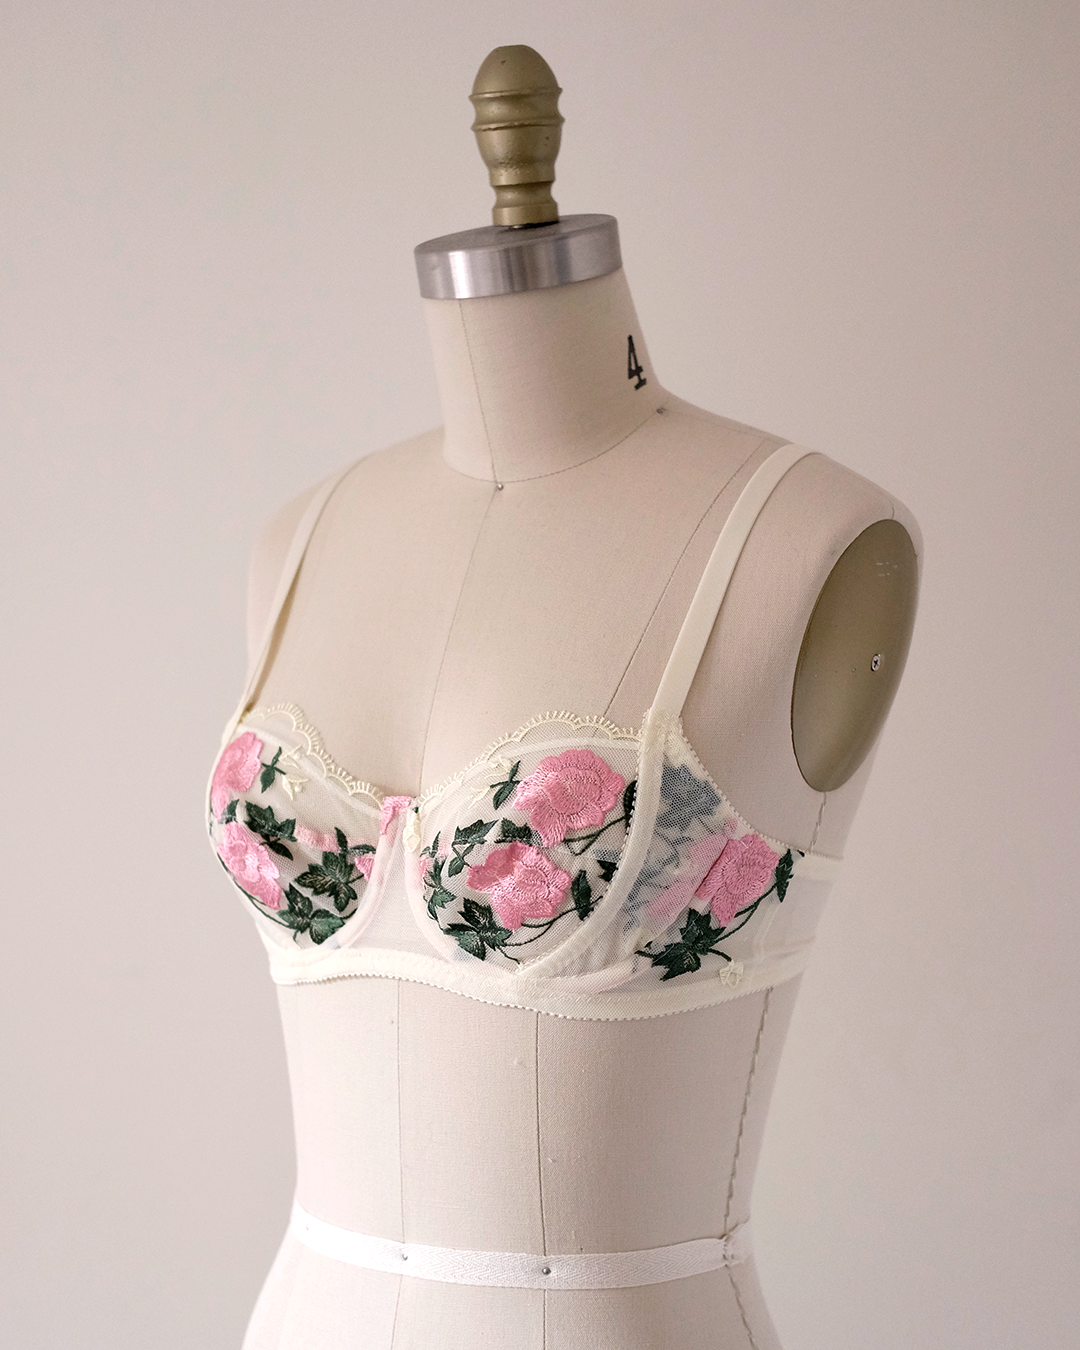
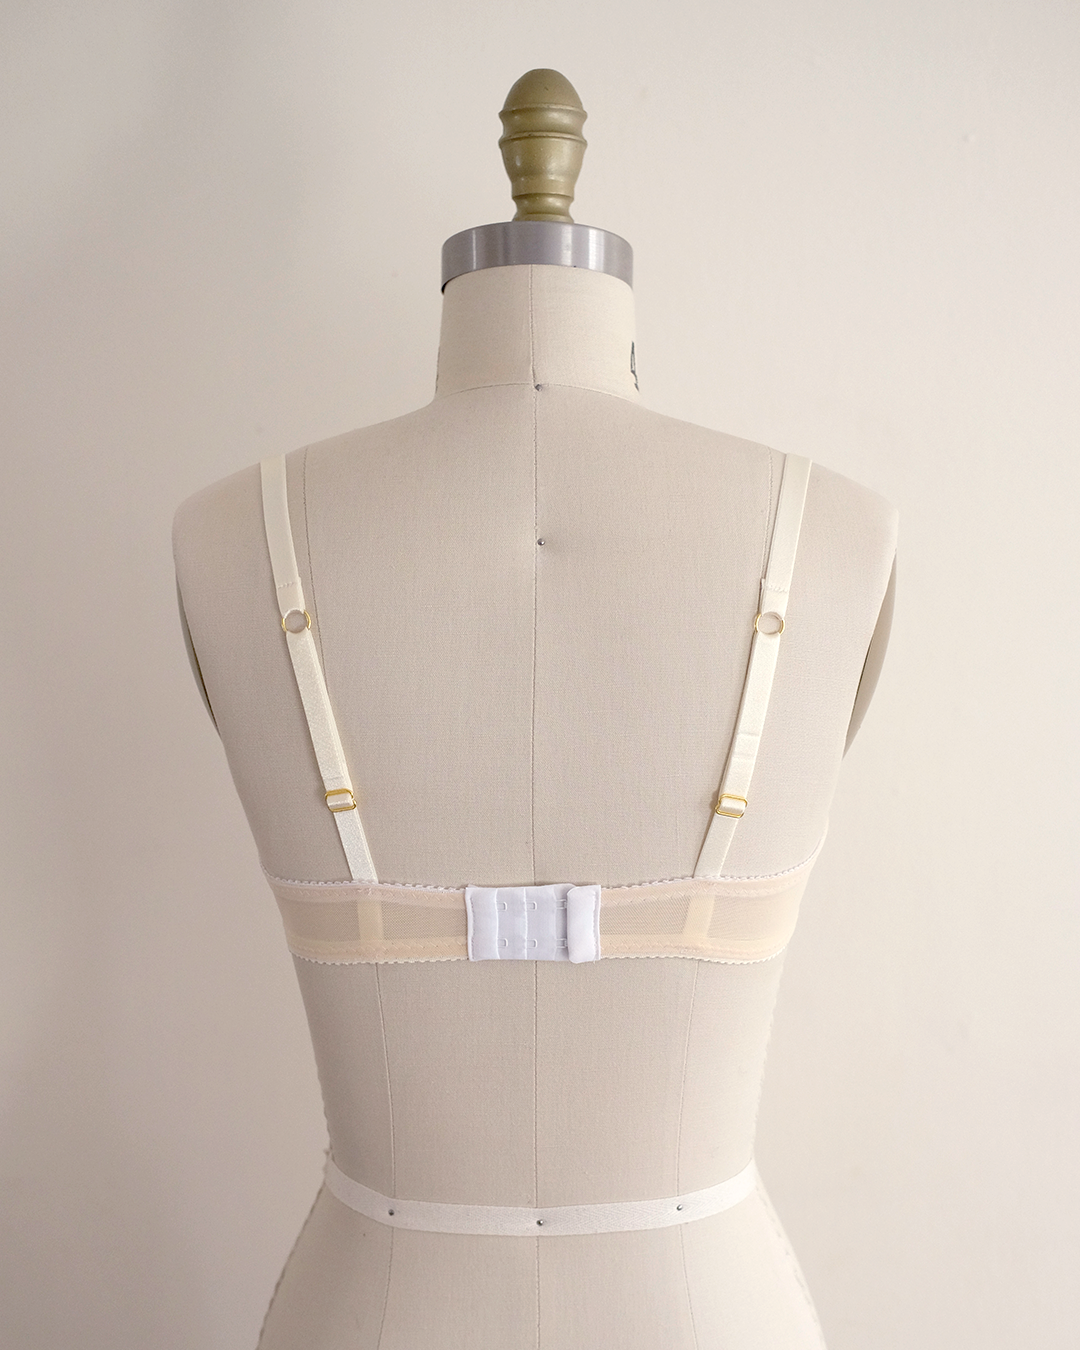
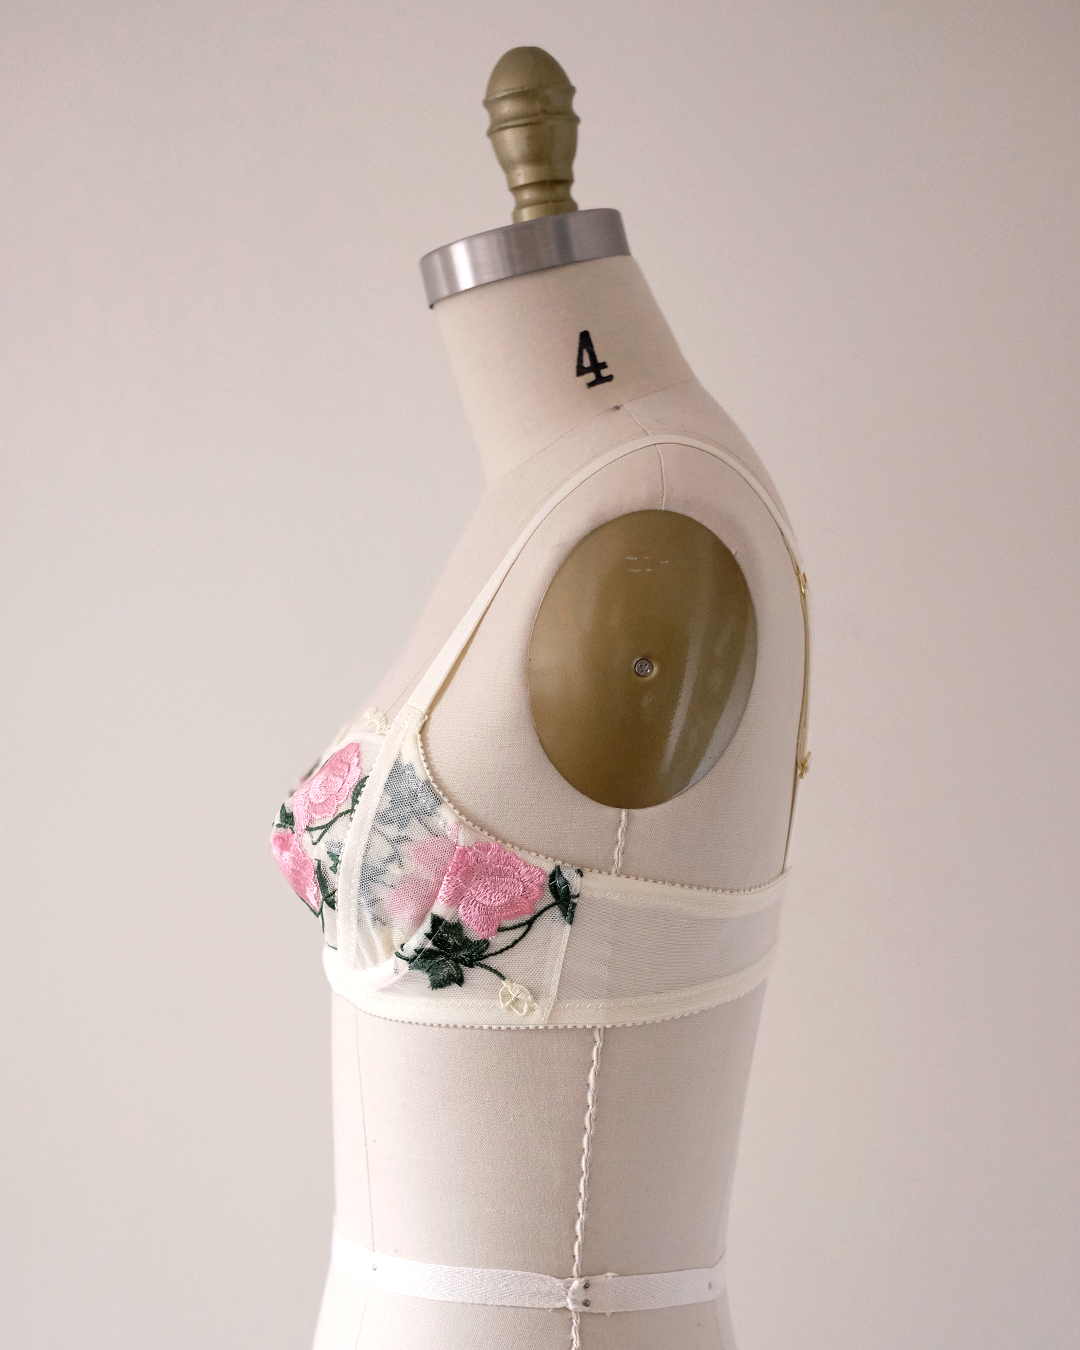
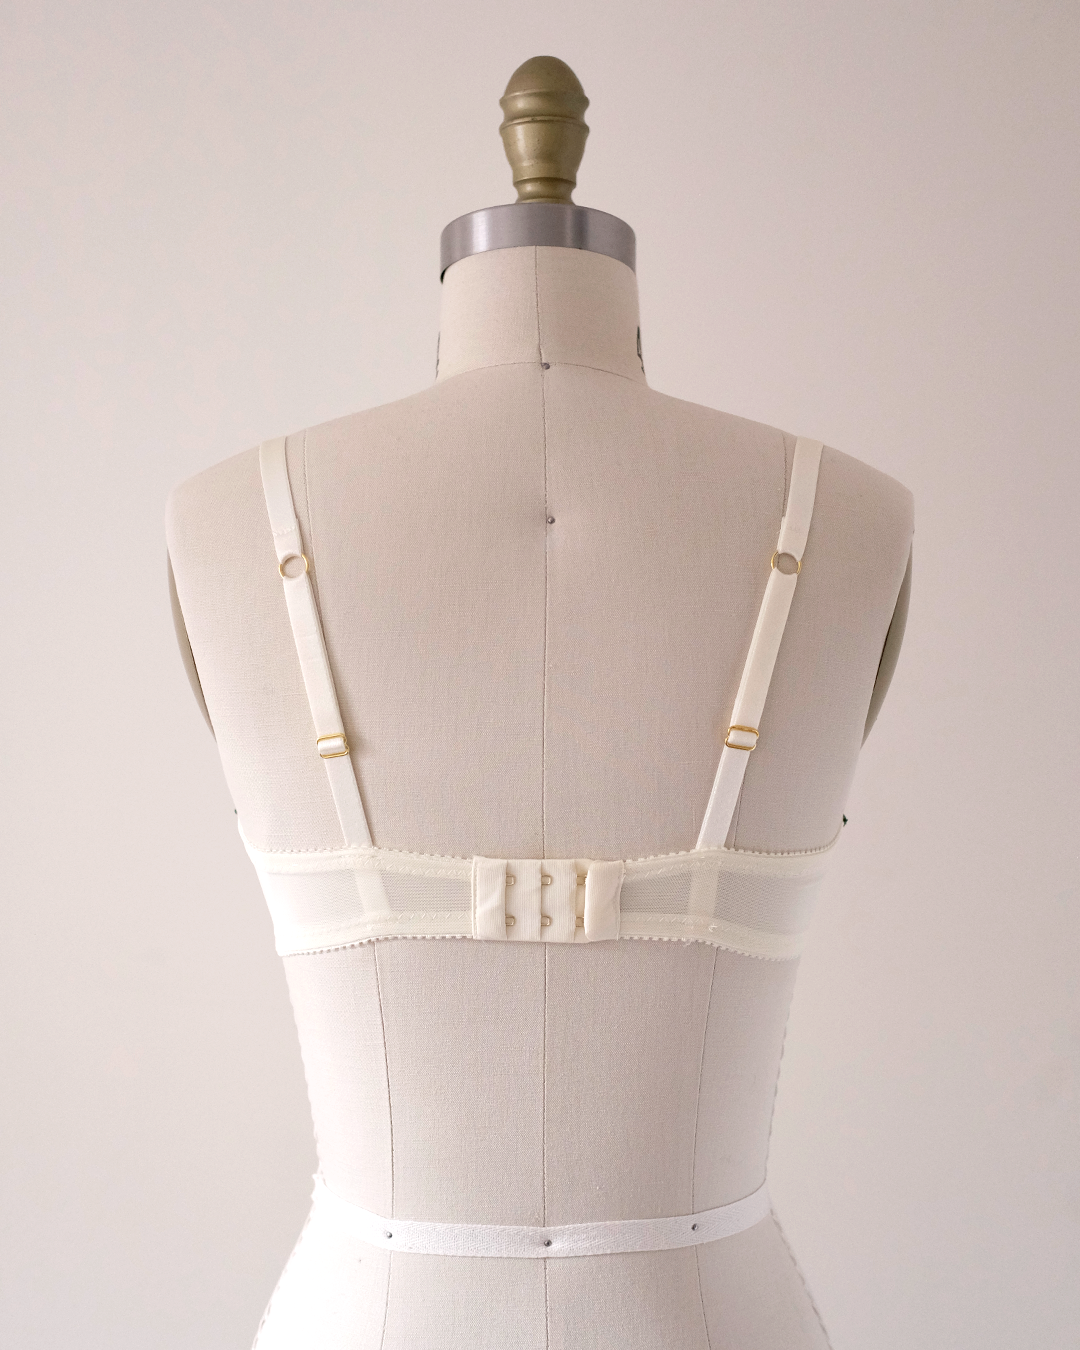
The slightly larger frame and underwires felt much better, and the position of the side seam (due to the wider front frame) worked better for my body, but the back band actually felt a little loose this time. Additionally, while the Lower Cup felt nice and taut against my breast tissue, the Upper Cup was gaping just a little at the top edge.
I will probably need to remove some excess fabric from the Back Band, and also take out about ½” from the top edge of the Upper Cup for the next iteration.

In the “Pattern Adjustments” section of this post, I’ll show you how I adjusted the Black Beauty Bra patterns to accommodate my fit changes.
If you’d like to try out a few iterations of pattern sizes without cutting into your more precious fabrics, you can try making a muslin version of the bra first. Here are a few great resources for how to approach this process:
Underwire Sizing
Before we get into pattern adjustments, let’s talk a little bit about underwire sizing.
It’s not uncommon for you to end up with a different underwire size than what the pattern recommends. Your breast root may be narrower or wider than the recommended wire size, and this is normal!
(Ying: When you are more comfortable with bra making and have worked out your ideal underwire size and shape, it’s not uncommon for bra makers to start with a well fitting wire and then modify patterns to then fit the wire.)

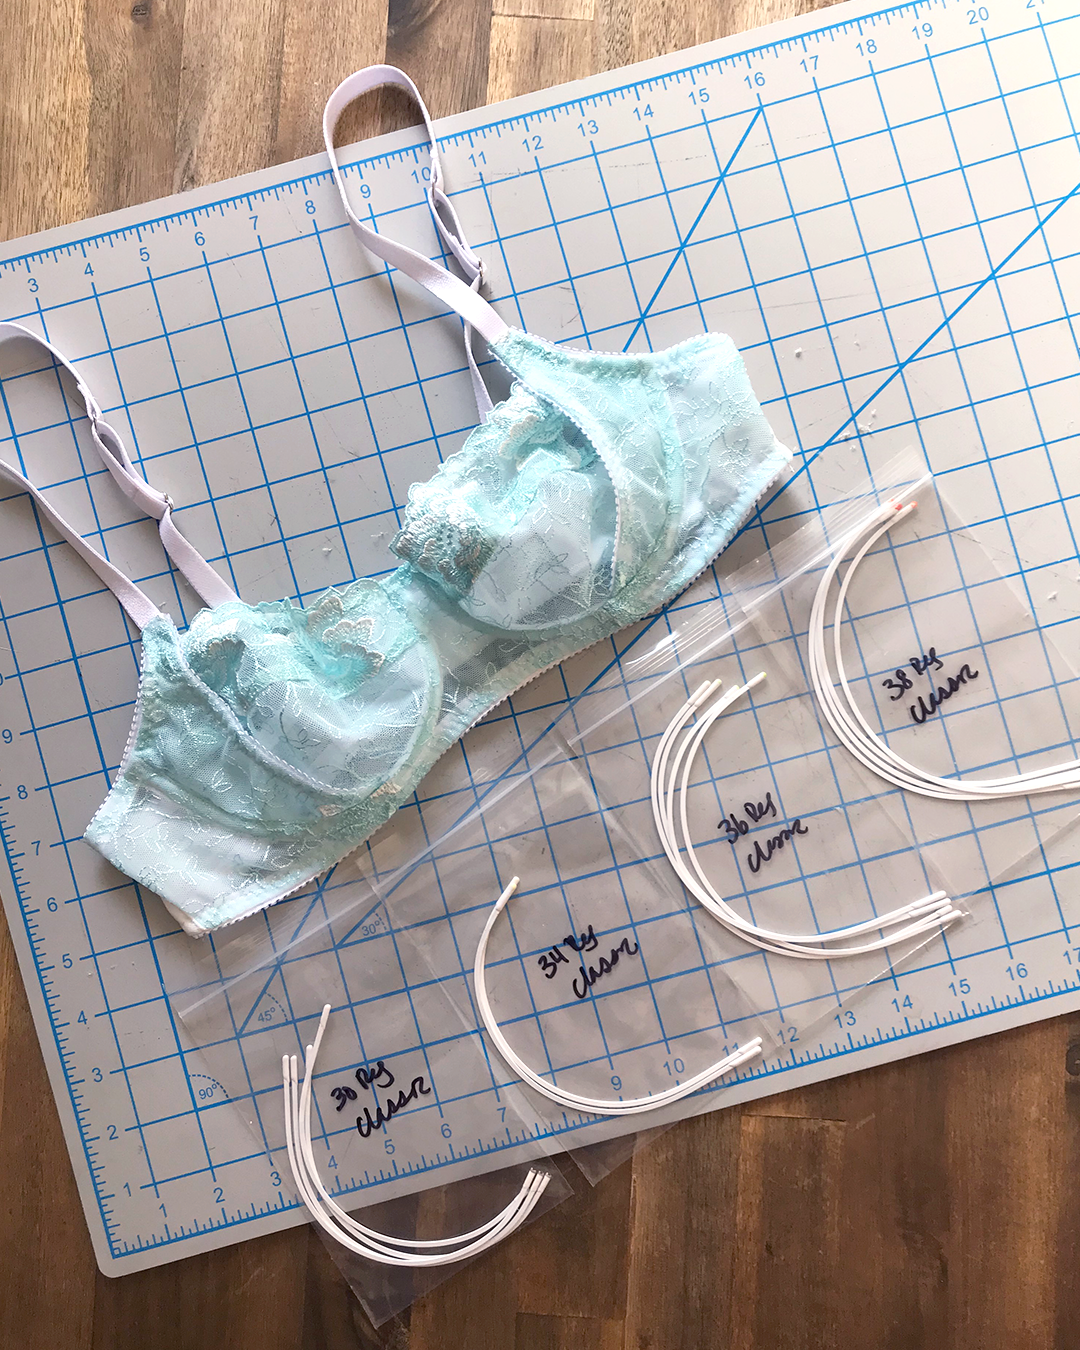
Although sizes 30D and 32C both call for a size 34 underwire, I knew that I’d need at least a size 36.
For the Orange Wire, there is a ⅝” (15mm) difference between adjacent underwire sizes. In the next section, I’ll show you how I adjusted my pattern to accommodate a size 36 underwire, accounting for that ⅝” difference.
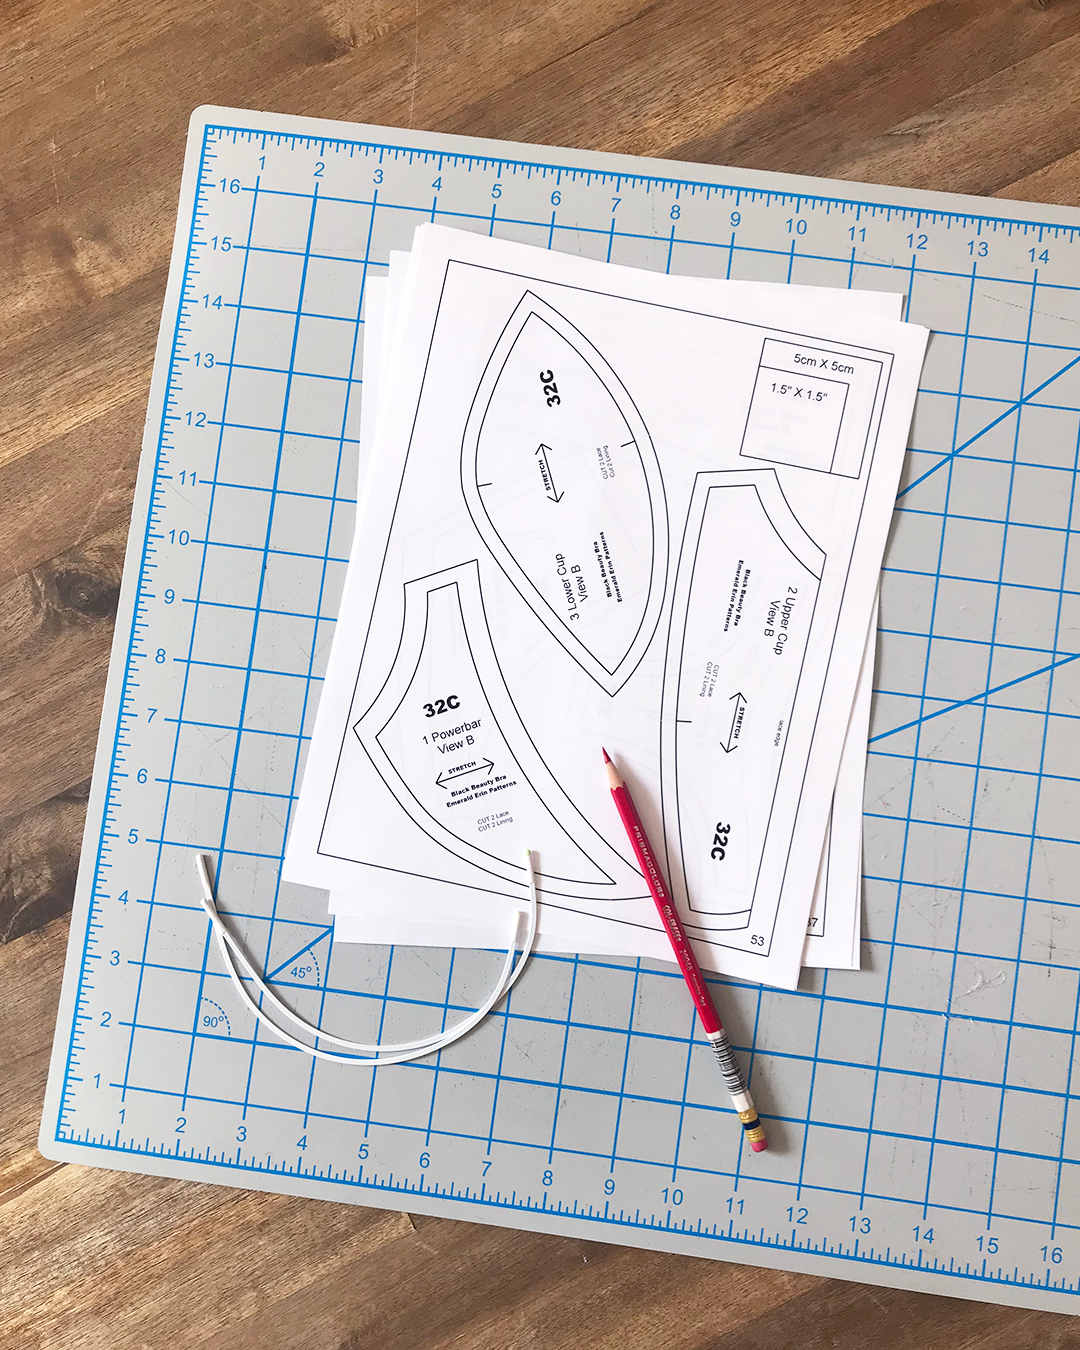
Pattern Adjustments
It’s amazing how subtle changes to your pattern can make all the difference in how a bra fits and feels!
These were the changes that I wanted to make to my pattern before sewing up the third iteration:
- Combine pieces from 30D and 32C to achieve better frame and band fit
- Add extra length along the wireline to accommodate a size 36 wire
- Remove excess from the top edge of the Upper Cup

Because I wanted to reduce the amount of fabric in the Back Band, but keep the Frame and Cups the same, I decided to use the Back Band piece from size 30D, and the rest from 32C.
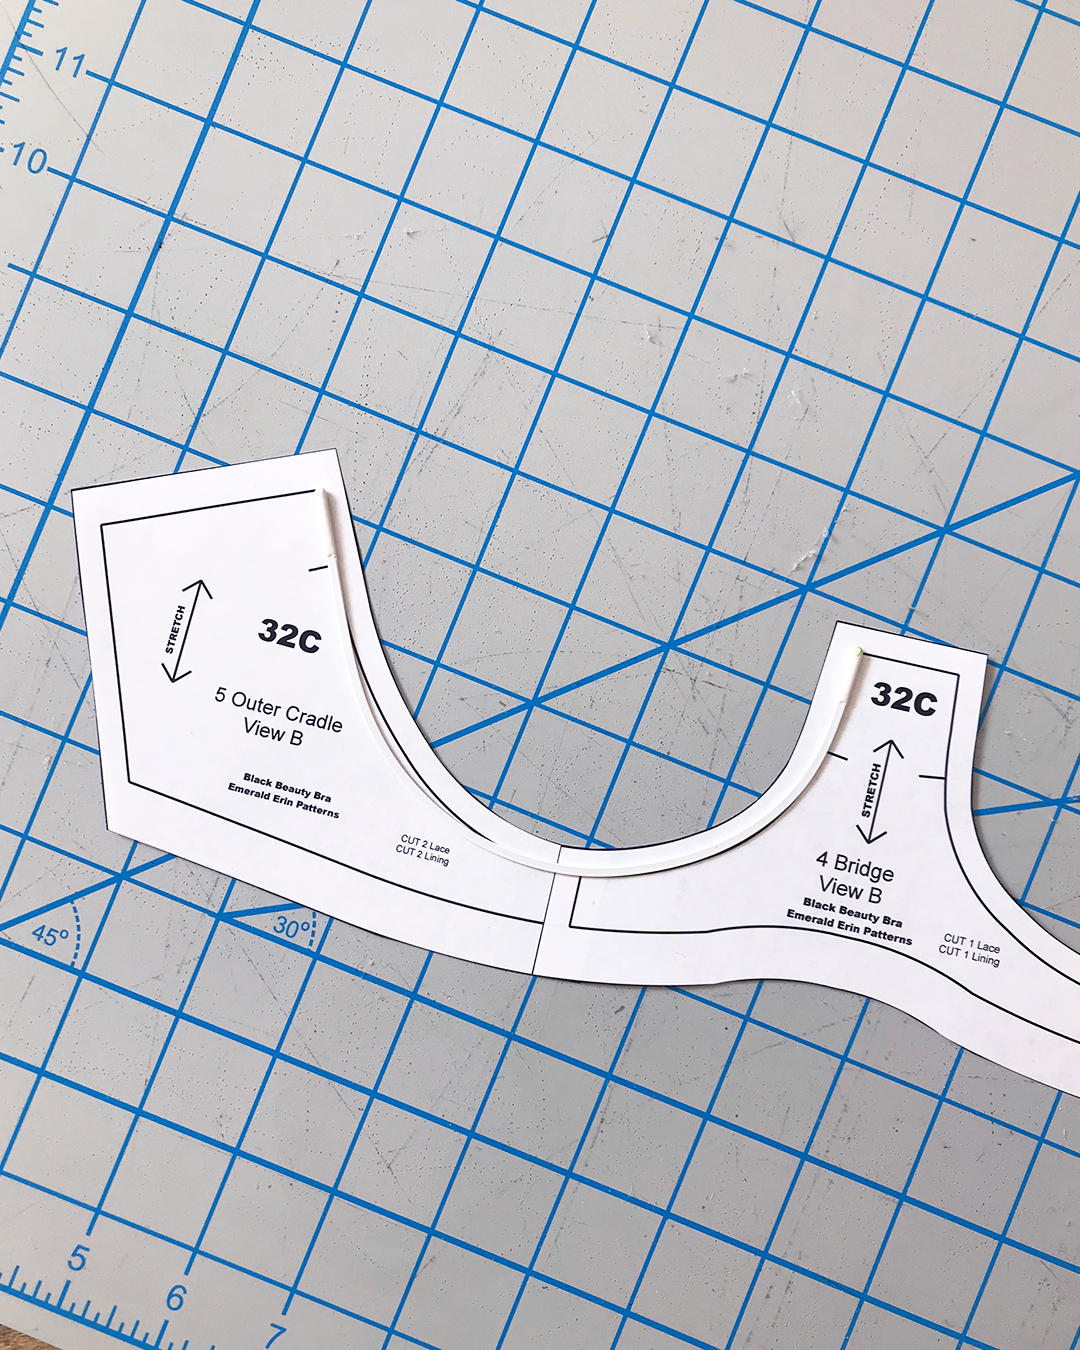
I would need to make a few adjustments to almost all of the pieces in order to ensure that a size 36 underwire would fit along the wire line.
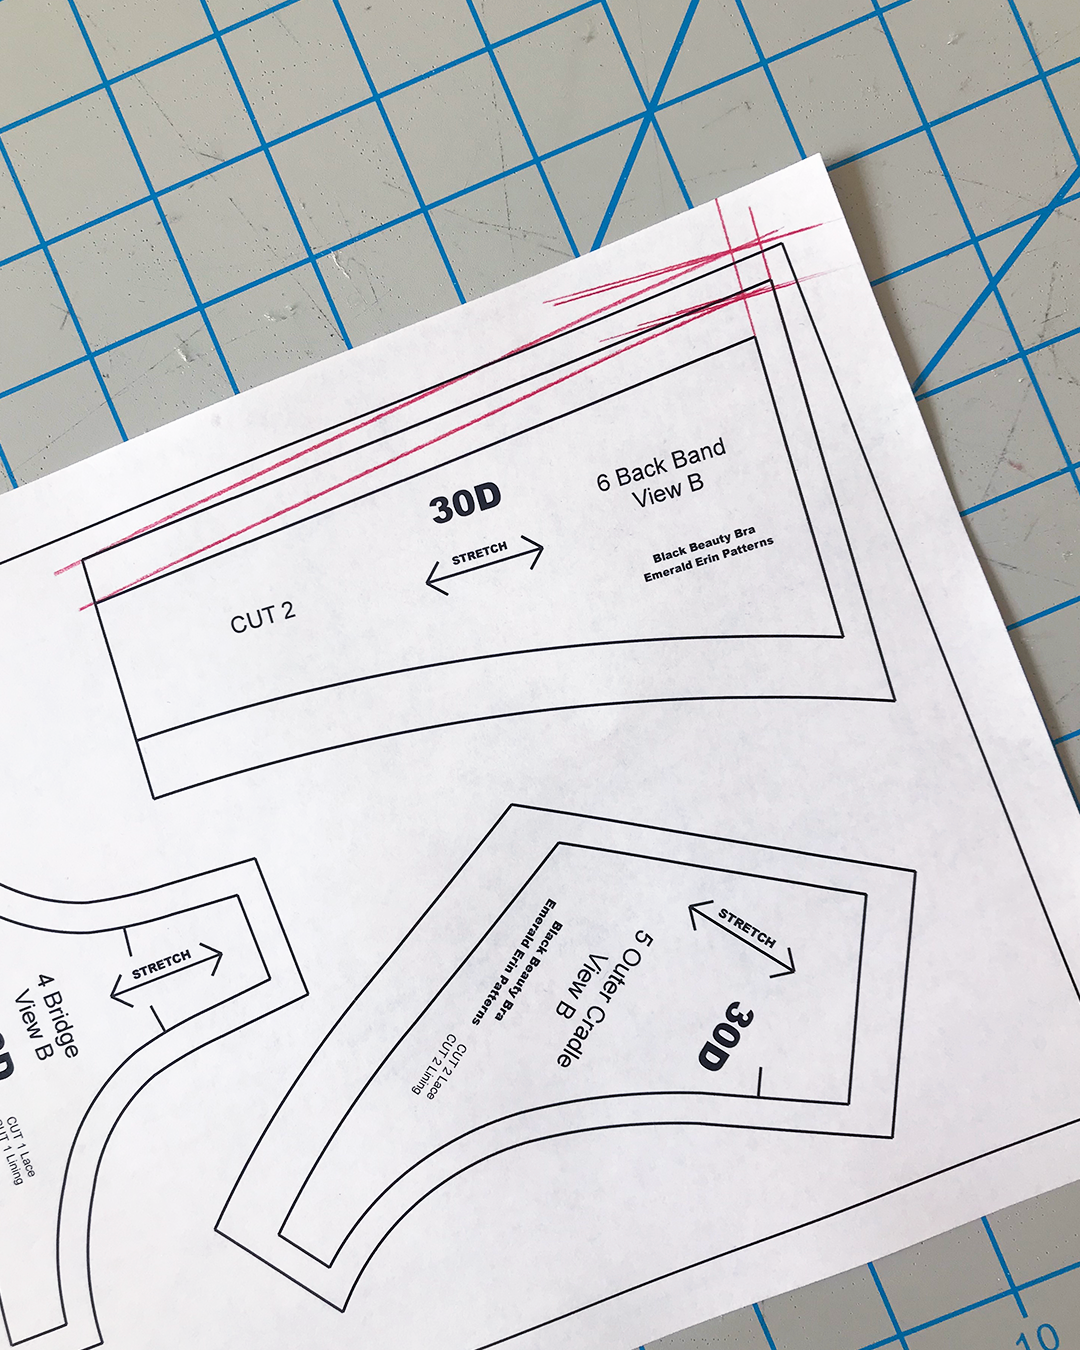
To do so, I first measured the length difference between a size 34 and 36 wire—it was a ⅝” difference. Then, I split the difference in half (5/16”) so that I could add half of the extra length at the underarm area, and half at the center front of the bra.
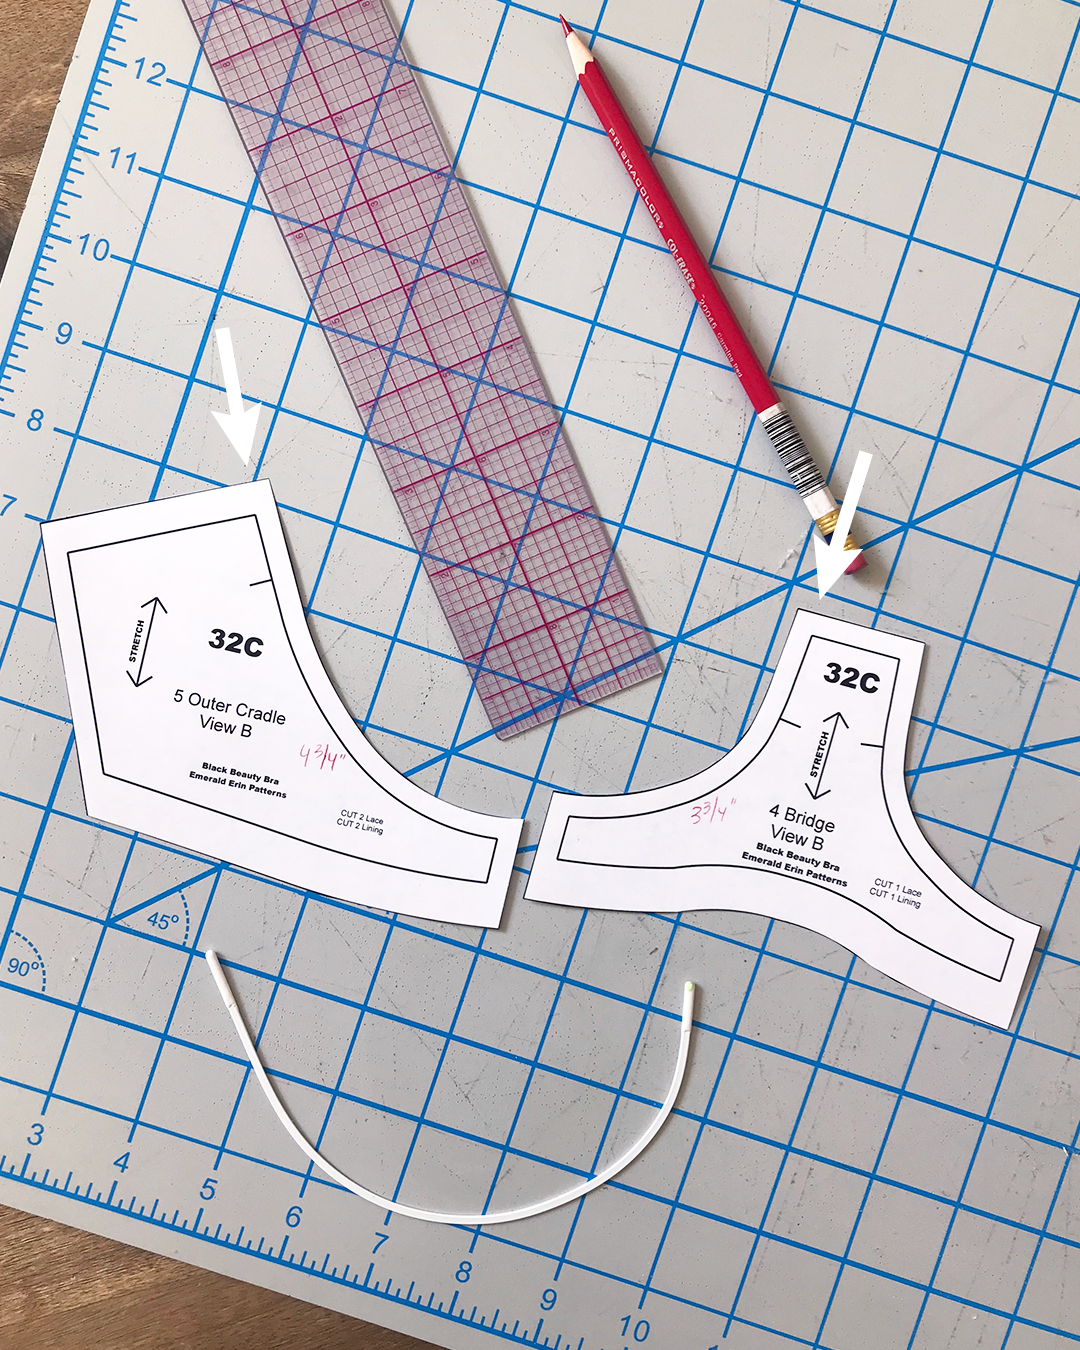
I used my clear ruler and pencil to raise the height of the side seam by 5/16” on the Outer Cradle piece.
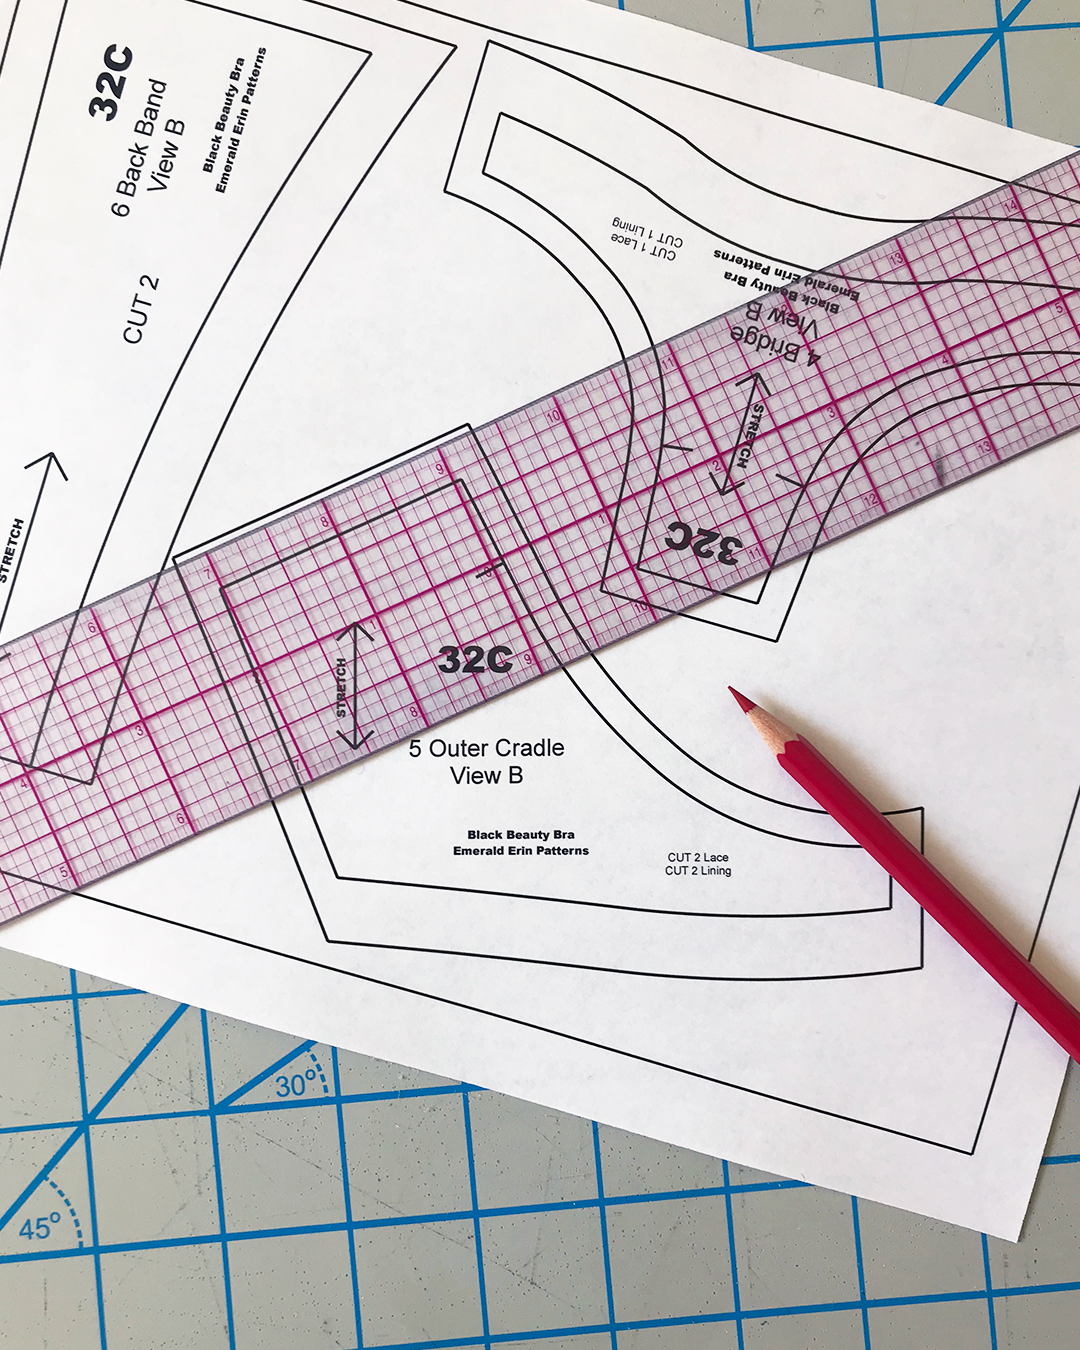
I did the same at center front, the top of the Frame piece.
Then, I added seam allowance to both—3/8” to the side seam (to accommodate my ⅜” picot elastic), and ¼” to the top of the frame (where I’d be sewing lacing and lining pieces together at a ¼” seam allowance).
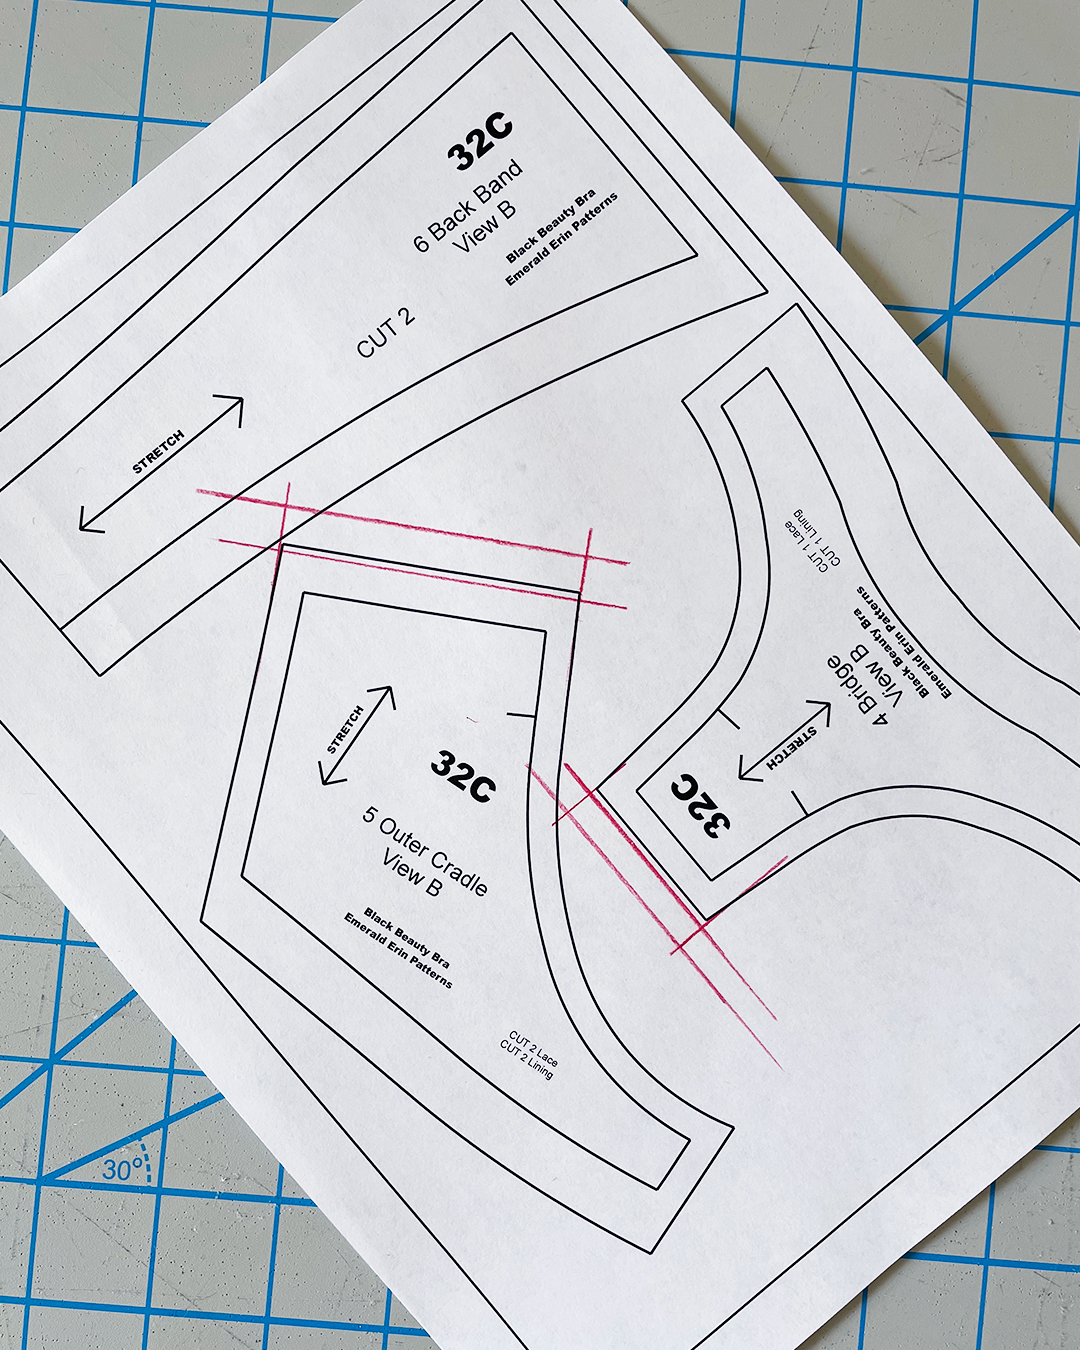
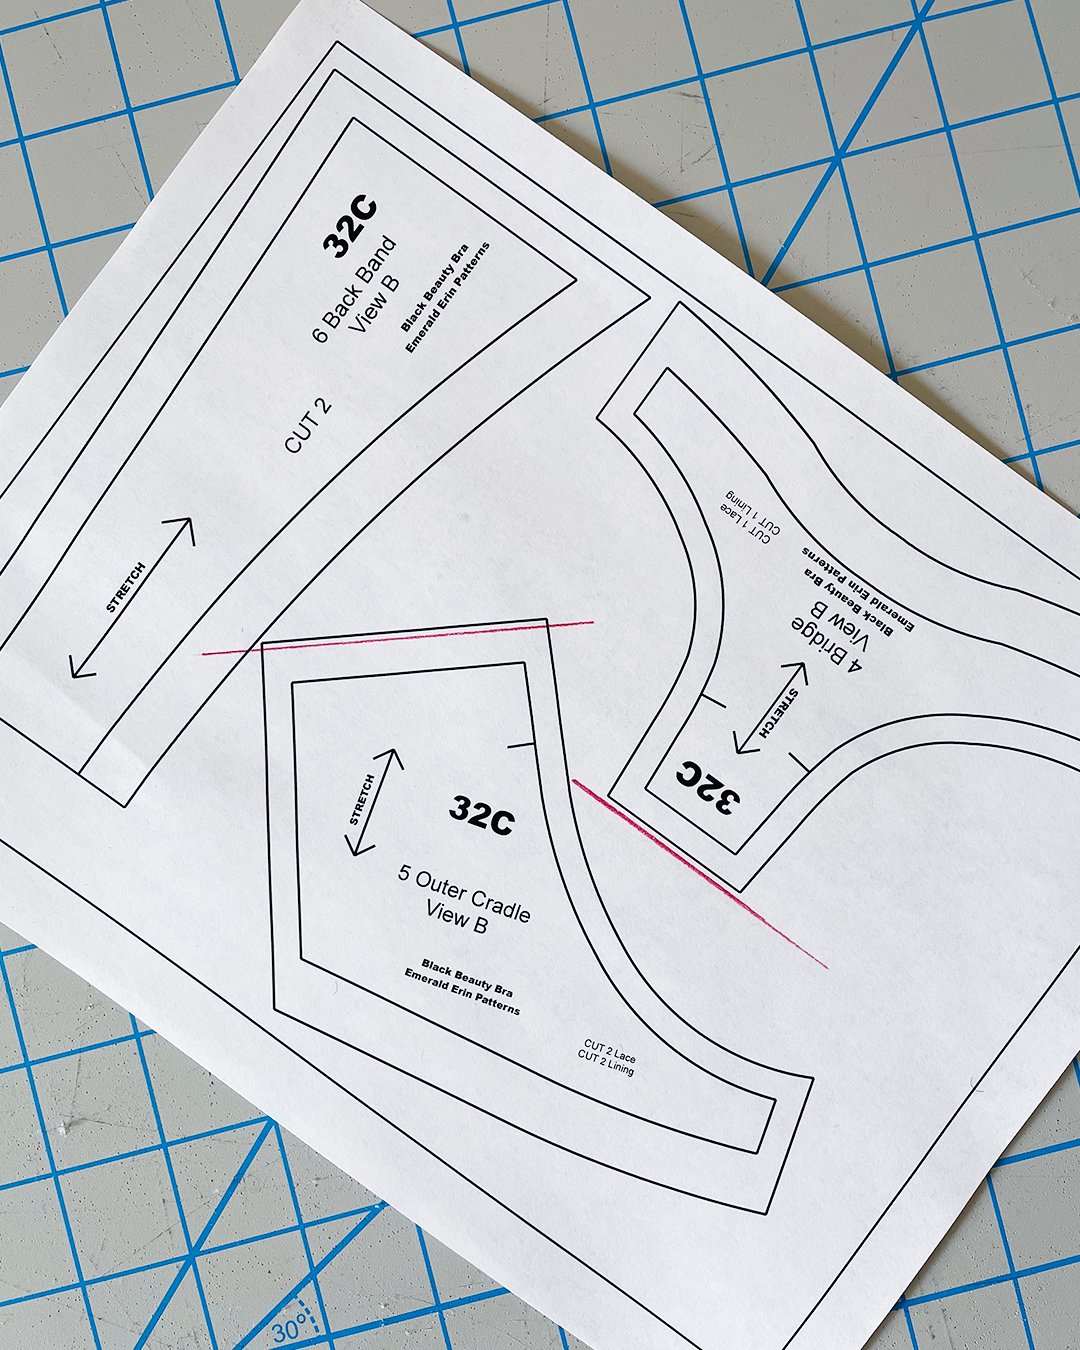
After adjusting the side seam, I had to make sure that the adjustments were reflected on the corresponding Cup and Back Band pieces.
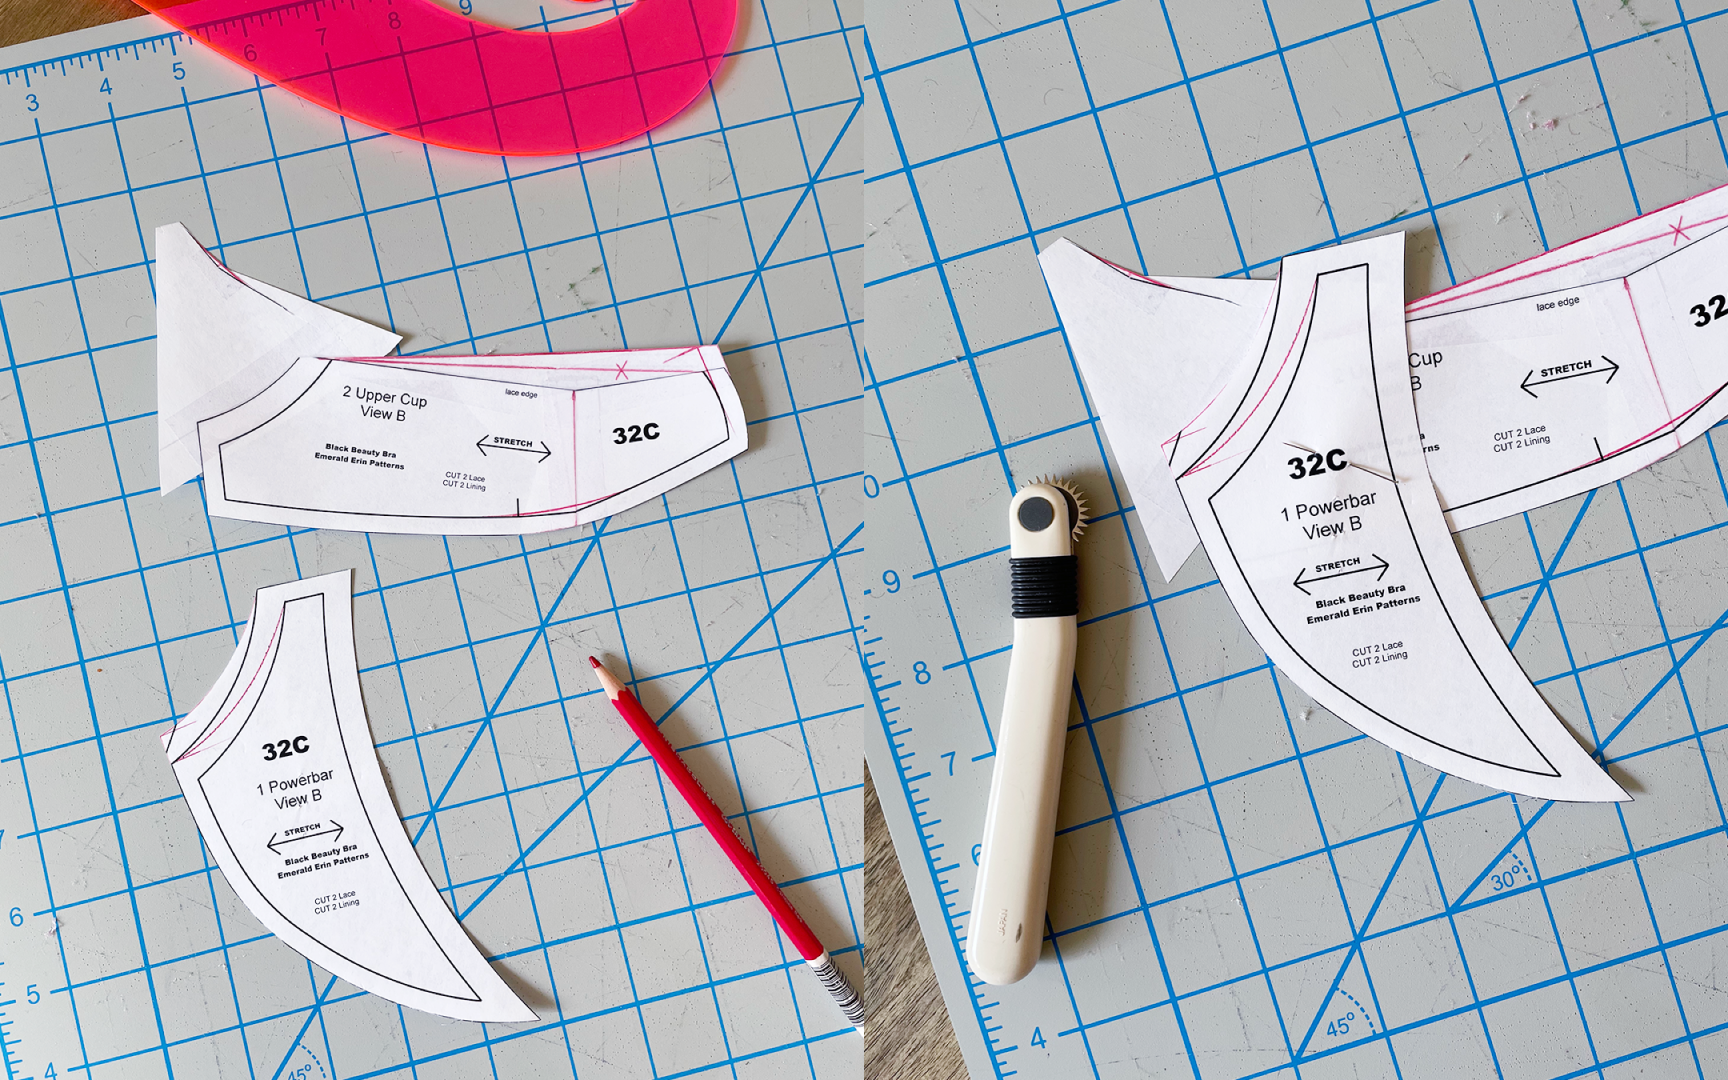
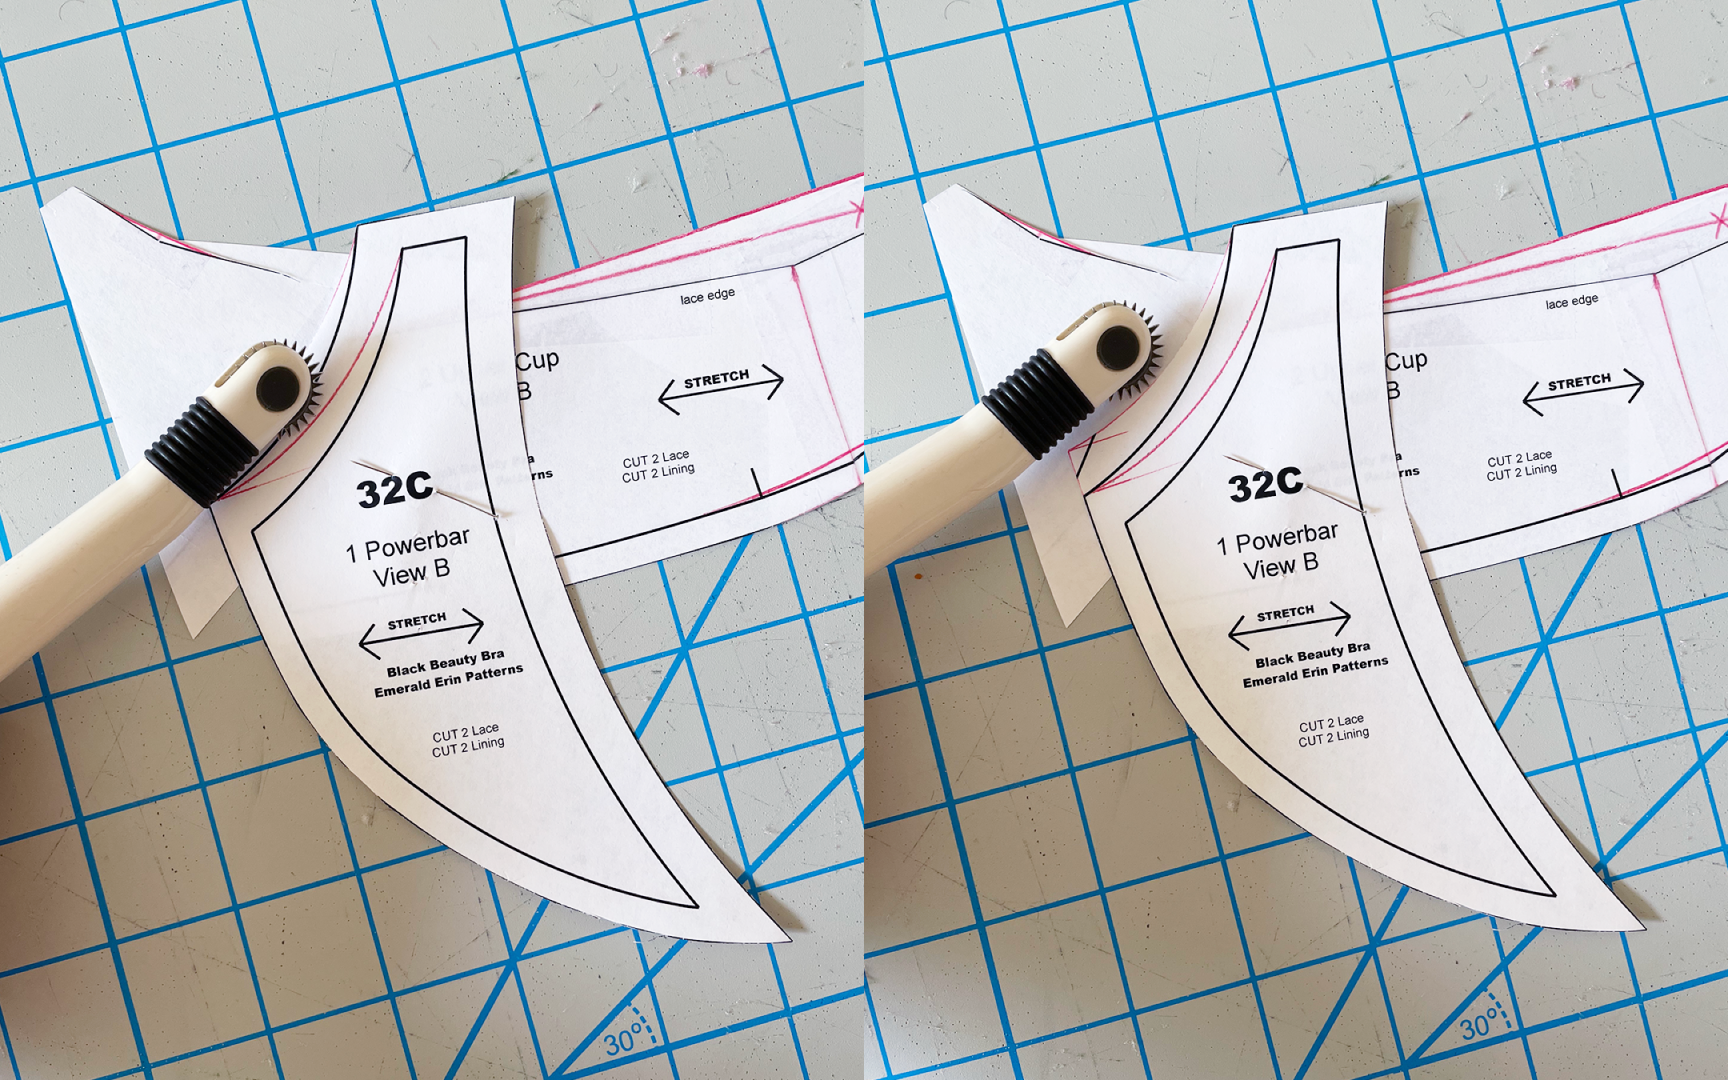
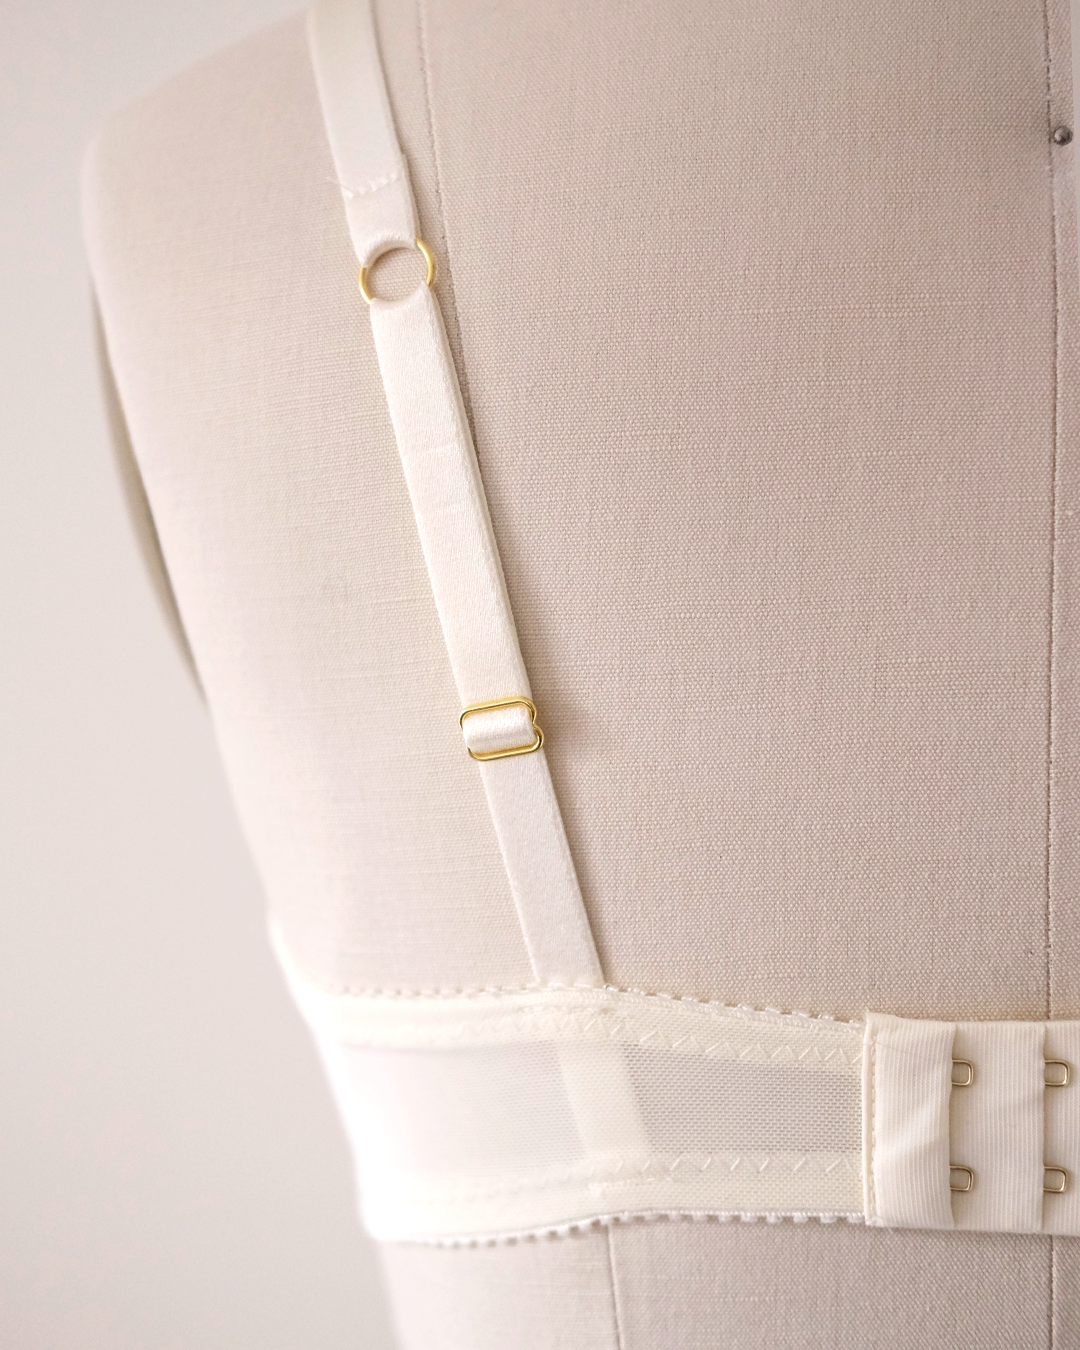
I increased the height of the Powerbar piece at the armhole, so that it matched the increased height of my Outer Cradle. I used my french curve to draw a smooth line and added ⅜” elastic allowance for applying picot elastic.
I did the same for the side seam edge of the Back Band, so that it would match the new side seam edge of the Outer Cradle. I added ⅜” elastic allowance here too.

Finally, to remove the excess from the Upper Cup, I first drew a vertical line approximately where I had pinned out the excess during my fitting.
To remove ½” total, I measured ¼” on either side of the vertical line at the top edge, and then connected those points with the bottom point of the vertical line.
These lines would become my cut and paste lines.

I cut along the left side, overlapped it to the right side to line up with the second line, and then taped the pieces together.

I then put some extra paper beneath the pattern pieces so I could draw my new lines.
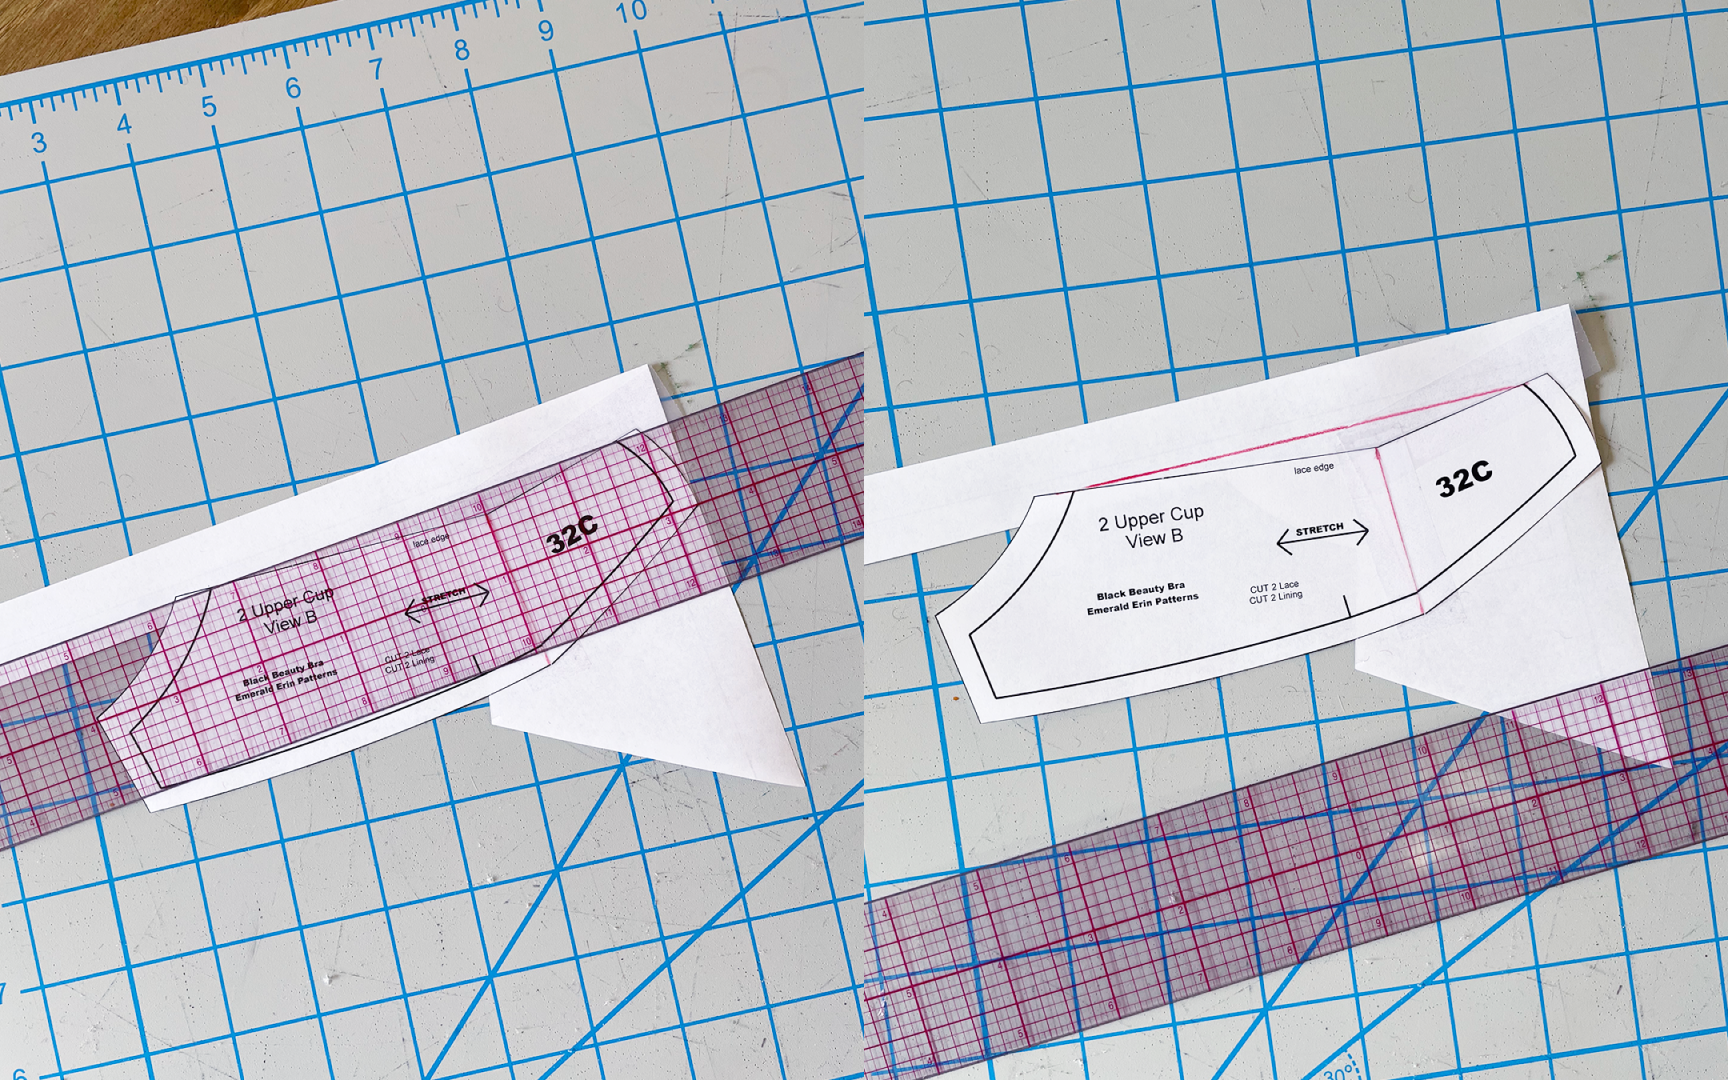
Knowing that the top edge of the Upper Cup would be lined with the scalloped edge of my lace during the cutting phase (Part 3), I knew that this had to be a straight line. I used my straight ruler to connect the top corners of the Upper Cup.
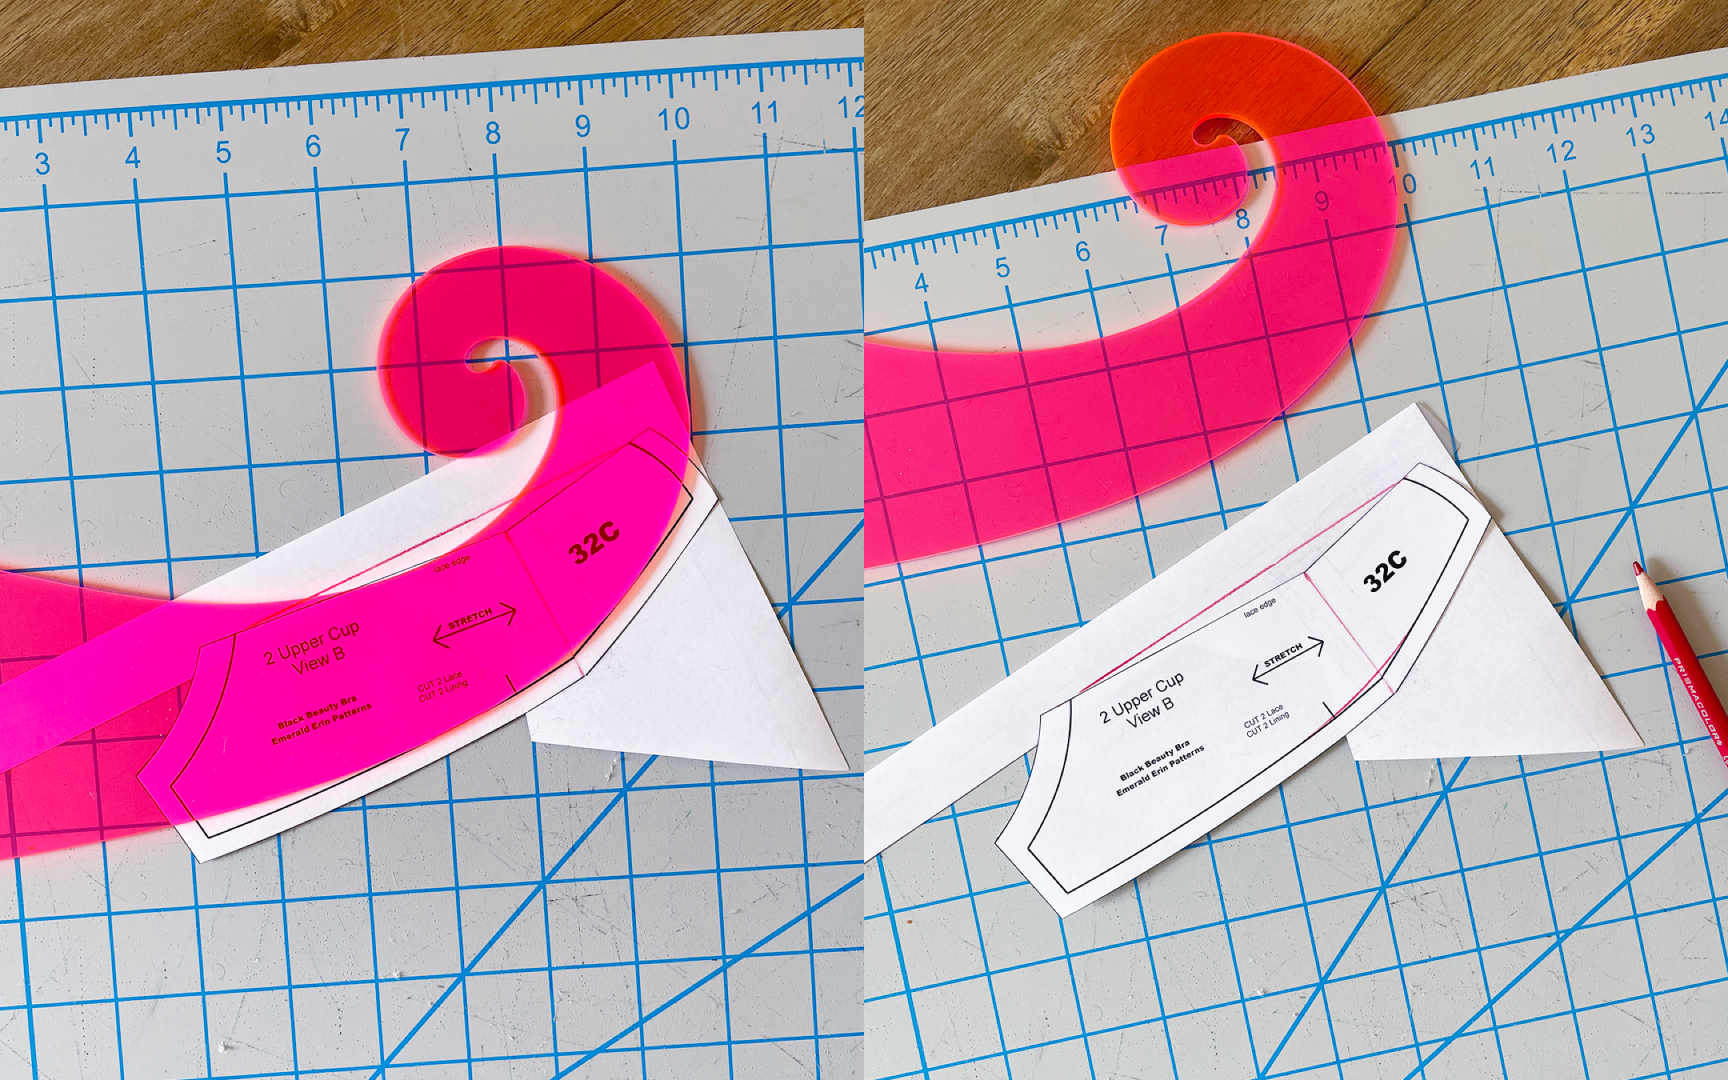
I then used my (extremely gregarious) french curve to draw a smooth line along the bottom edge of the Upper Cup.
But wait, there’s more!
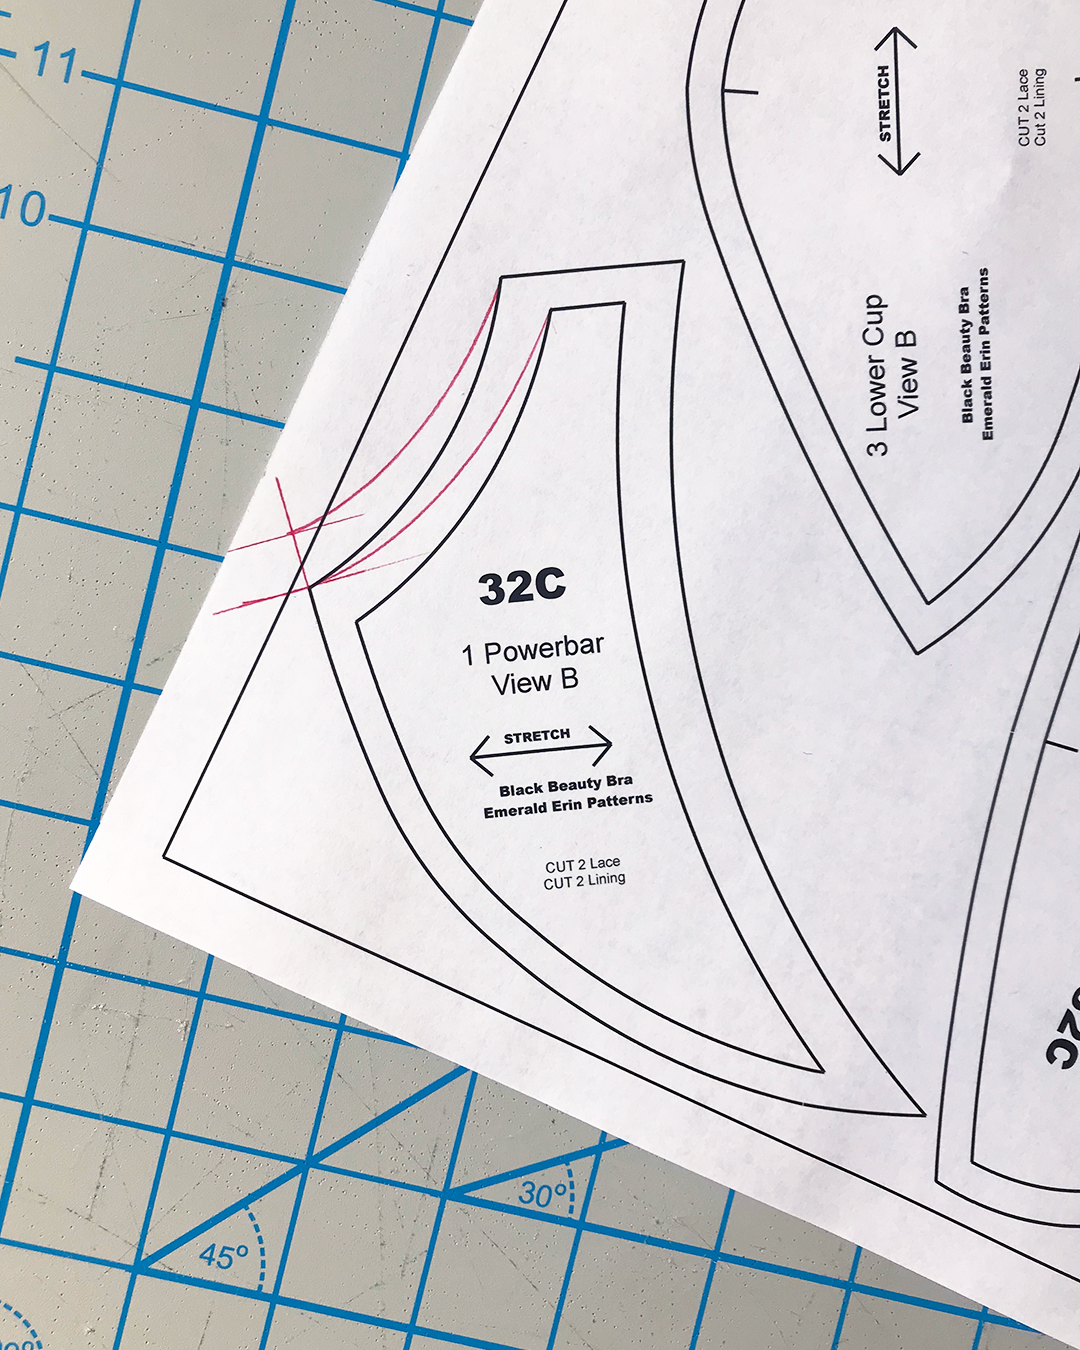
Because I had raised the top edge of the Frame by 5/16” of an inch to accommodate the size 36 underwire, I needed to do the same with the corresponding edge of the Upper Cup.
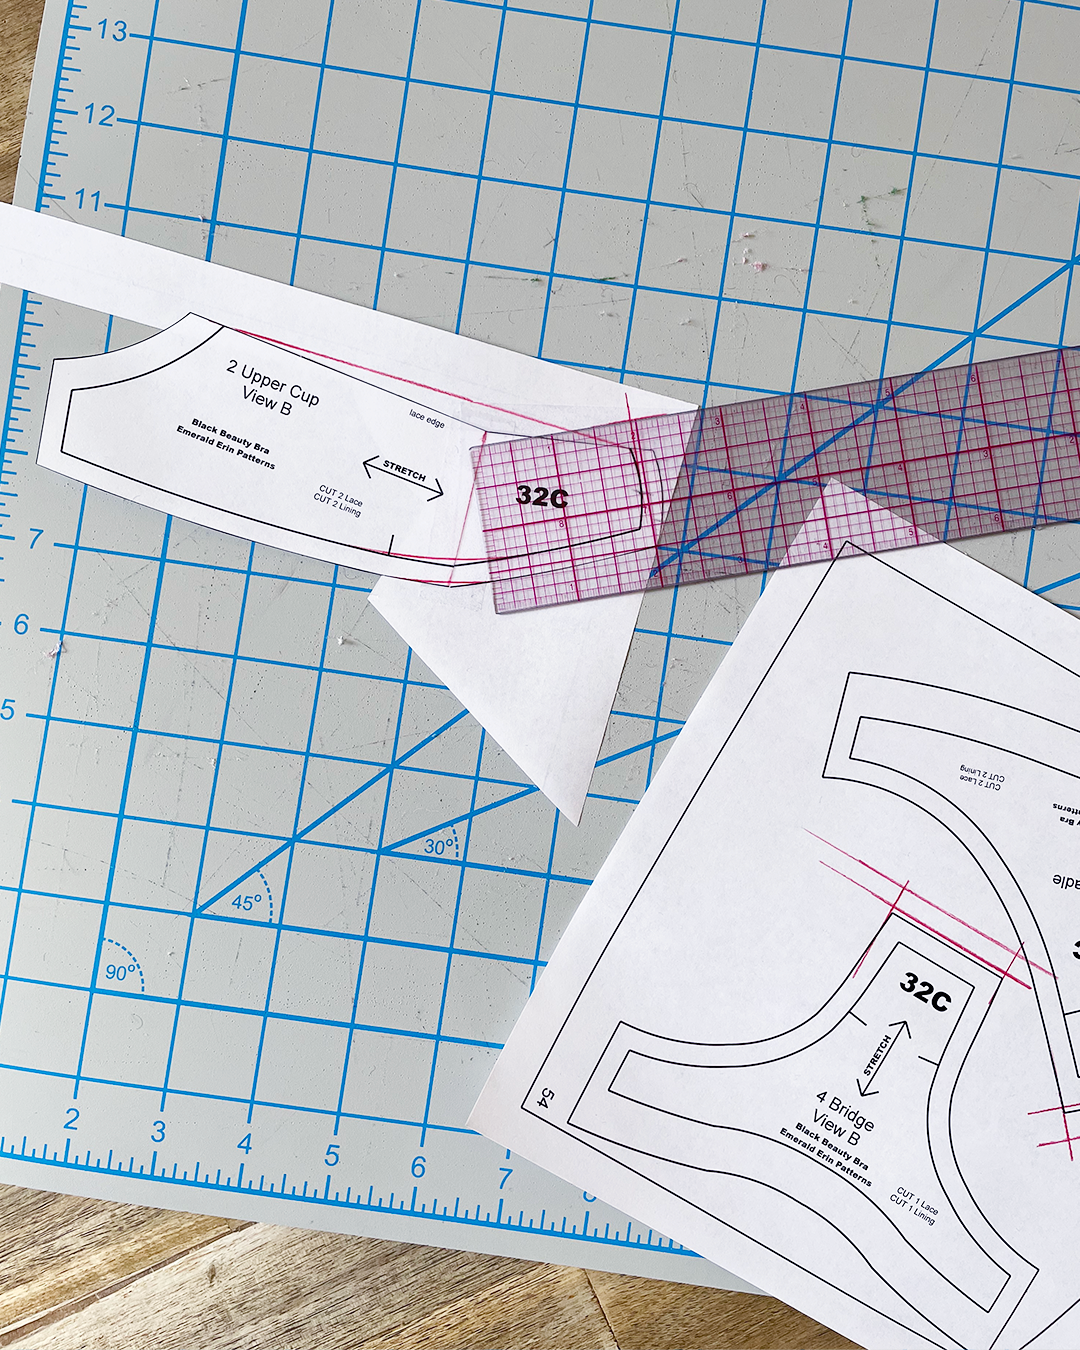
To do so, I used my clear ruler to measure 5/16” up from the existing edge at center front, and made a perpendicular mark to indicate the new corner of the pattern piece.

I drew the new Upper Cup edge by connecting the new center front corner to the armhole corner with a straight line. I marked the older line with an X just to distinguish it from the new line.
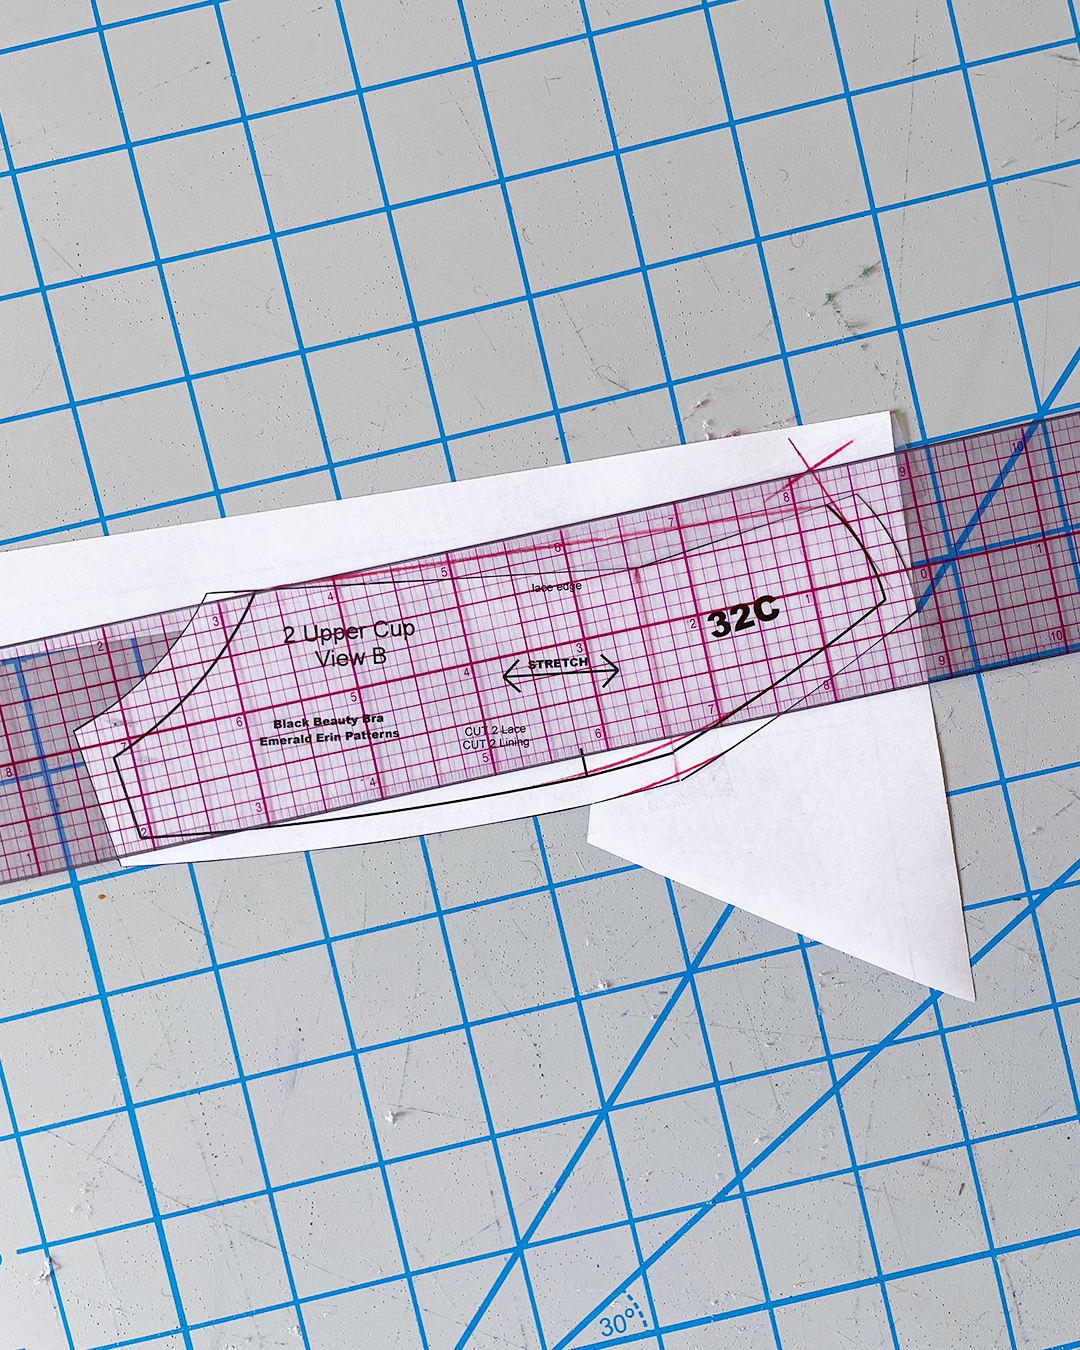
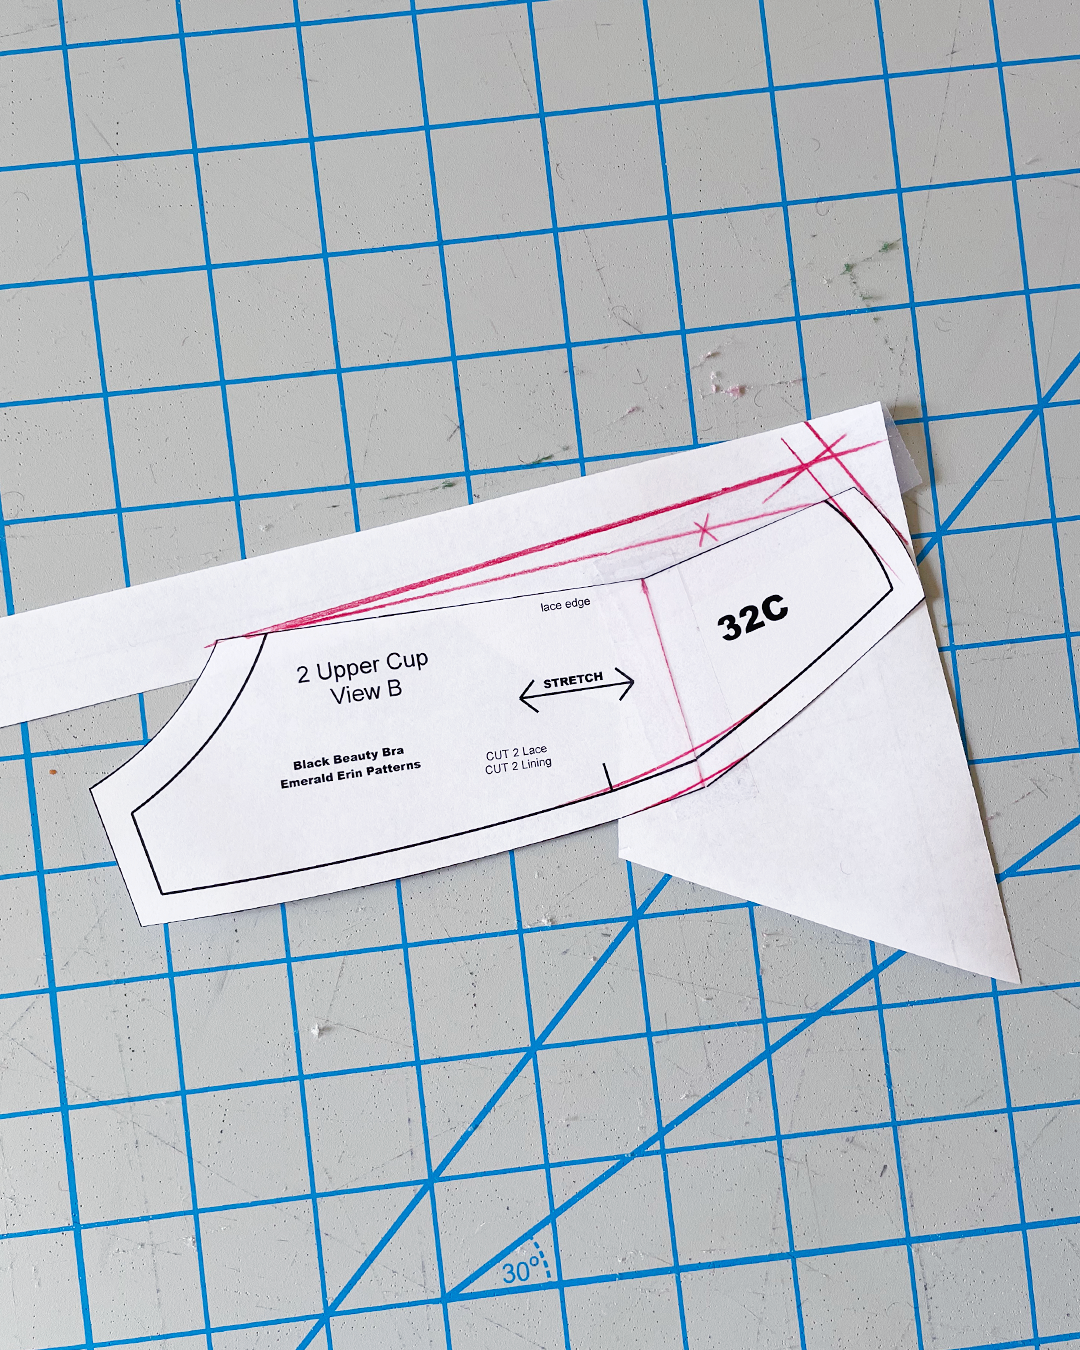
I double-checked the updated Upper Cup by lining it up with the Frame piece, as the pieces would be sewn together. You’ll notice that I angled my new line slightly so that the pieces would fit a bit better together:
Next, I needed to make sure that the armhole of the Upper Cup also matched the armhole of my adjusted Powerbar.
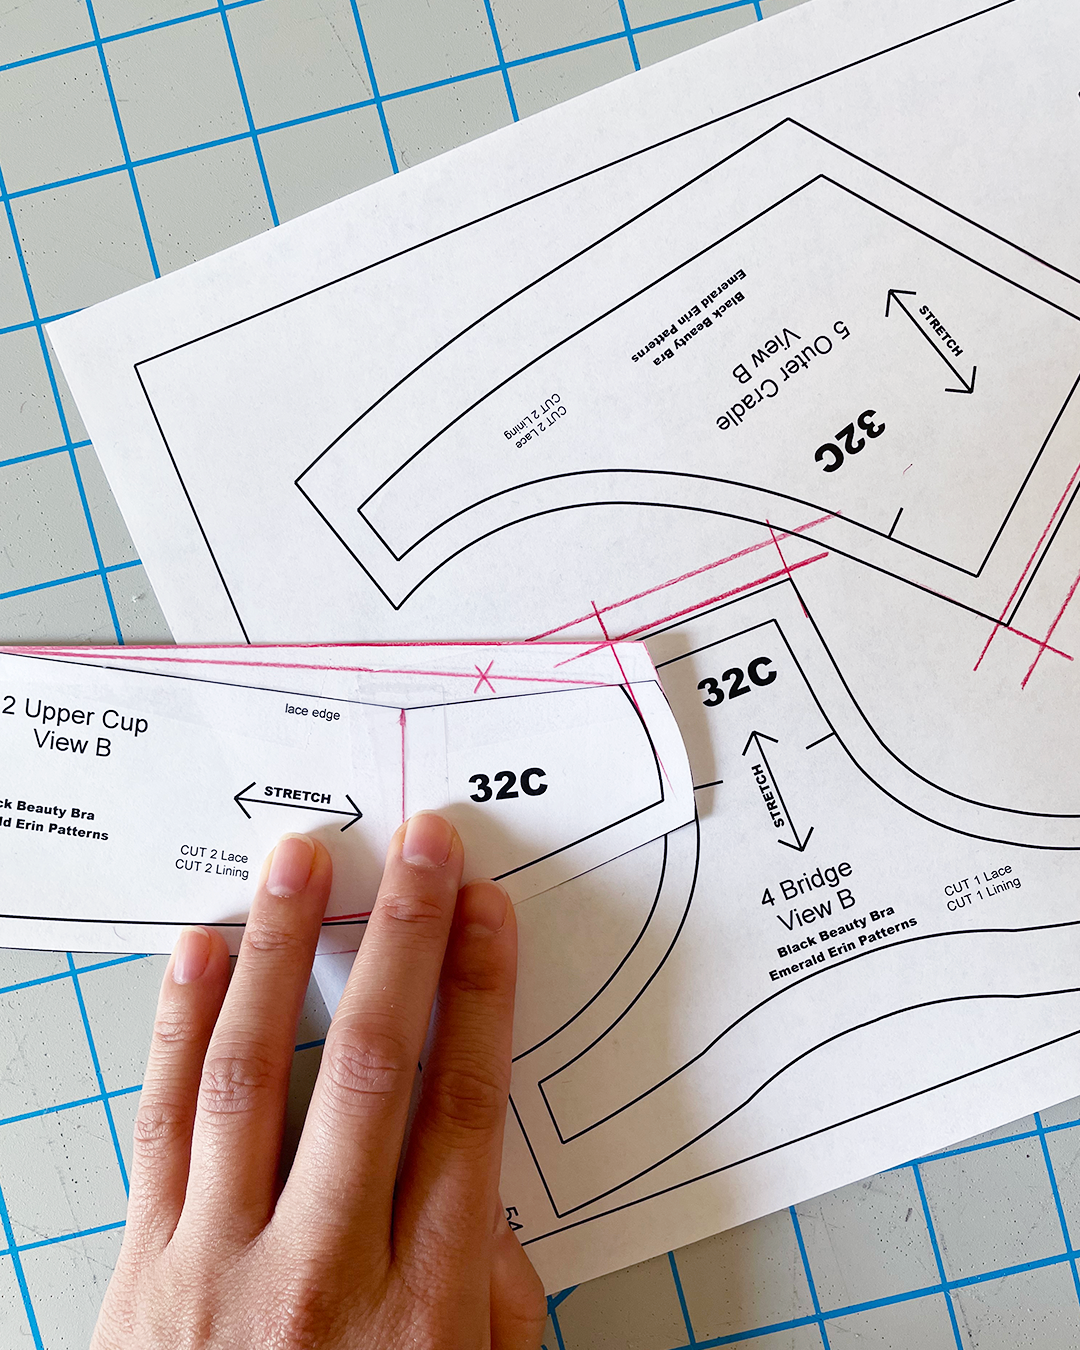
To make sure it was an exact match, I first taped some paper under the armhole area of the Upper Cup. I placed the Powerbar piece on top of the Upper Cup piece, lining up the original pattern lines, pinning the pieces together to hold them, and then used my tracing wheel to trace the new lines.
After removing the Powerbar layer, the marks from the tracing wheel indicated where the new armhole line should be on my Upper Cup piece.
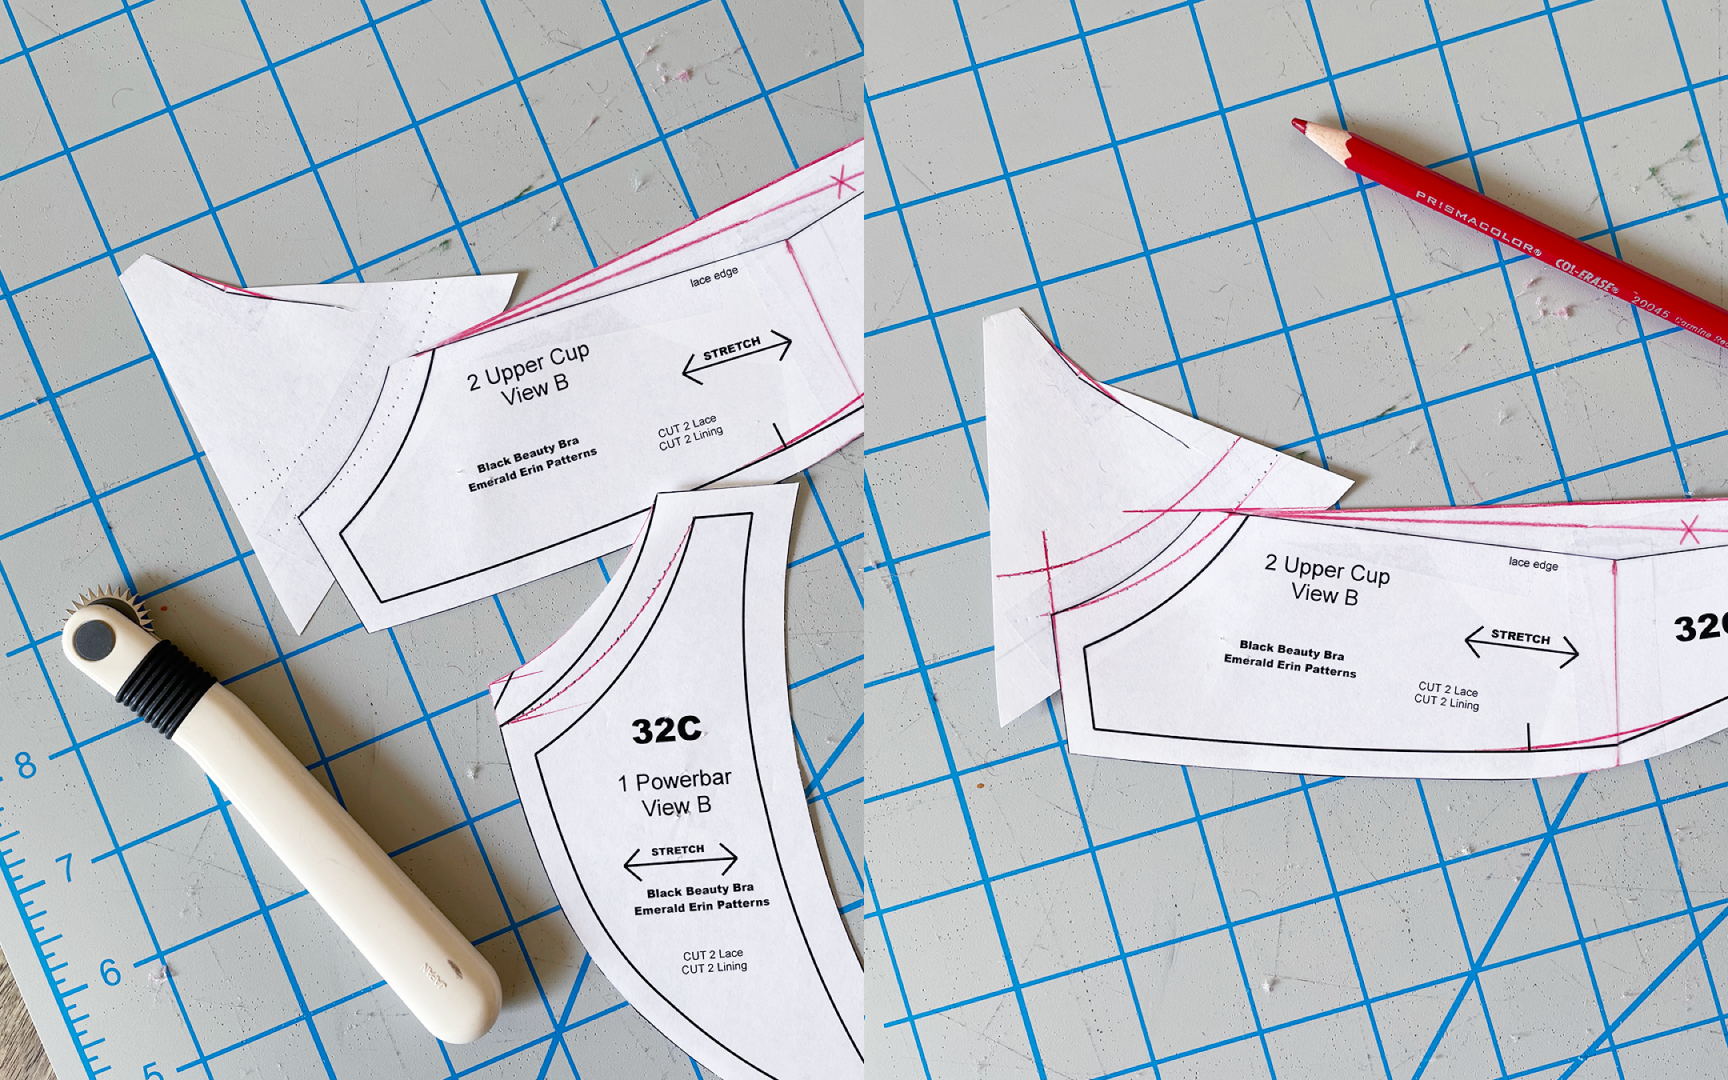
I traced those lines in red, and cut out my adjusted Upper Cup piece.
Et voila! My rather Frankenstein-ed pattern was ready to go:
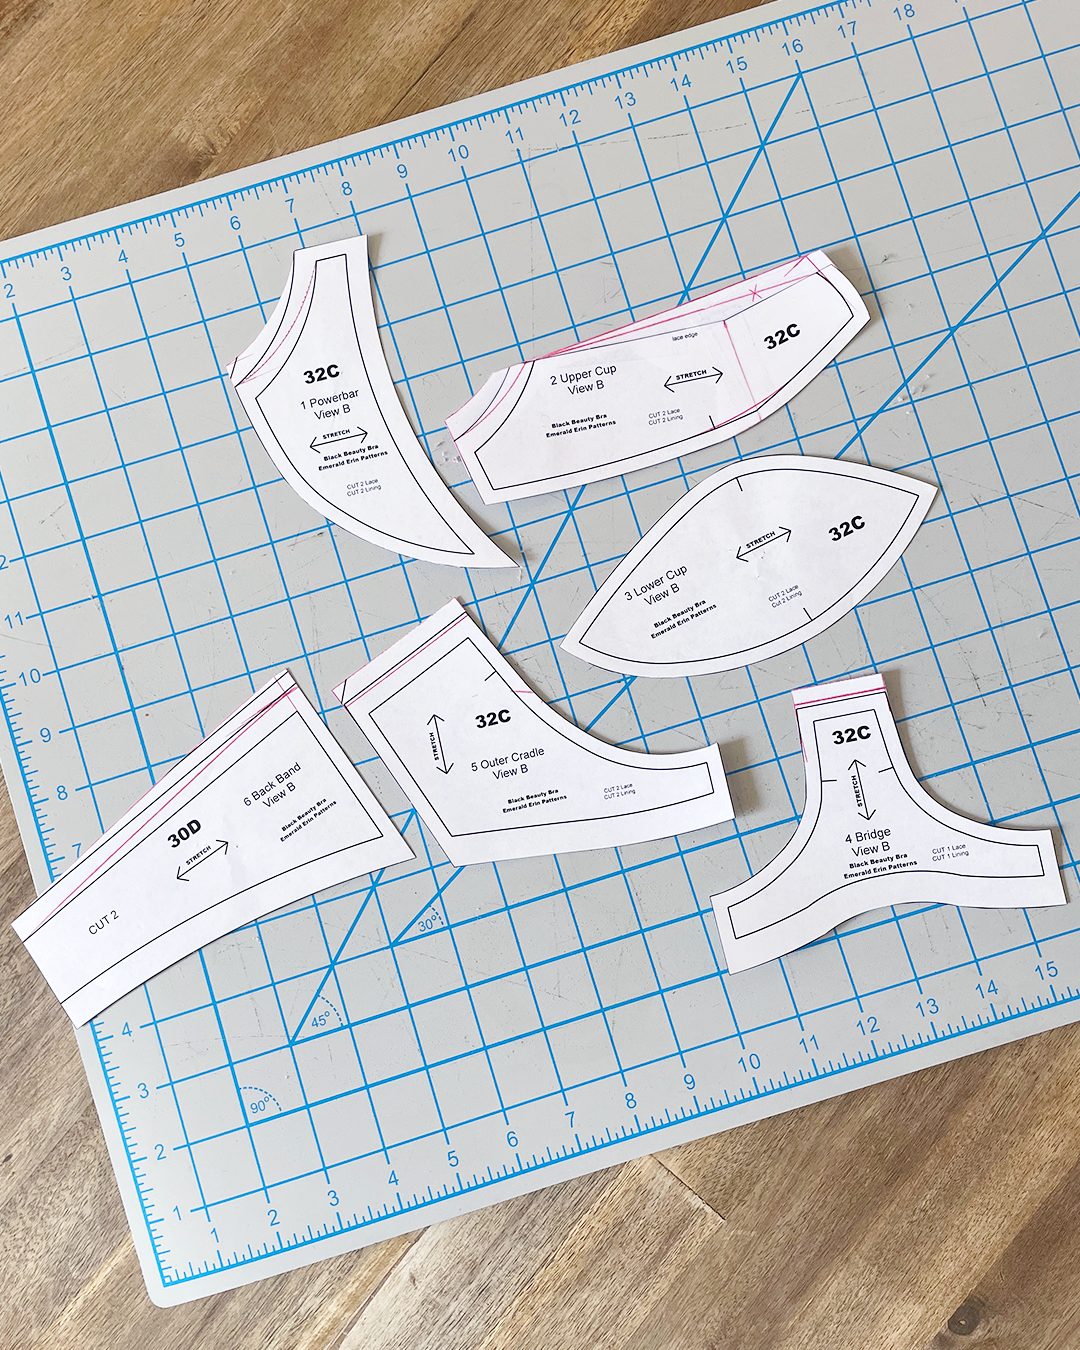
Et voila! My rather Frankenstein-ed pattern was ready to go.
Final Thoughts
I hope you enjoyed this series as much as I enjoyed documenting it!
As a bra-making beginner, going through the process of making the Black Beauty Bra was a great learning opportunity for me. It gave me a chance to learn about some of the specialized materials of the bra-making world, as well as a bit of pattern-making for a very complex part of the body.

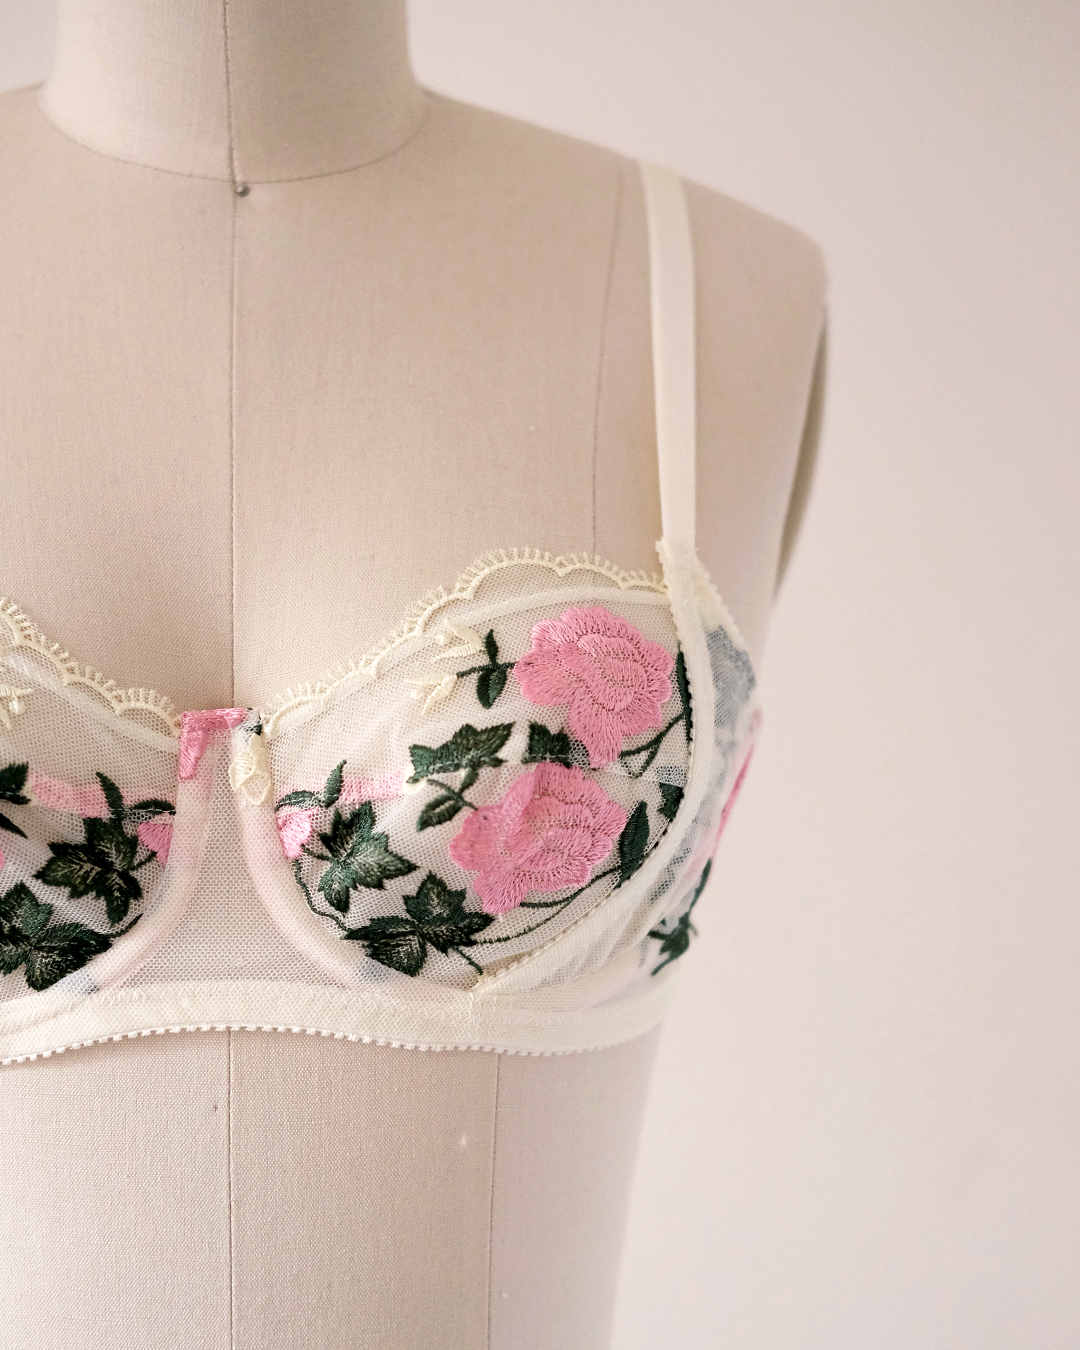
The process of fitting my bras also taught me a lot about my own body! Although my third iteration of the Black Beauty Bra fit pretty well, my gut tells me that perhaps a vertical bust seam could work even better for my shape. Perhaps that’s what I should tackle next?
Thank you again for following along! Wishing us all luck as we continue to learn about this amazing craft.
xo Joy
About Joy:
joy mao is a slow fashion studio creating small batches of thoughtfully-made clothing, accessories, and artwork. The brand centers materials, skill, process, and pleasure in pursuit of a more sustainable and joyful way of being.
Chinese-American designer Joy Mao holds a BA Fundamentals from the University of Chicago and AAS Fashion Design from the Parsons School of Design. Originally from Shanghai, China, she now lives in New York with her beloved husband, struggling house plants, and Silver Reed SK280 knitting machine named Grace Hopper.
You can visit Joy on joymao.com, or @byjoymao on Instagram.