
Black Beauty Bra View B Sew-Along // Part Three: Cutting
This post contains affiliate links.
Hello everyone & welcome back for Part 3 of our Black Beauty Bra View B Sew-Along! Today, we’ll be going over the details of cutting your materials in preparation for sewing.
There’s a number of things to pay attention to during the cutting phase that can help not only make your bra easier to sew, but add to the structural integrity and overall polish of your project.
What we’ll be covering in this section:
- Pressing (or ironing)
- Direction of Greatest Stretch
- Pinning vs. weights
- Fabric scissors vs. rotary cutter
- What to cut
- Final cut pieces
Let’s get started.
Pressing
If you have an iron at your disposal, I would highly recommend giving your materials (fabrics as well as elastics) a gentle press before you begin cutting.
Because most bra-making fabrics and trims contain some percentage of synthetic materials like nylon and elastane, be sure to set your iron for the lowest heat setting to avoid melting your fabrics. Always test your iron on a swatch before using it on a large piece of material.
Pro-tip: If you don’t have an ironing board, you can use a cotton or wool placemat / blanket / towel. Fold it a few times if needed and place it on a flat surface, and hold it down while you iron so it doesn’t slide.
Here’s an example of the difference that a gentle pressing can make:

Direction of Greatest Stretch
Before you begin laying out your fabrics for cutting, you’ll need to determine each fabric’s “direction of greatest stretch.” Some bra-making fabrics only stretch in one direction (e.g. horizontally), while others can stretch in two directions (e.g. horizontally and vertically).
Often, even if a fabric can stretch in two directions, it will be stretchier in one direction than in the other—the direction which stretches more is known as the “direction of greatest stretch.”
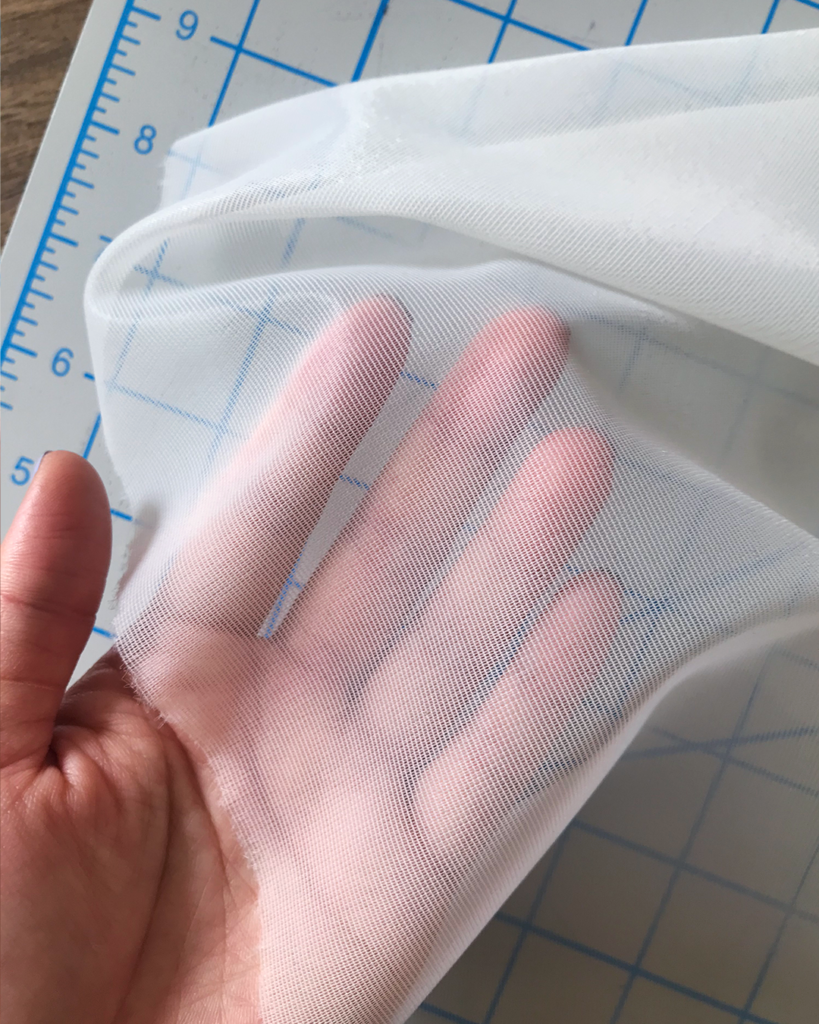
To determine your fabric’s direction of greatest stretch, gently pull it in both directions to compare. You should be able to tell the direction of greatest stretch fairly easily just by look and feel.
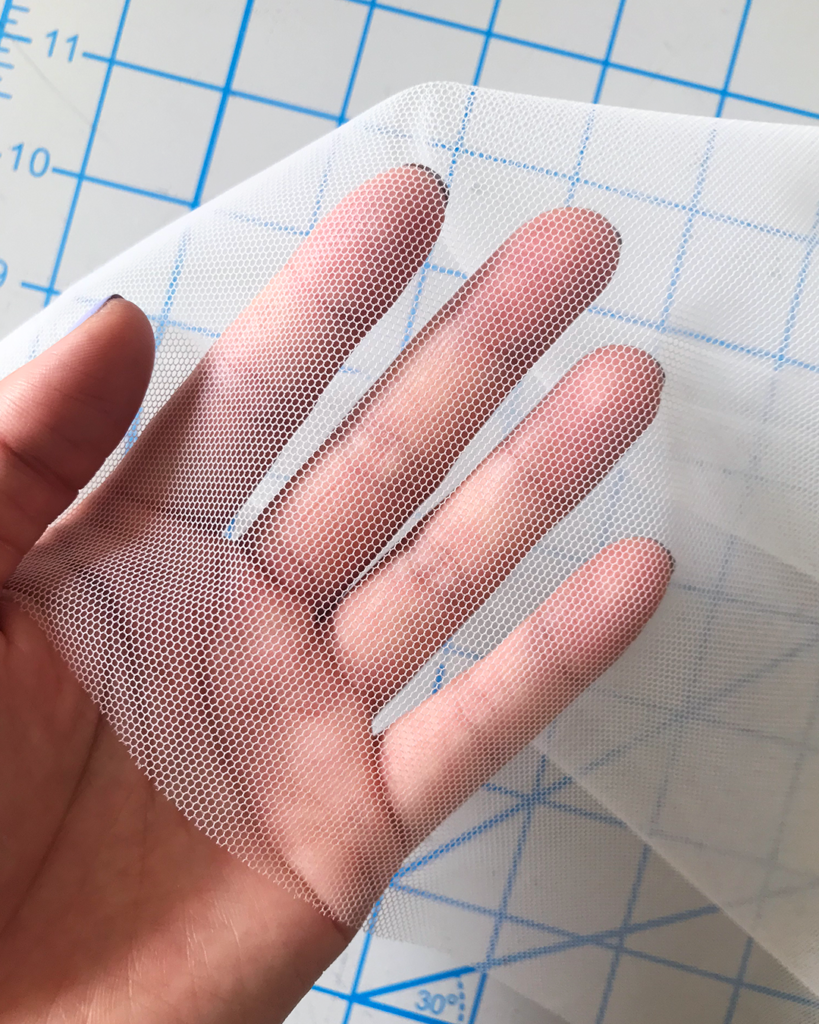
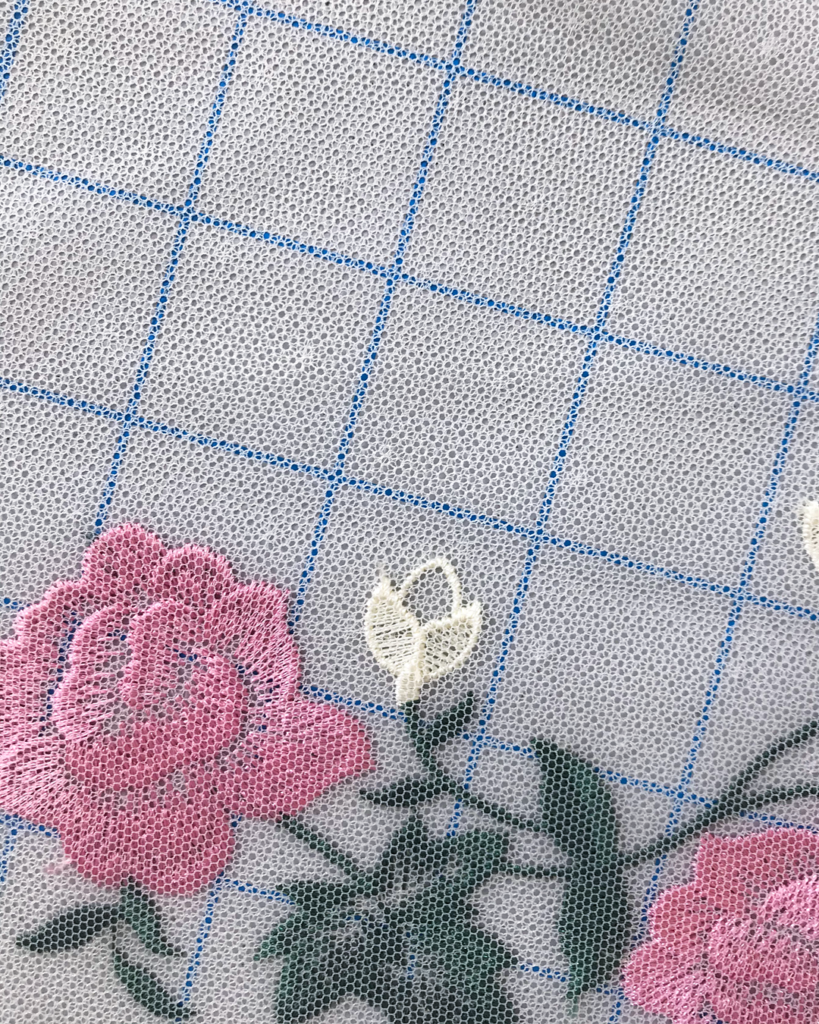
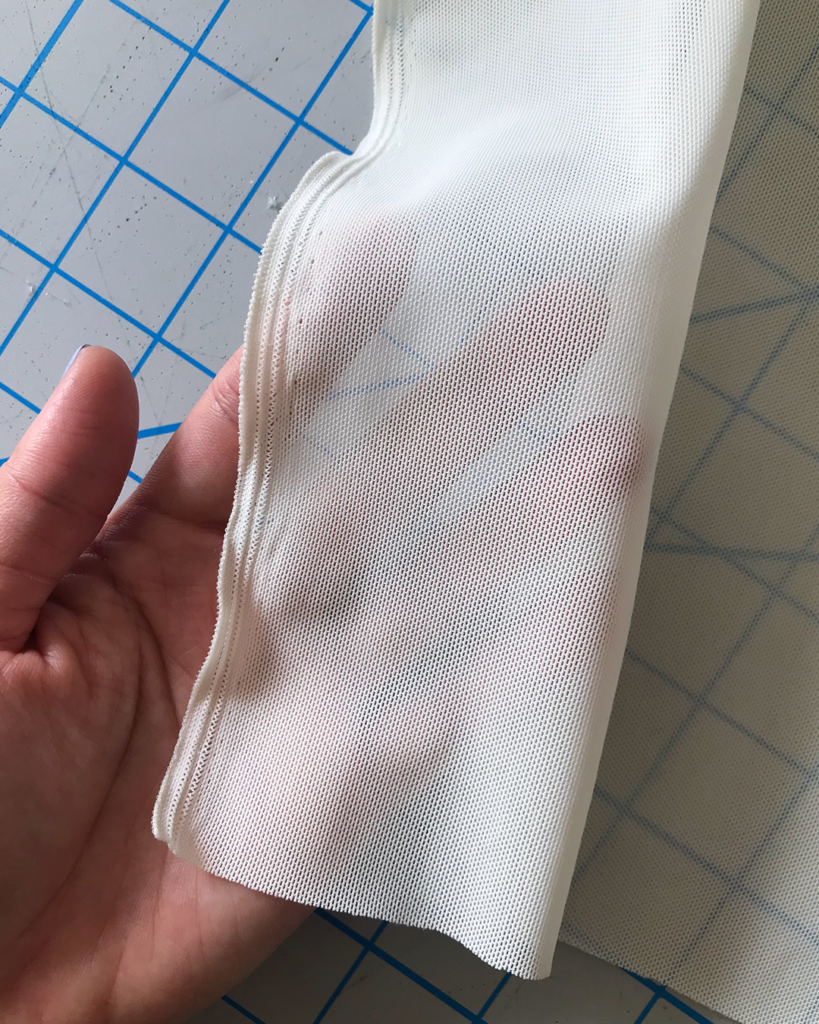
Let’s observe this power net fabric as an example:
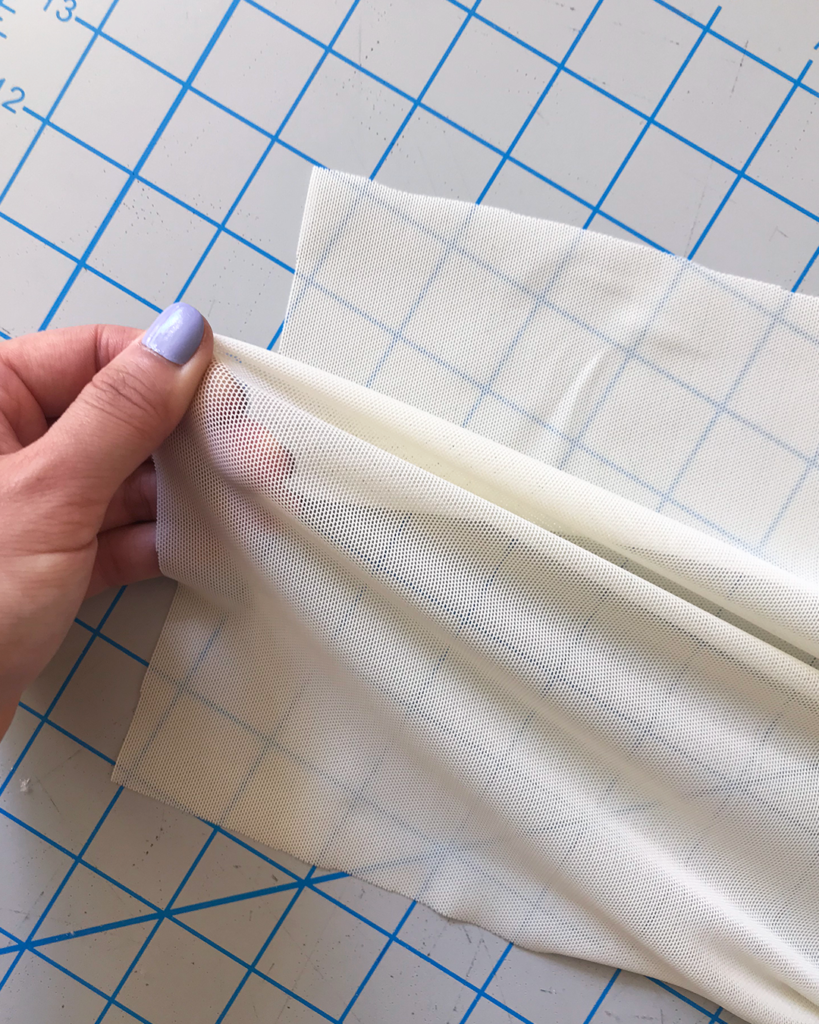
Power net is usually stretchiest in the direction that’s parallel to the selvedge. However, you can sometimes encounter power net that is equally stretchy in both directions.
In the case where power net is equally stretchy in two directions, the way to determine the DOGS (Direction of Greatest Stretch) is to observe the behavior of the holes when the fabric is being pulled. If the holes become wider when you pull the fabric, that is NOT the direction of greatest stretch. If you pull on the power net and the holes aren’t being distorted/getting wider, that is the direction of greatest stretch.
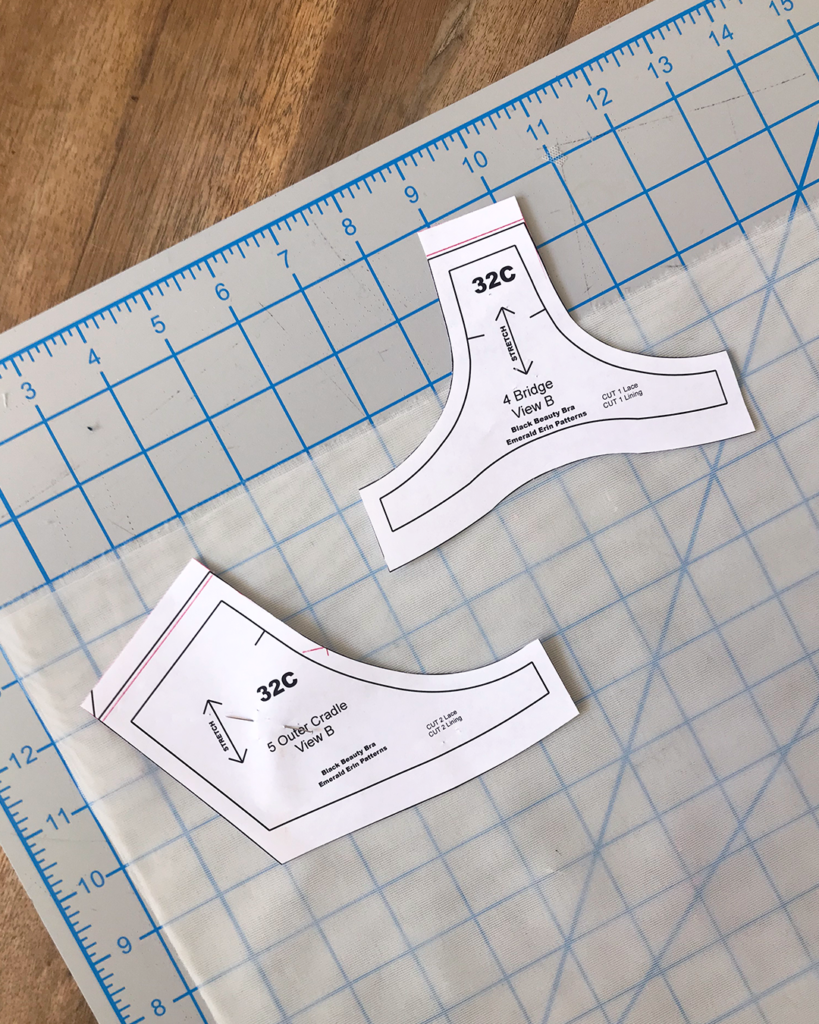
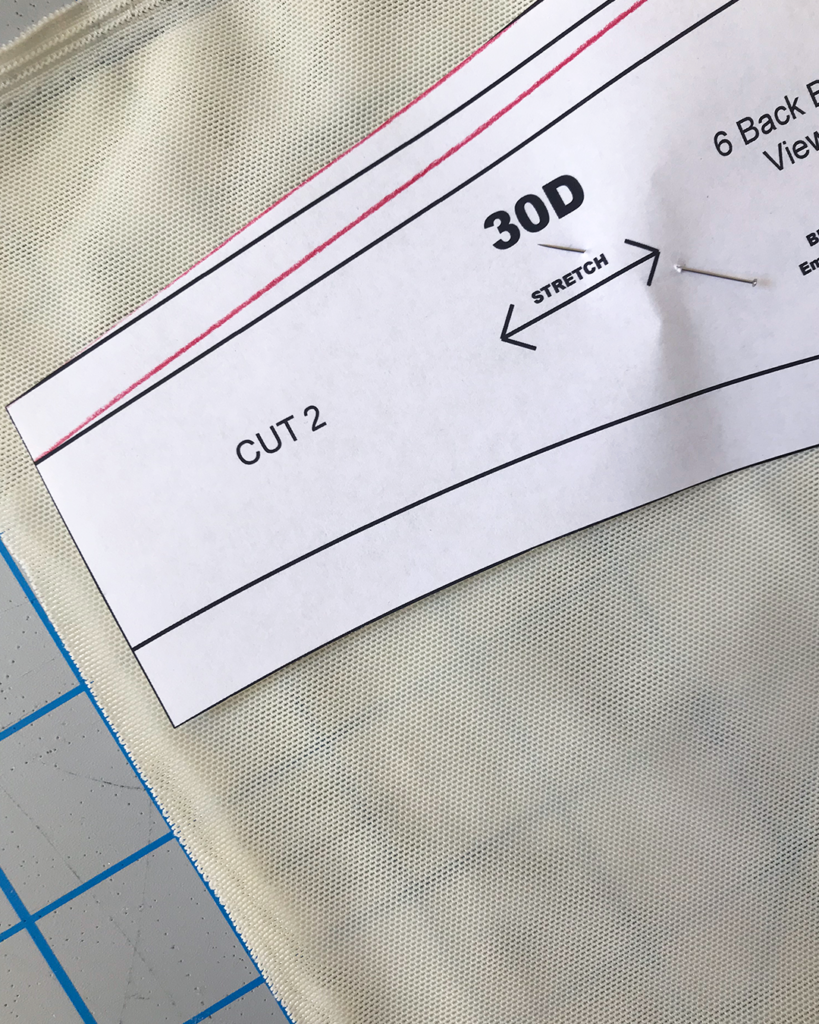
Once you’ve identified your fabric’s direction of greatest stretch, you can determine how to lay your pattern piece on top for cutting.
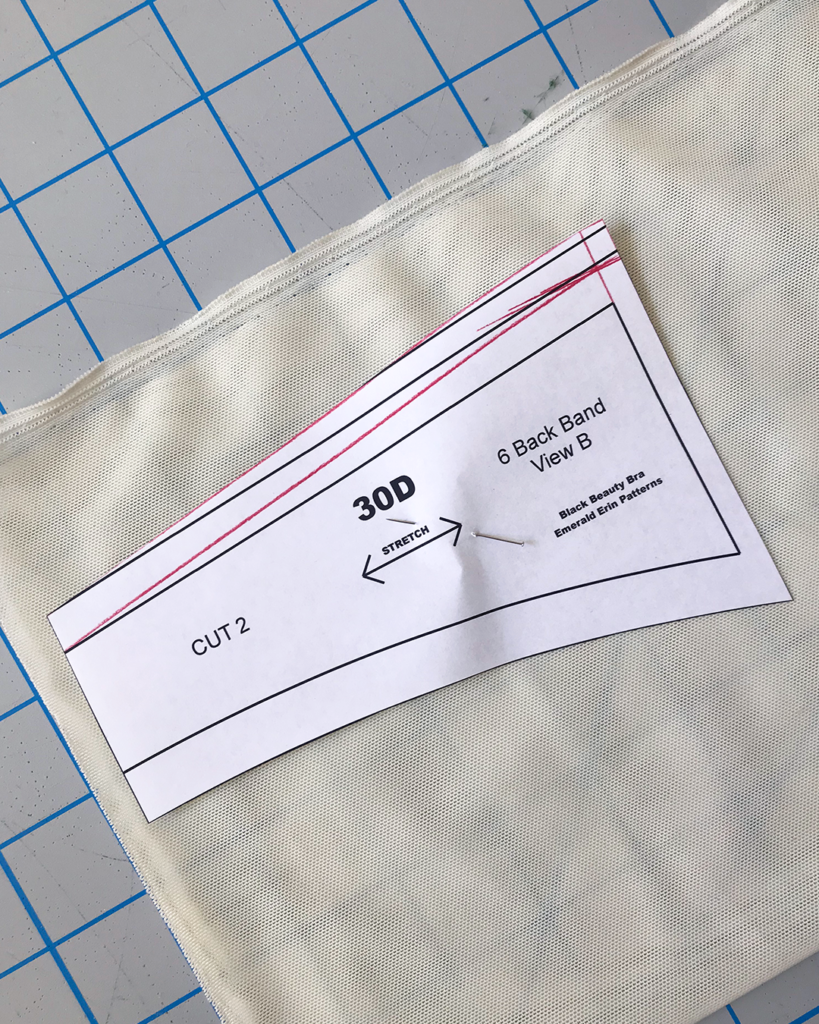
On each pattern piece for the Black Beauty Bra, there is an arrow indicating where the fabric’s direction of stretch should be in relation to the pattern piece. In the image above, you’ll notice that the arrow on the “Back Band” pattern piece runs horizontally around the band of the bra. By orienting the direction of stretch so that it runs around the bra band, it helps make your back band extra stretchy and comfortable.
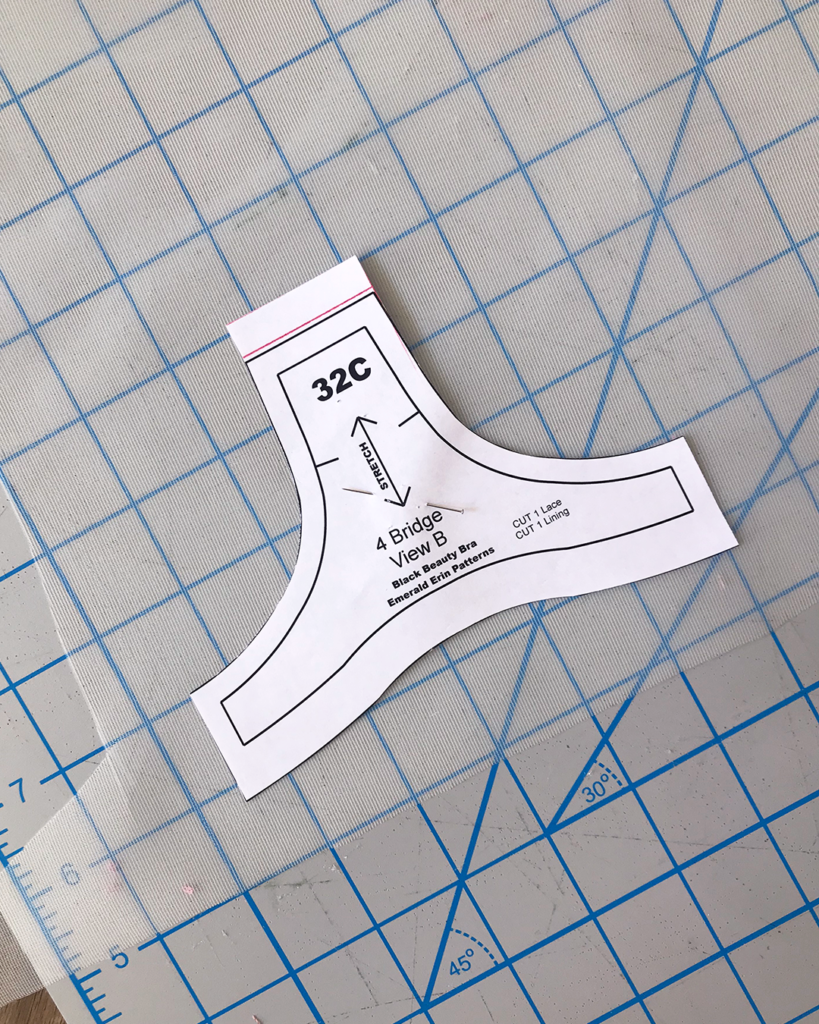
Following the pattern’s instructions, I’ve laid the pattern piece so that the arrow runs parallel to the power net’s selvedge.
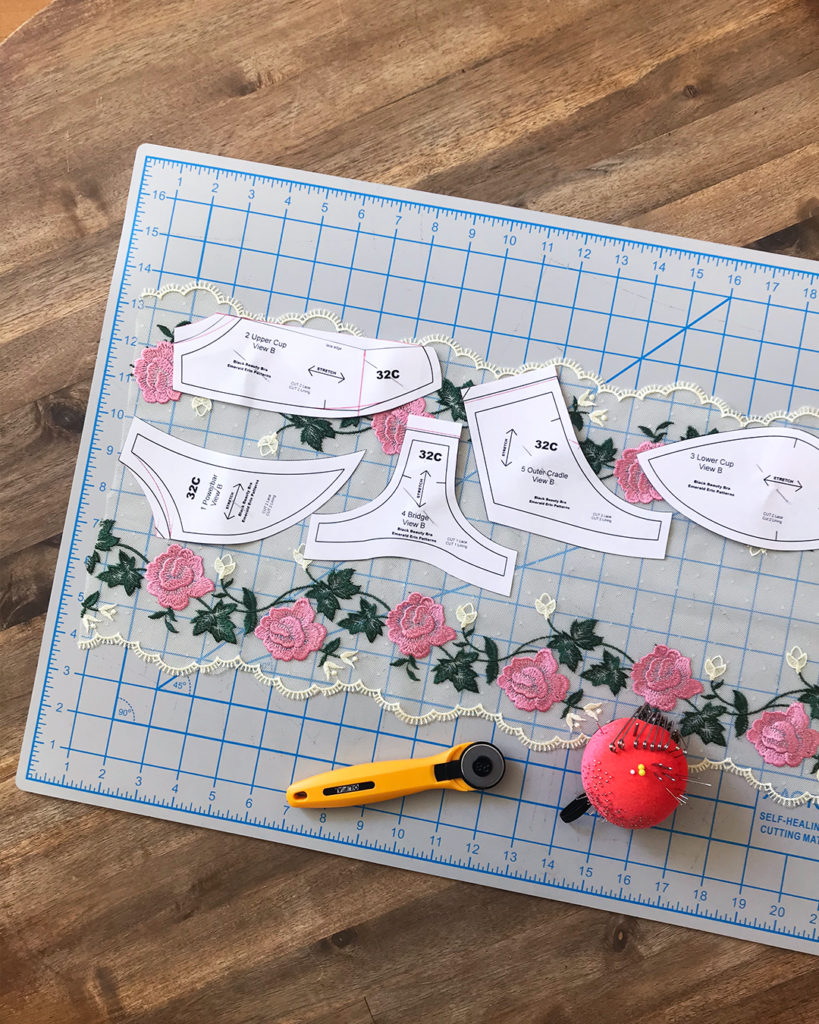
Pinning vs. Weights
You can choose whether to use pins or weights to hold your pattern pieces to your fabrics as you cut—either works!

In my case, I chose to use pins because I didn’t have small enough pattern weights on hand. Typically, I use these small cans of tuna as pattern weights (they work really well!), but as you can see here, they’re just a tad too big for some of the pattern pieces. You can always move your weights as you cut, but it does increase the chance of things shifting around by accident.
Pro-tip: Pin at a diagonal angle to the direction of stretch to achieve the most secure hold with the least number of pins. The fewer pins the better, so you can avoid distorting the fabric too much.
Scissors vs. Rotary Cutter
What kind of cutting tools you use is also totally up to you. I have three cutting tools that I like to use: embroidery scissors, fabric scissors and rotary cutter.

I use a 28mm rotary cutter and my cutting mat to cut all of the pattern pieces out of fabric, because I find it much easier to go around the small curves of bra patterns with a small rotary blade.
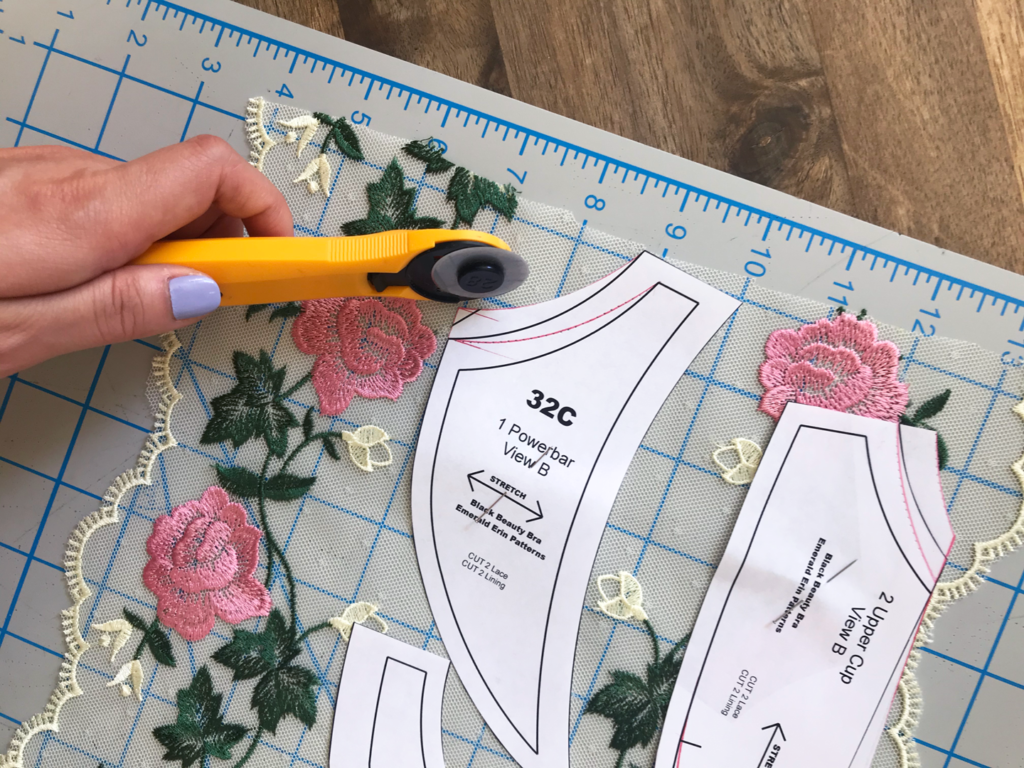
I prefer to use my fabric scissors to cut through elastics and channeling.
The small embroidery scissors are perfect for snipping thread at my machine.
What to Cut
This part of the cutting process was the most confusing bit for me when I was trying to do it for the first time! What do I cut from what? How many pieces do I cut? How do I lay out each pattern?? Fear not—we’ll walk through it all!
On every piece of the pattern, there are instructions for what to cut from that piece.
For example, the Upper Cup piece indicates that you need to “cut 2 lace, cut 2 lining.” This means that you’d need to cut two mirrored pieces of the Upper Cup out of lace, and two more mirrored pieces out of your lining of choice (e.g. bra tulle).
Although there are only 6 pattern pieces to the Black Beauty Bra, you’ll need to cut a set of mirrored pieces for the bra cups (upper and lower), powerbar, outer cradle, and back band to form the left and right sides of the bra.
If it helps you to remember to cut the mirrored pieces, you can print out two copies of these pattern pieces and label the backsides before you begin cutting.
What to Cut: Main Fabric / Fashion Fabric
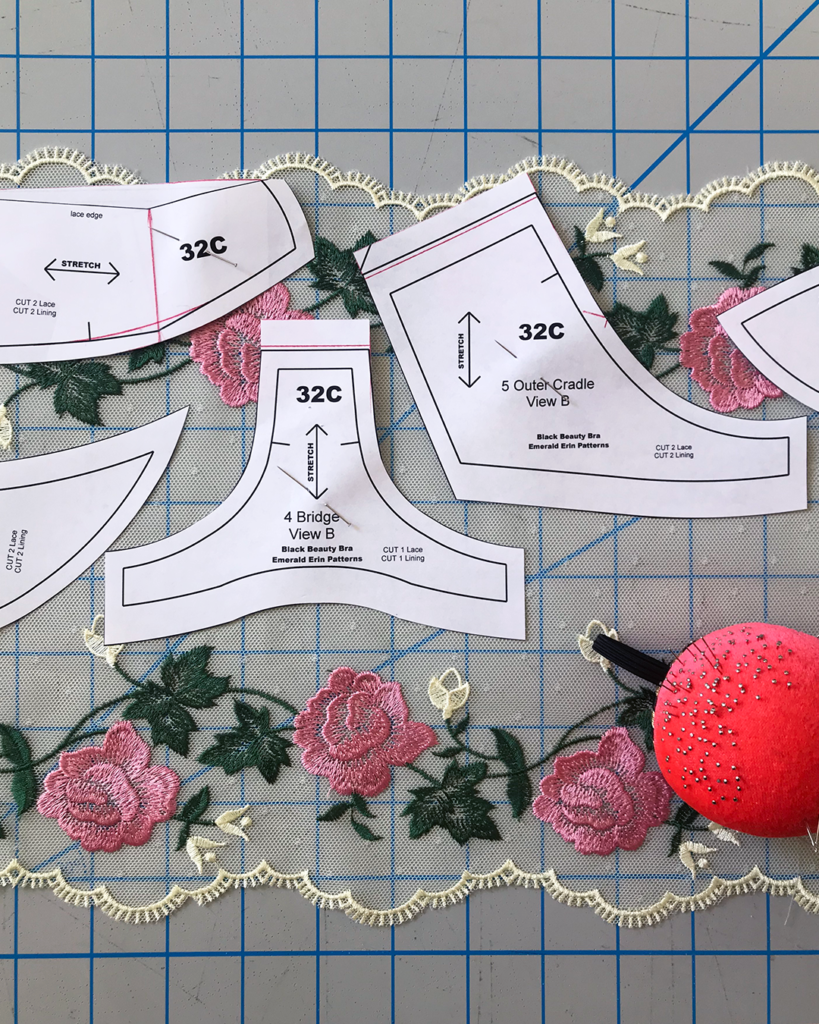
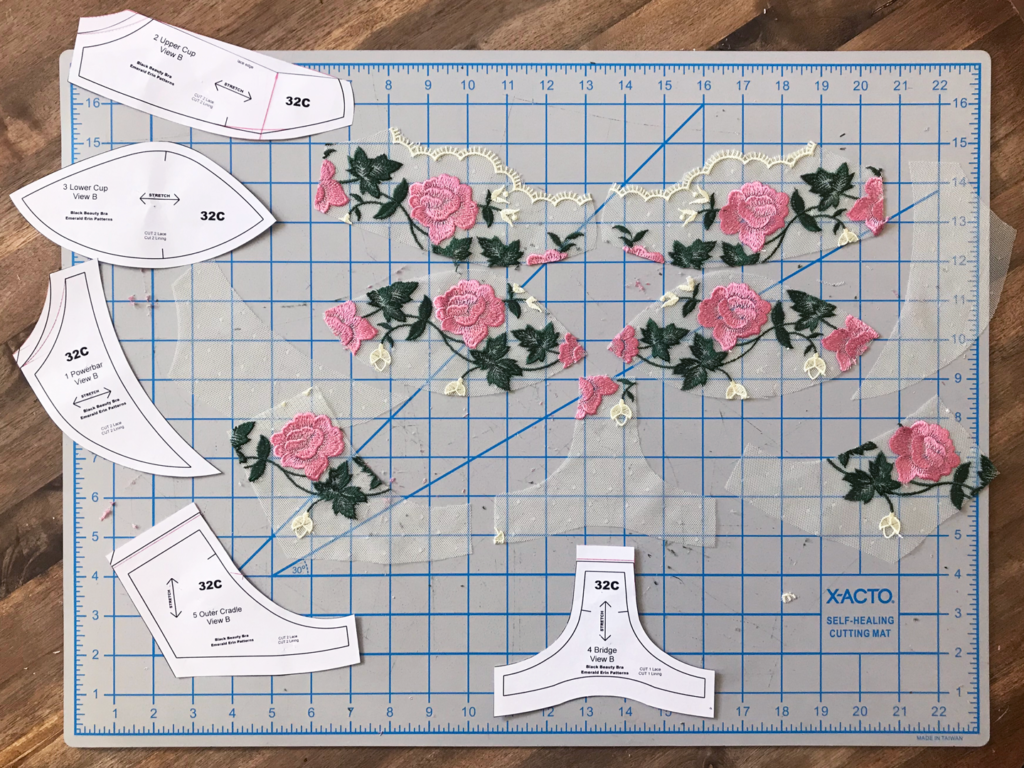
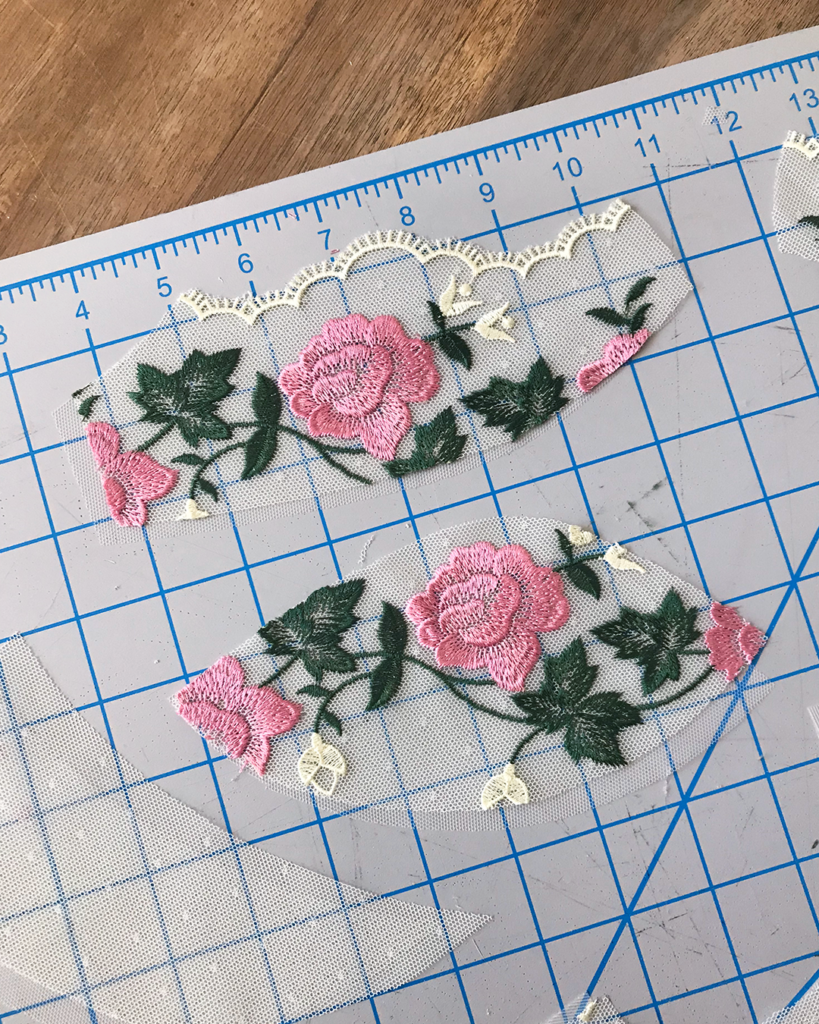
The first (and perhaps most exciting) thing you cut is your main fabric, or fashion fabric. In my Embroidered Tulle Bra Kit from Tailor Made Shop, it was this lovely floral lace:
How you place your pattern pieces on your main fabric will have a big impact on how your bra will look, so it’s important to take some time to think about what effect you want to achieve, and how to place your pieces accordingly.
This particular lace that I used is a mirrorable lace with two scalloped edges. This means that the two scalloped edges are mirrored versions of each other, making it possible to create a mirrored image on left and right sides of the bra by placing patterns for one side of the bra along one scalloped edge, and patterns for the other side of the bra along the opposite edge.
You may encounter laces that are not mirrorable, in which case you will need to do some additional planning in order to achieve a balanced look. Asymmetry can be totally gorgeous too, though!
In my case, I just wanted to make sure to strike a nice balance between rose and vine motifs. I ended up placing the Bra Cup pieces on top of roses, the Outer Cradle on top of vines, and the Powerbar and Bridge pieces in the less busy areas along the middle of the lace.
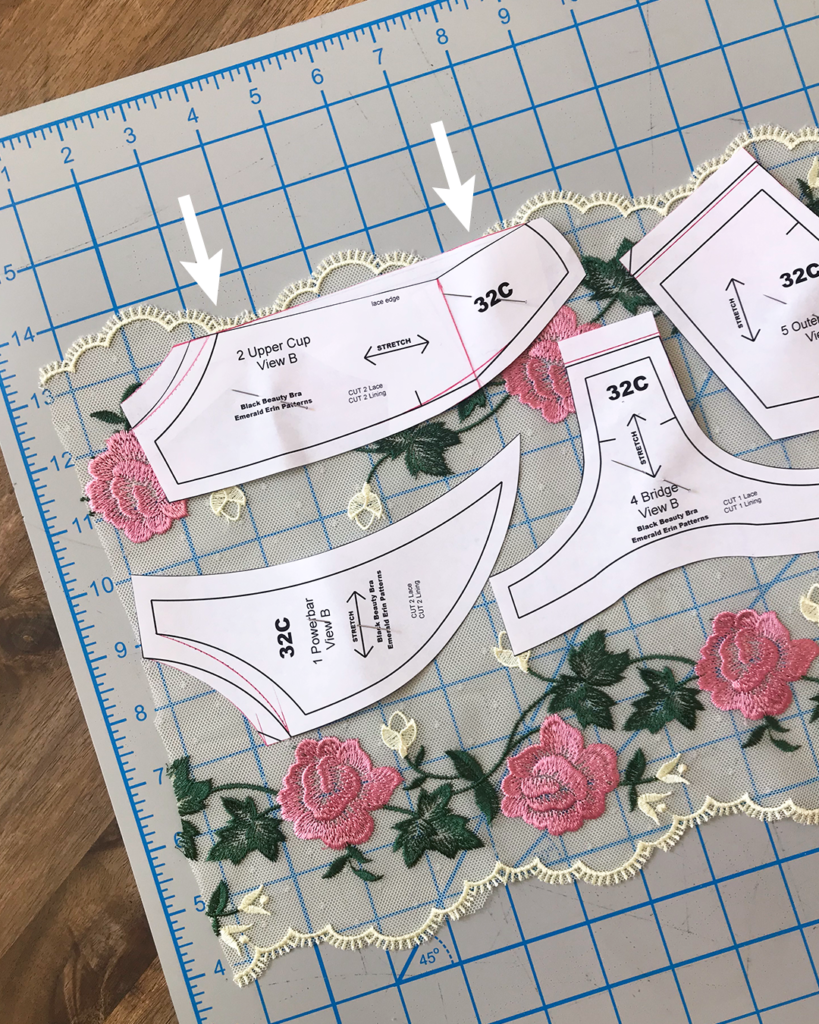
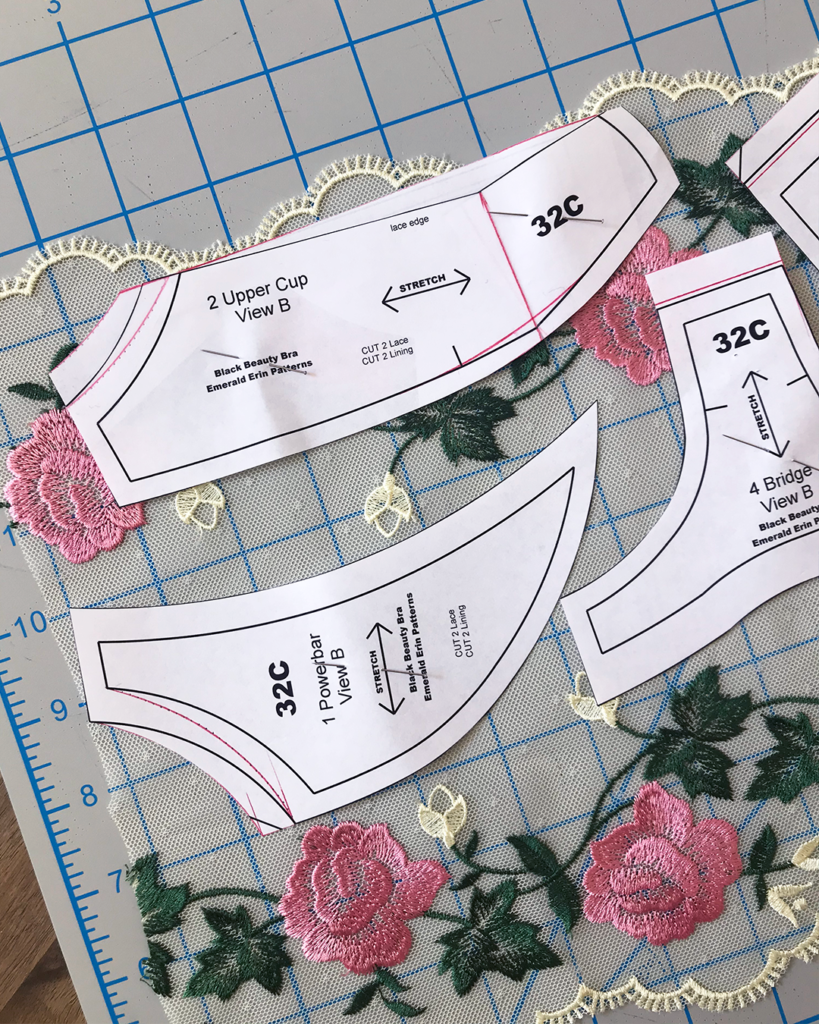
According to Emerald Erin’s instructions for the Black Beauty Bra, the top edge of the Upper Cup should be aligned with the lowest points of the scalloped lace edge.
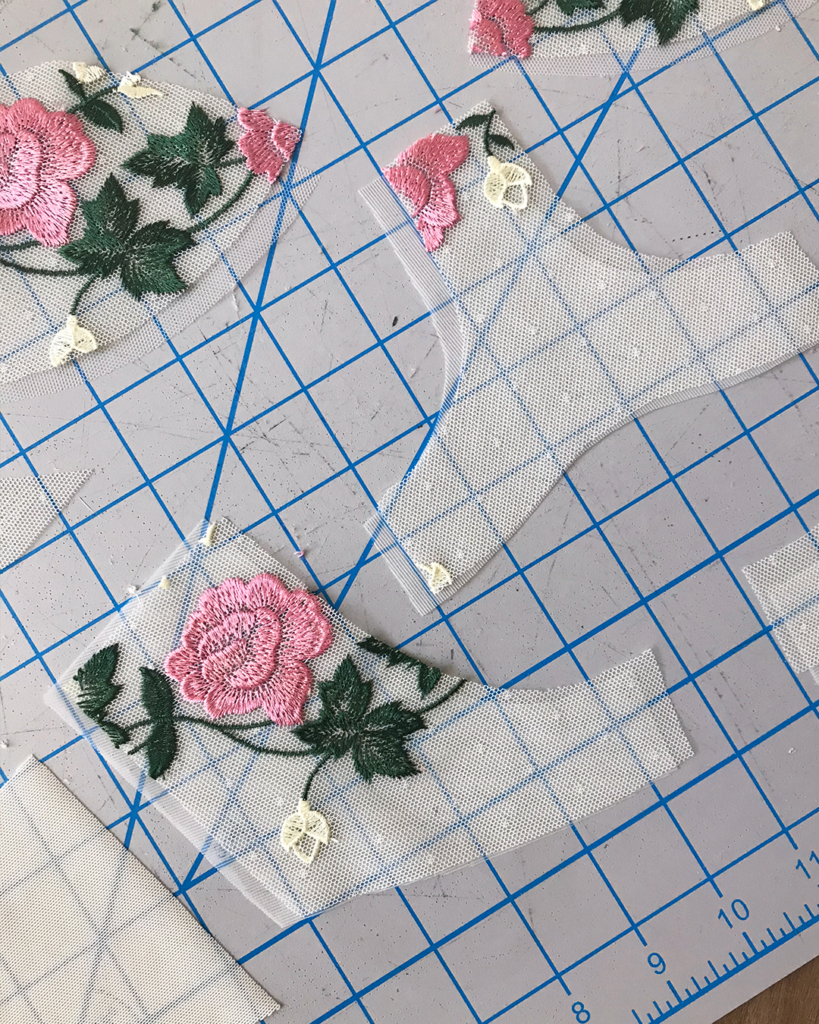
Because I hadn’t printed two copies of each pattern piece, I ended up cutting the pieces for the other side of the bra by flipping my pattern pieces over.

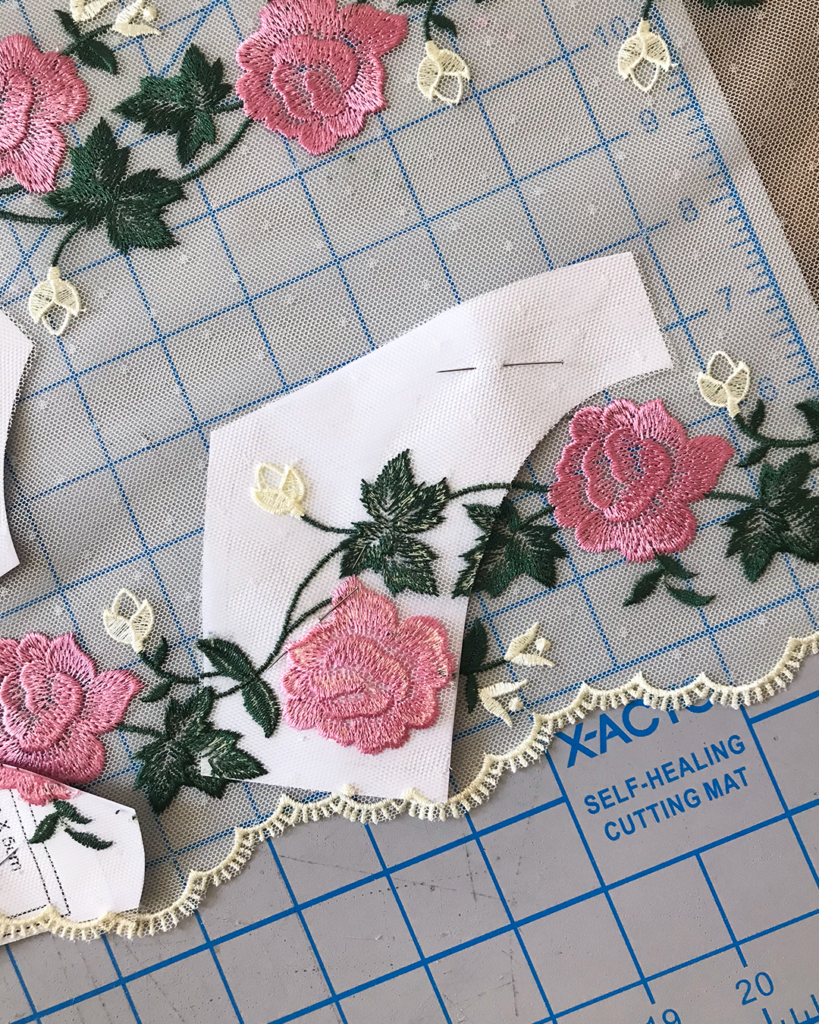
This part may be a bit confusing, but is a convenient way to ensure that your pieces are mirrored nicely:
In order to make sure that I was cutting the same exact portion of the lace motif for each piece, I kept my previously-cut lace pieces pinned to the pattern before flipping it over, and used it as a guide to line the paper pattern up against the rose motif on the other edge of the lace.
I did this for the Upper Cup, Lower Cup, and Outer Cradle.
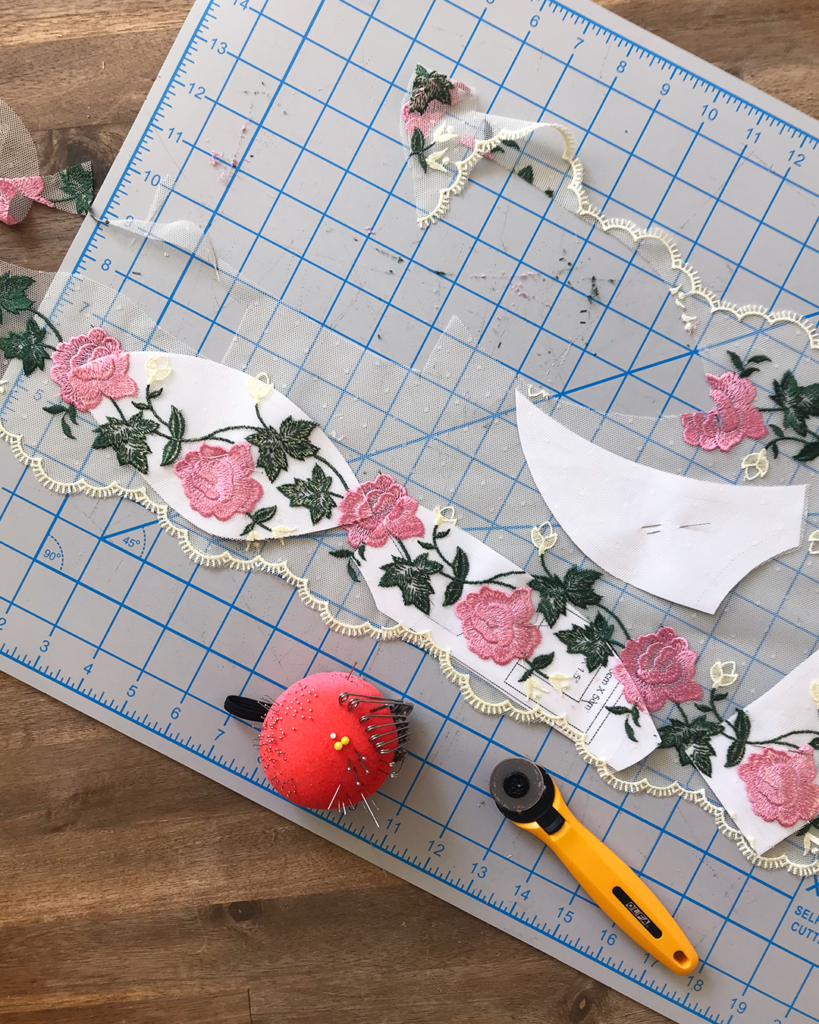
Here are all the lace pieces cut, still pinned to the pattern.
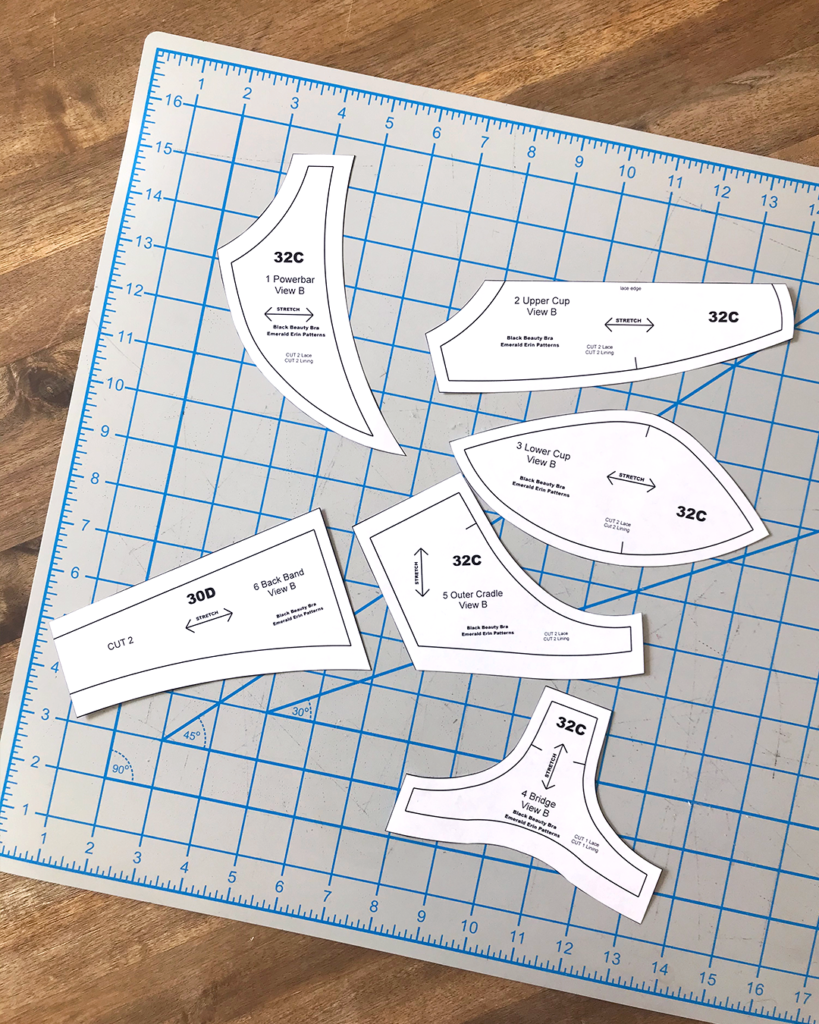
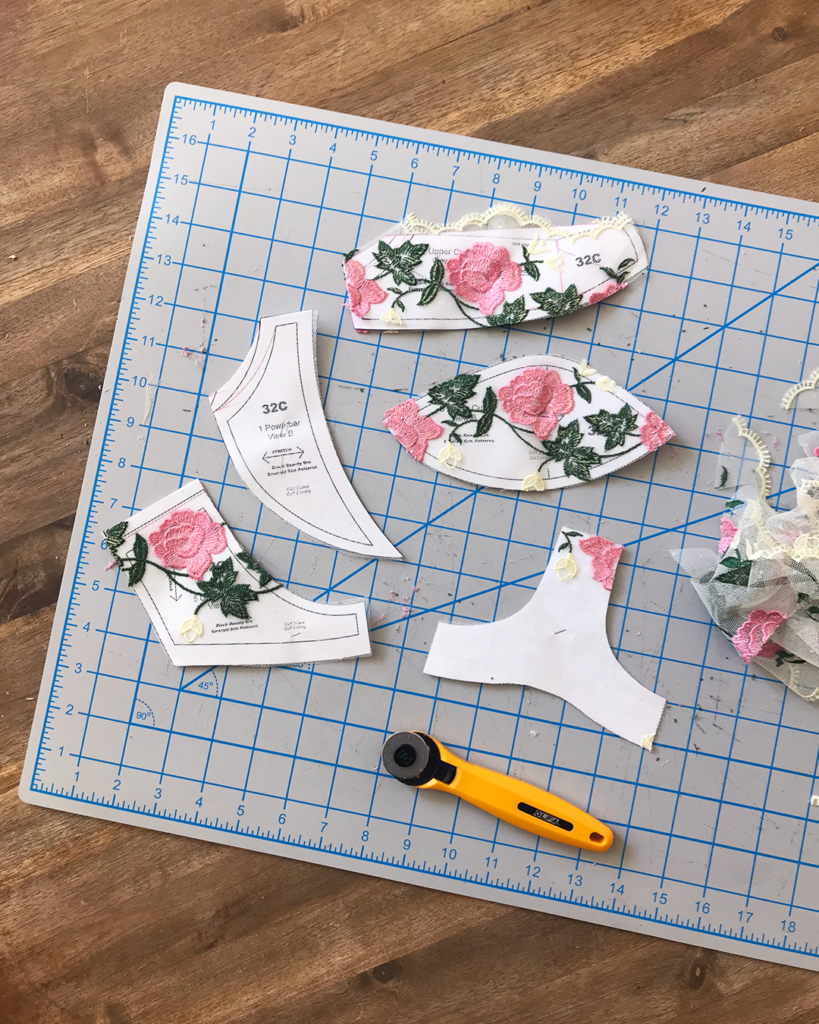
These are the main fabric pieces you should end up with when you’re done!
What to Cut: Bra Tulle
The Black Beauty Bra pattern calls for lining for the following pieces:
- Upper Cup
- Lower Cup
- Powerbar
- Bridge
- Outer Cradle
In the Tools & Materials section, we went over two different lining options that are suitable for different parts of the bra: Bra Tulle and Stabilizer Tricot.
Because of the properties of these fabrics, I cut the Upper Cup, Lower Cup, and Powerbar pieces out of Bra Tulle.
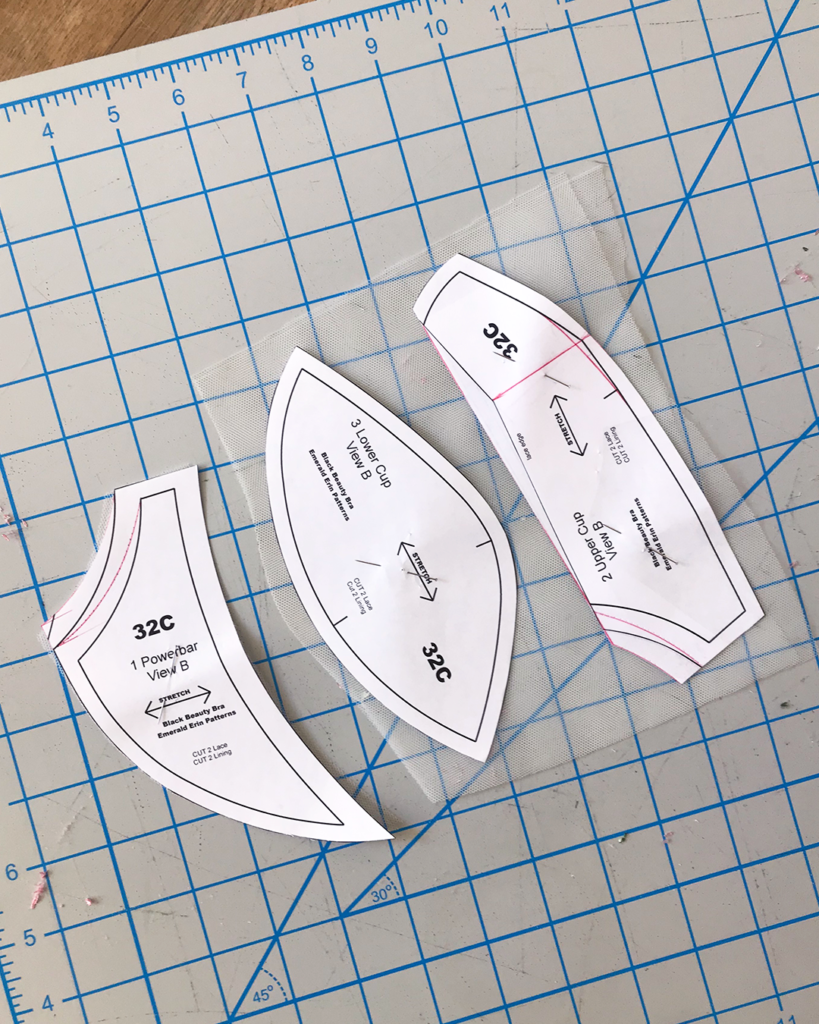
One thing you can do to add to the structural integrity of these pieces is to cut the bra tulle in an opposite direction of stretch to the lace.
What this means is that if you cut your lace pieces according to the direction of greatest stretch, you’d cut the bra tulle pieces in the opposite direction.
Here’s a side-by-side showing a piece of bra tulle on top of a piece of lace:
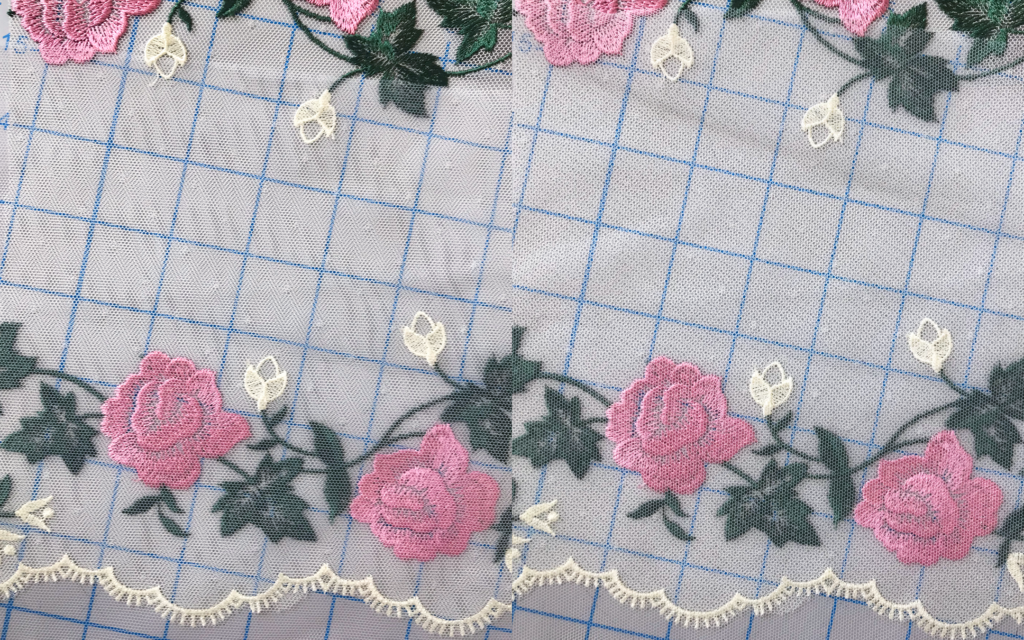
On the left, the direction of stretch for both fabrics is running in the same direction. On the right, the direction of stretch for lace and bra tulle are running in opposing directions.
When the hexagonal structures of the lace and the bra tulle are going in opposite directions, you get an interesting effect (resembling a honeycomb, flower, or sunburst pattern) that makes the fabrics stronger without adding much bulk.
What to Cut: Stabilizer Tricot
To line the Bridge and Outer Cradle pieces, I used a stabilizer tricot fabric.
Stabilizer Tricot has slight give in one direction and is completely stable in the other direction.
When cutting, simply follow the bridge’s and outer cradle’s DOGS for placement.
What to Cut: Power Net
Last but not least—I cut the Back Band pieces out of power net.
This one was more straightforward than the rest. I simply folded over the power net and made sure the DOGS was aligned with the direction of stretch on the pattern. By doing that, I am able to cut two pieces at the same time to create two mirrored Back Band pieces.
Final Cut Pieces:
After you’ve finished cutting, make sure you have 20 total pieces:
- Upper Cup: 2 lace, 2 bra tulle
- Lower Cup: 2 lace, 2 bra tulle
- Powerbar: 2 lace, 2 bra tulle
- Bridge: 1 lace, 1 stabilizer tricot
- Outer Cradle: 2 lace, 2 stabilizer tricot
- Back Band: 2 power net


Final Notes
All the pattern pieces are cut and ready for sewing! In the next post, we will go into machine settings.