Belgravia Bralette with Lace Strap Detail & Wide Band Elastic
This post contains affiliate links.
Hello!
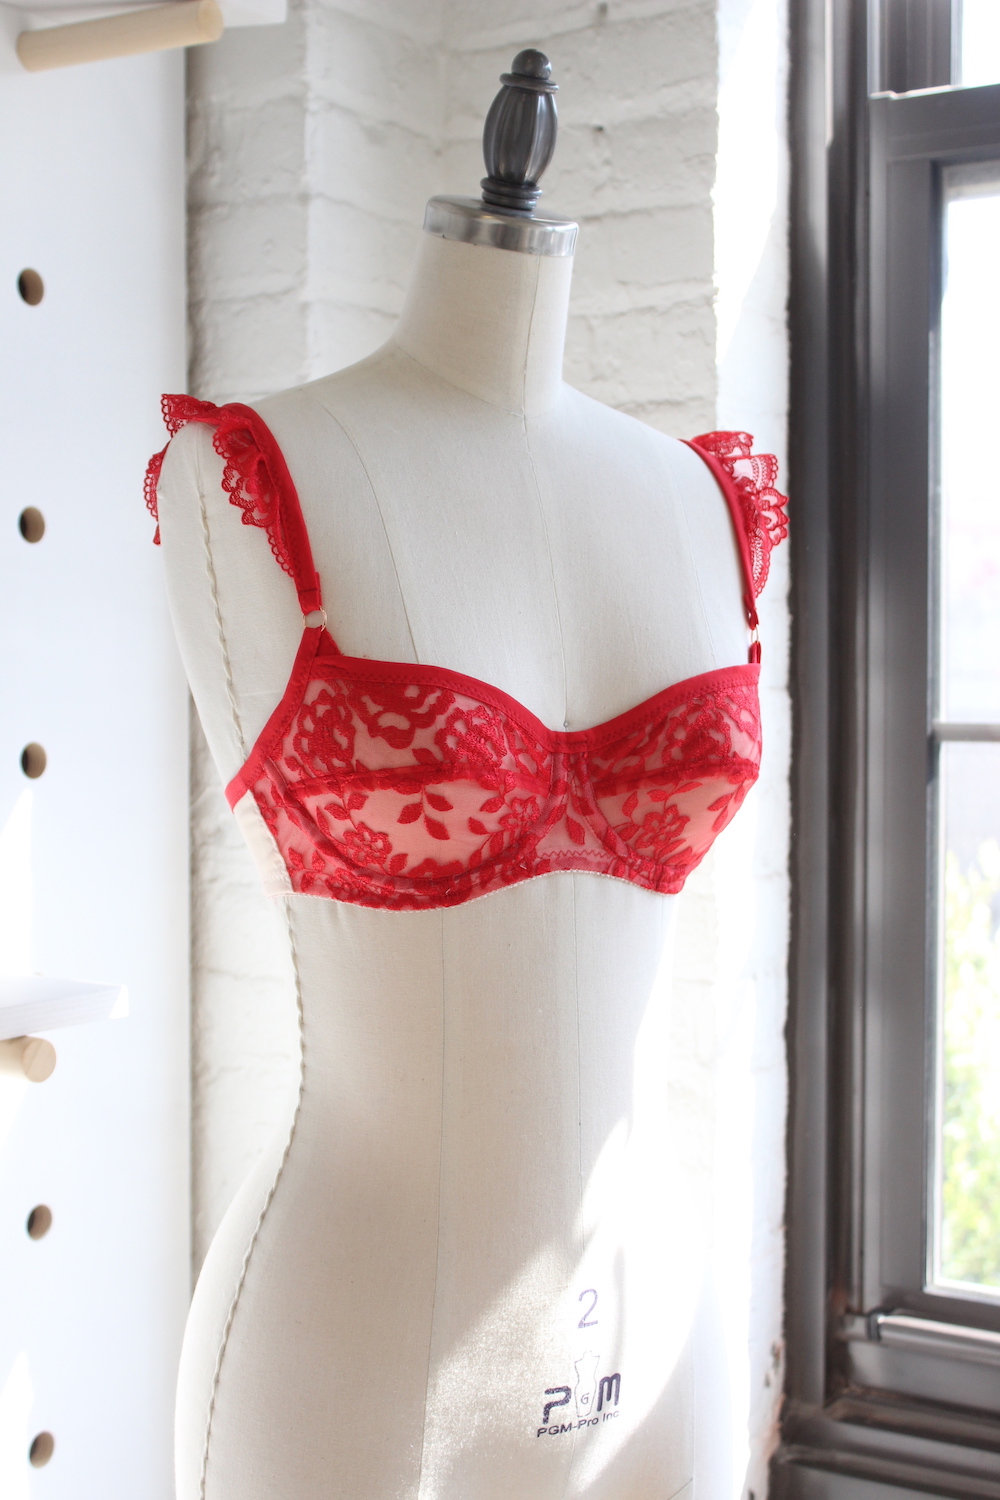
I have a quick make to share in today’s post. Lately, I’ve been using the Belgravia Bralette pattern a lot and it’s been fun coming up with small ways to tweak the pattern to get a different look and get more mileage out of the pattern.
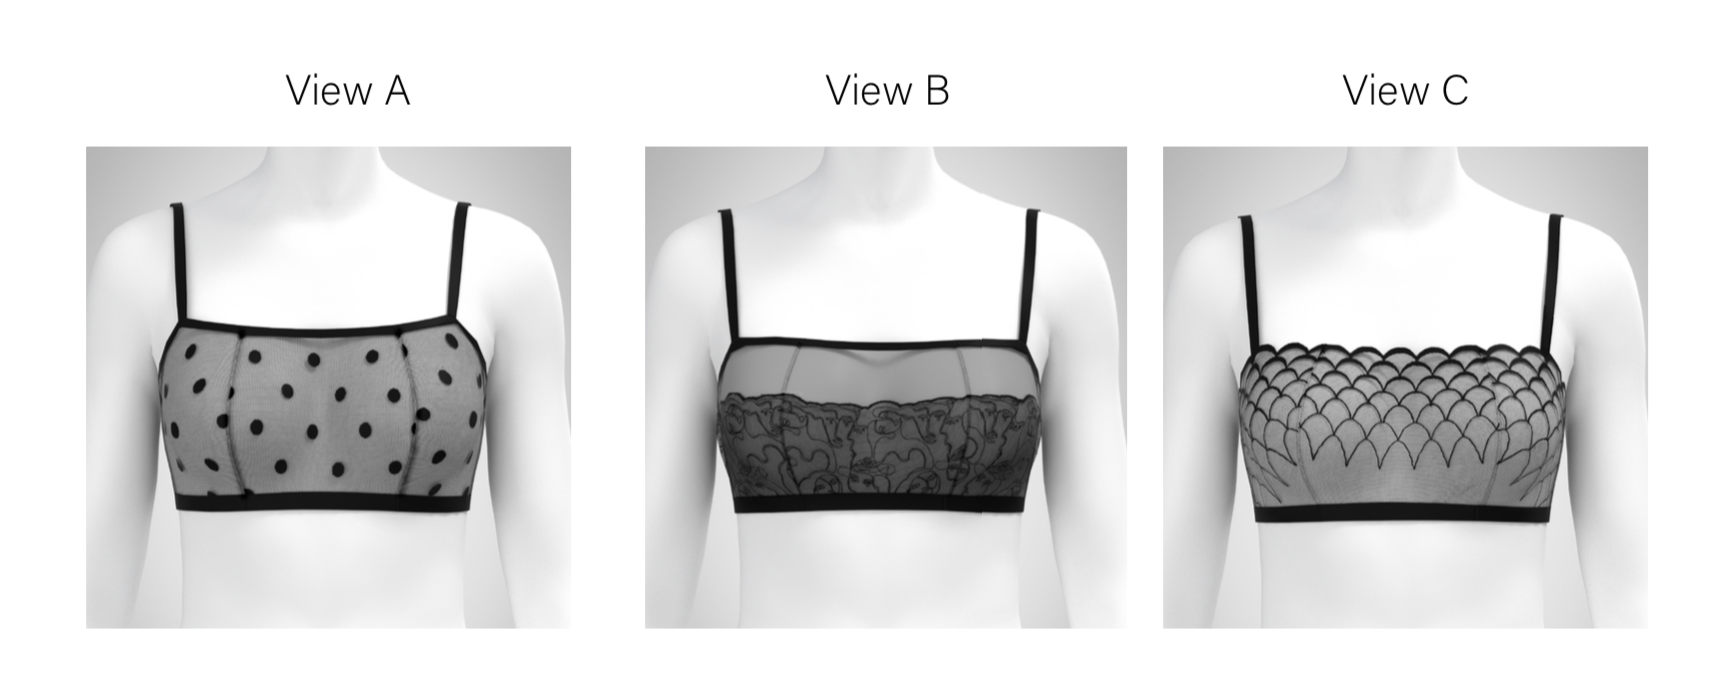
The Belgravia Bralette comes in three views:
- View A: Regular Neckline with foldover elastic along the upper edges of the bra
- View B: Straight Neckline with lace overlay and also uses foldever elastic for finishing the upper edges of the bra
- View C: Straight Neckline that utilizes the scallop edge of a lace or embroidered tulle and uses picot elastic for finishing the upper edges of the bra
Lace Strap Detail
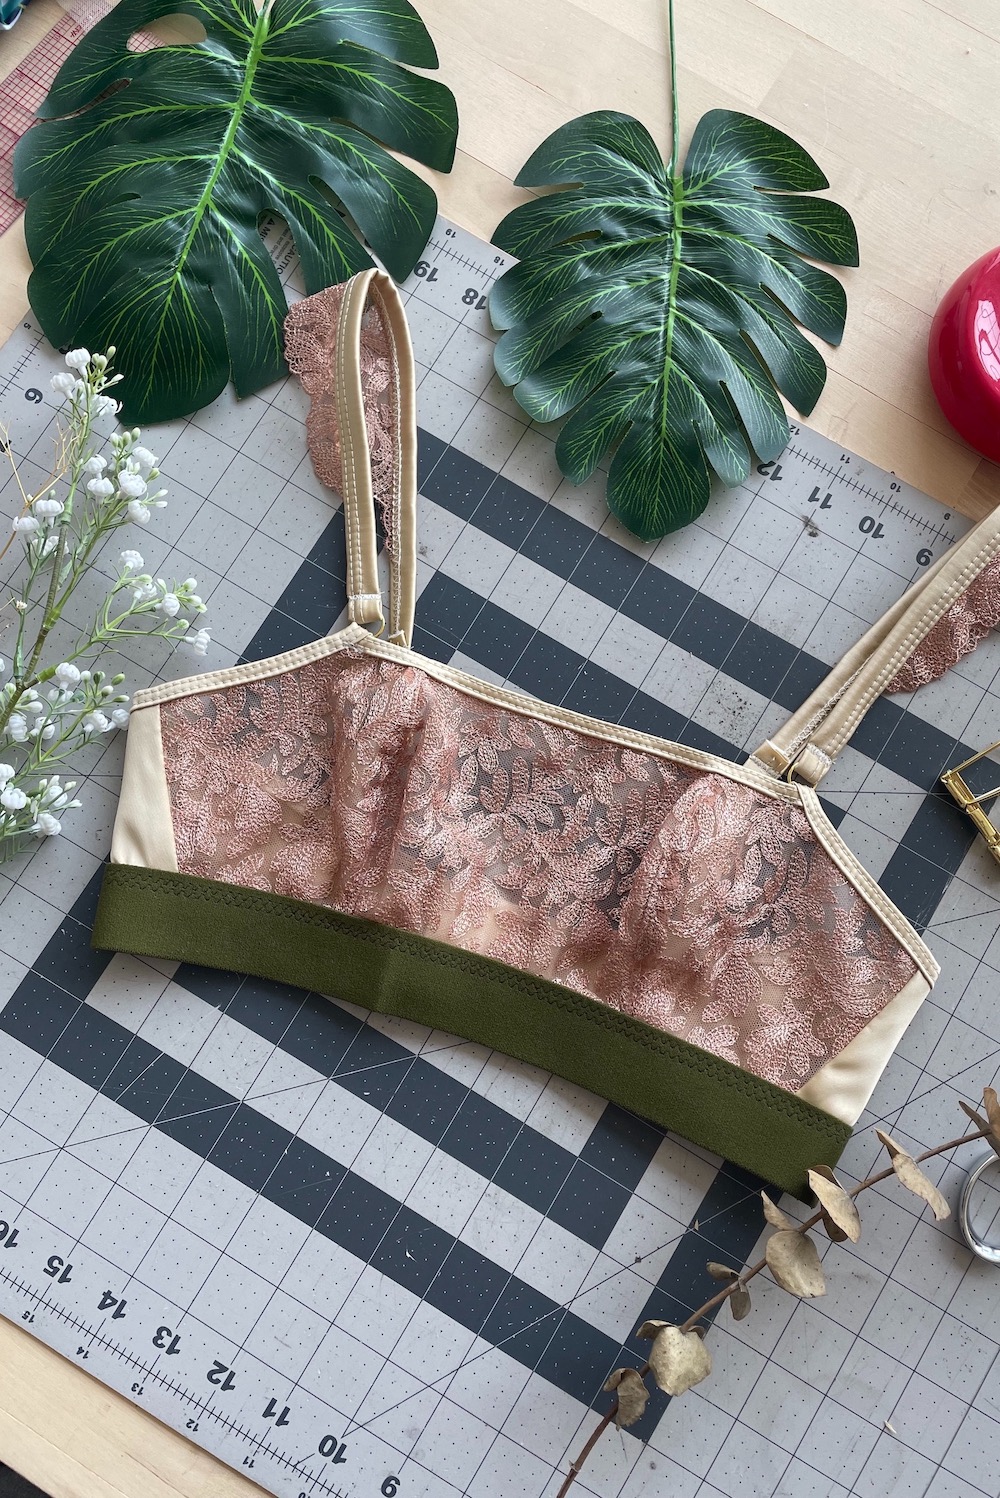
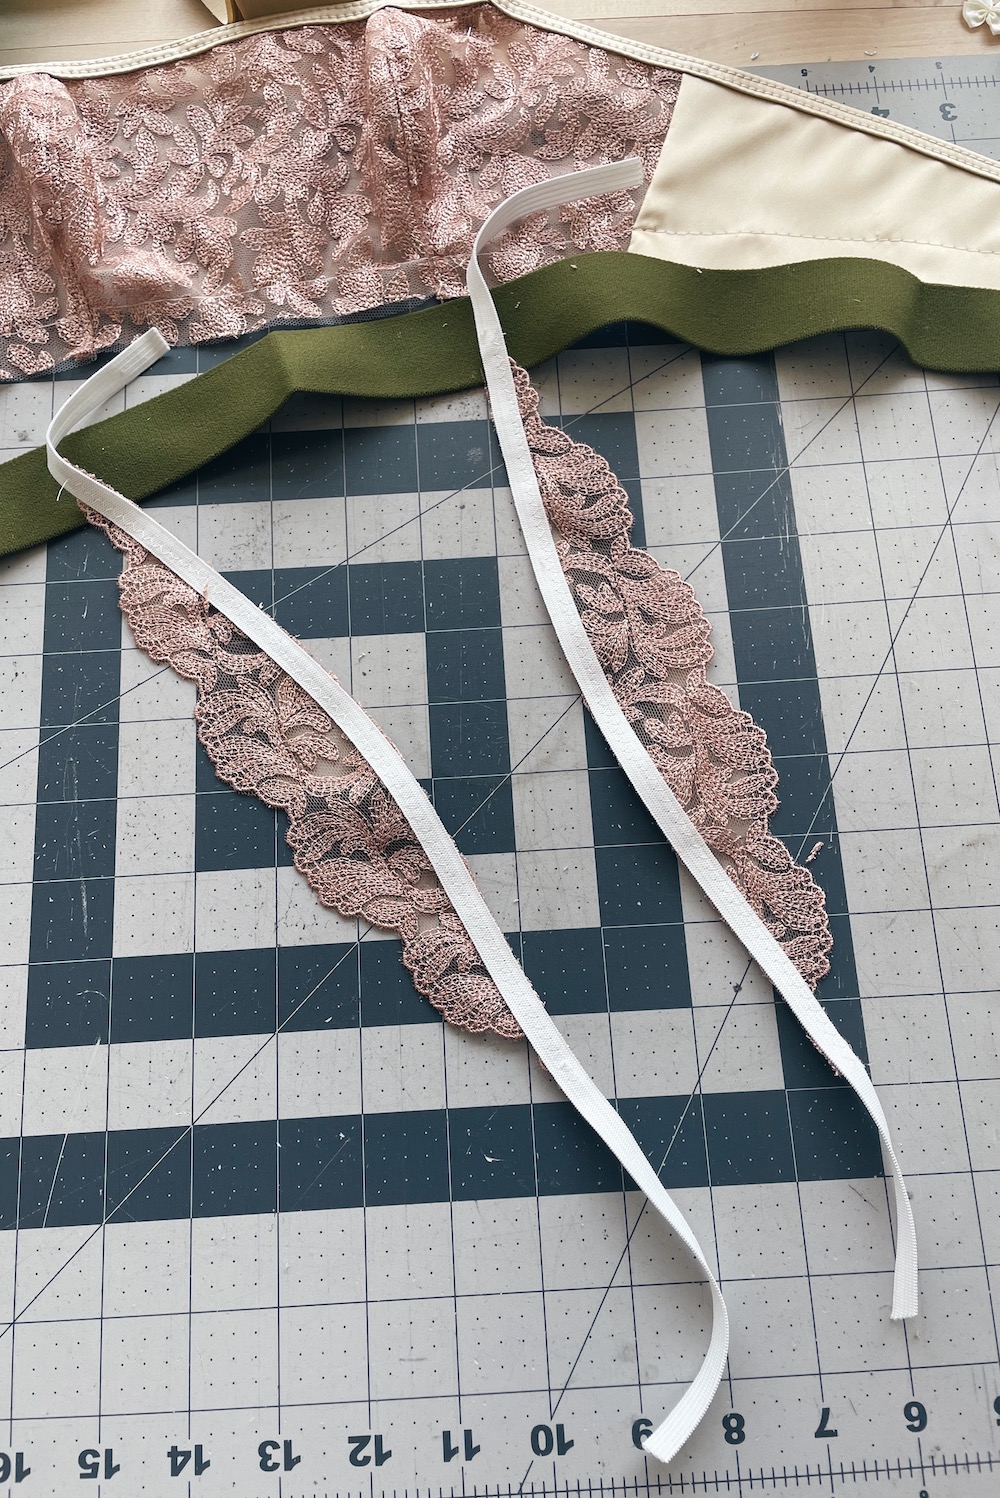
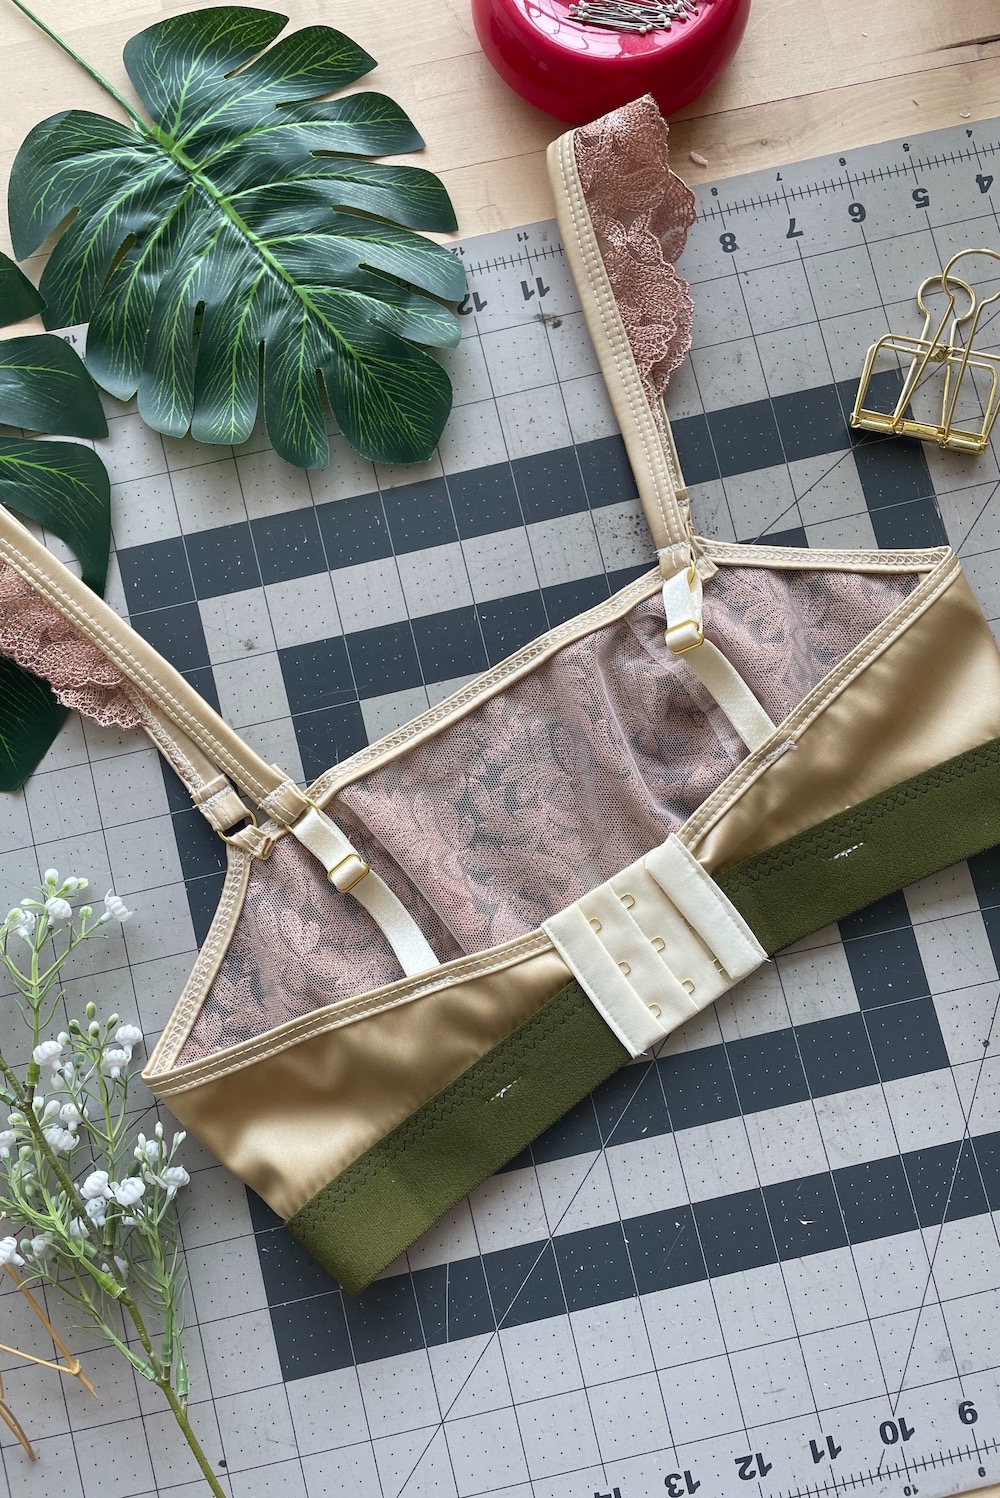
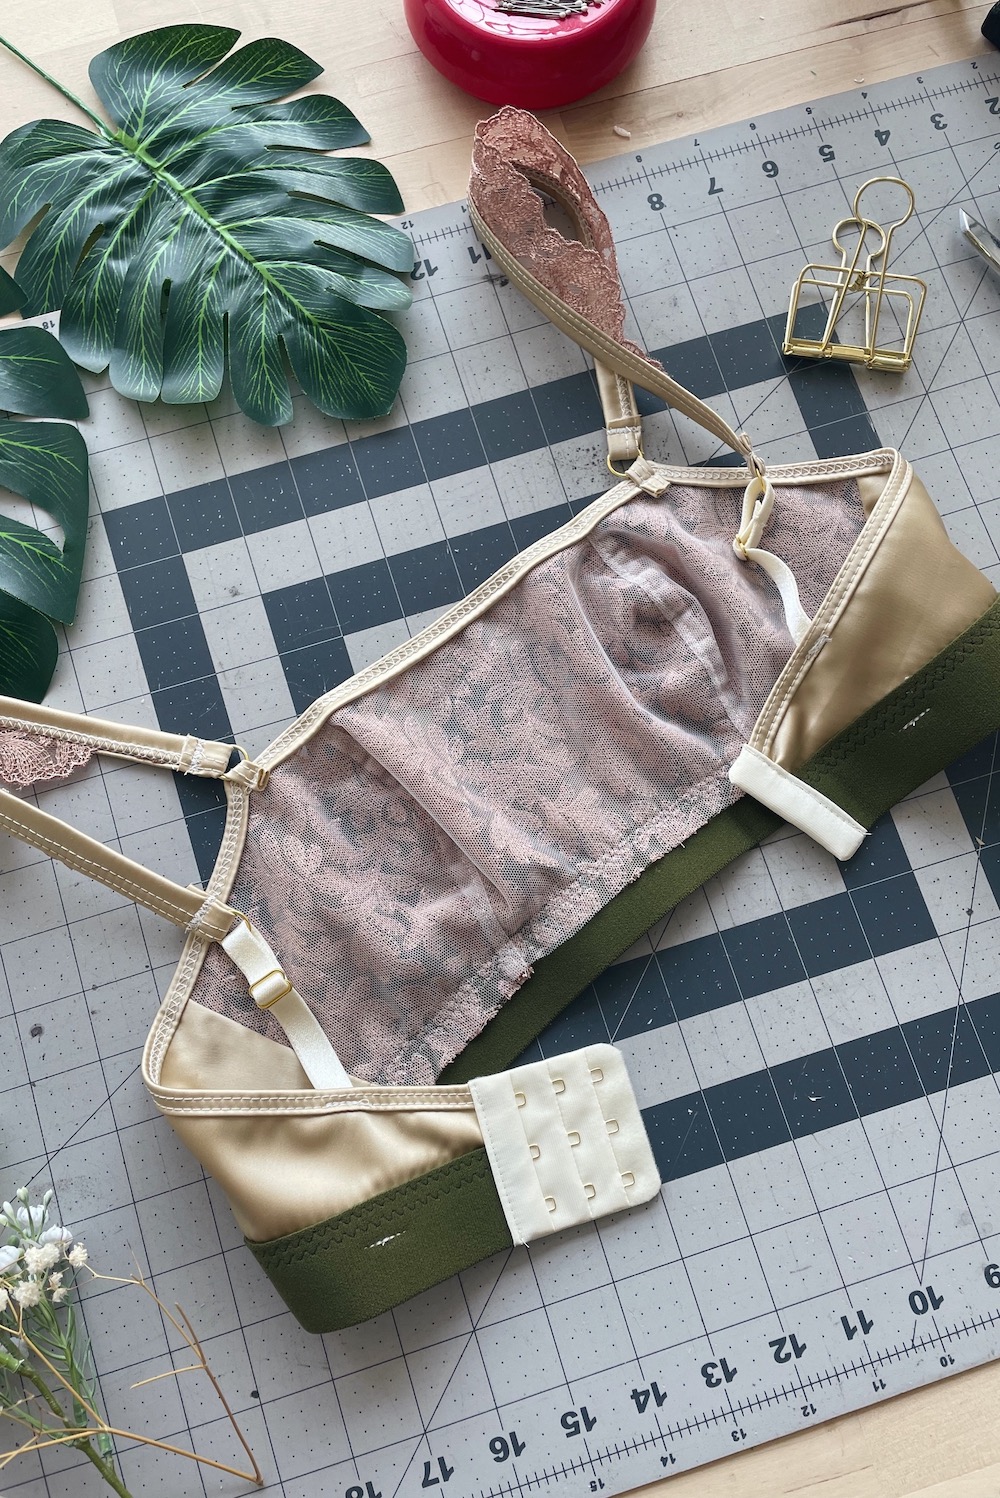
For this make, I chose view A so I wasn’t able to utilize the scallop edge of the embroidered tulle lace for the front and side cup pattern pieces. I decided to make use of the scallop edge by creating lace straps. You can see the shape I cut out to make the lace straps in the image below.
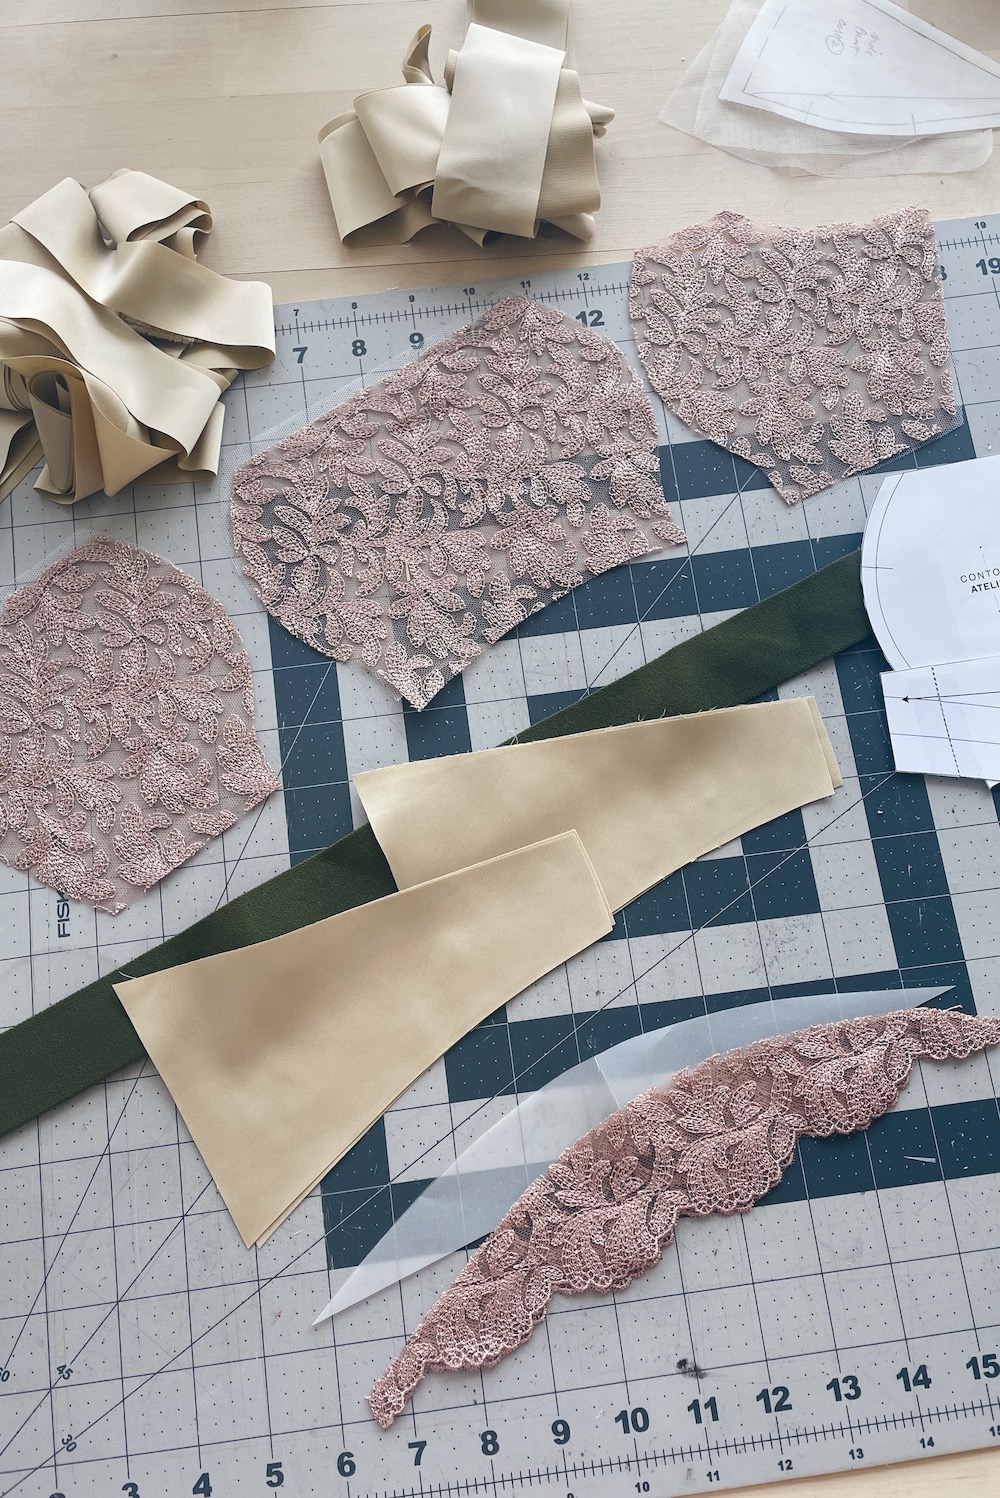
To create the lace straps, I applied 3/8″ flat elastic to the non-scallop edge of the lace pattern piece. I lined the flat elastic up with raw edge and stitched using a zigzag stitch.
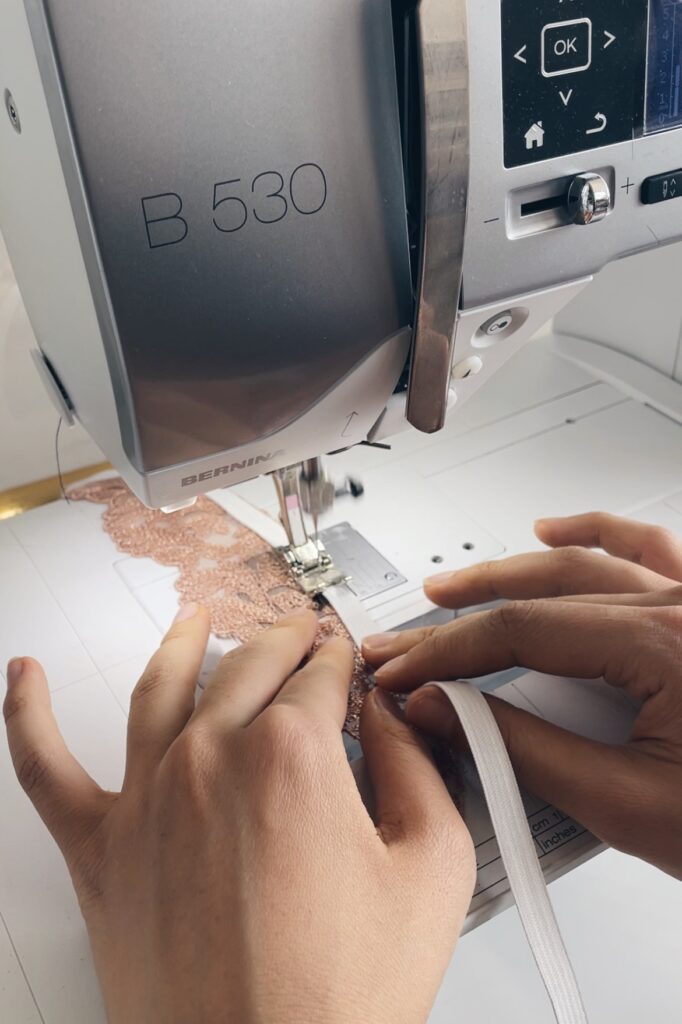
Applying flat elastic with a zigzag stitch. 
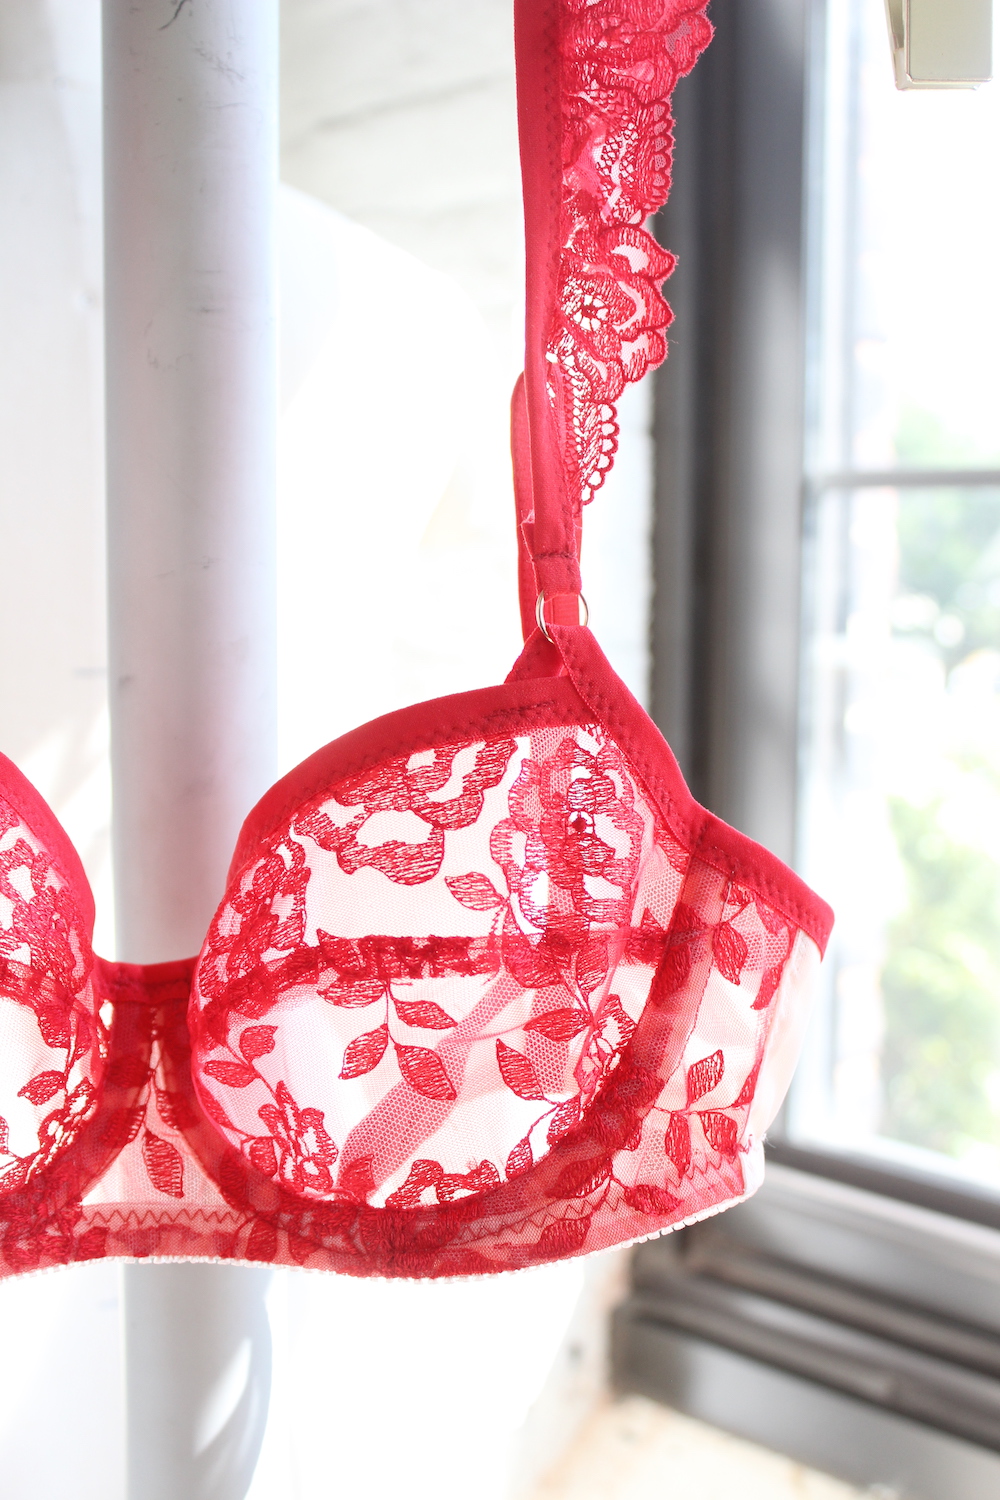
This is how the straps look after the flat elastic has been applied.

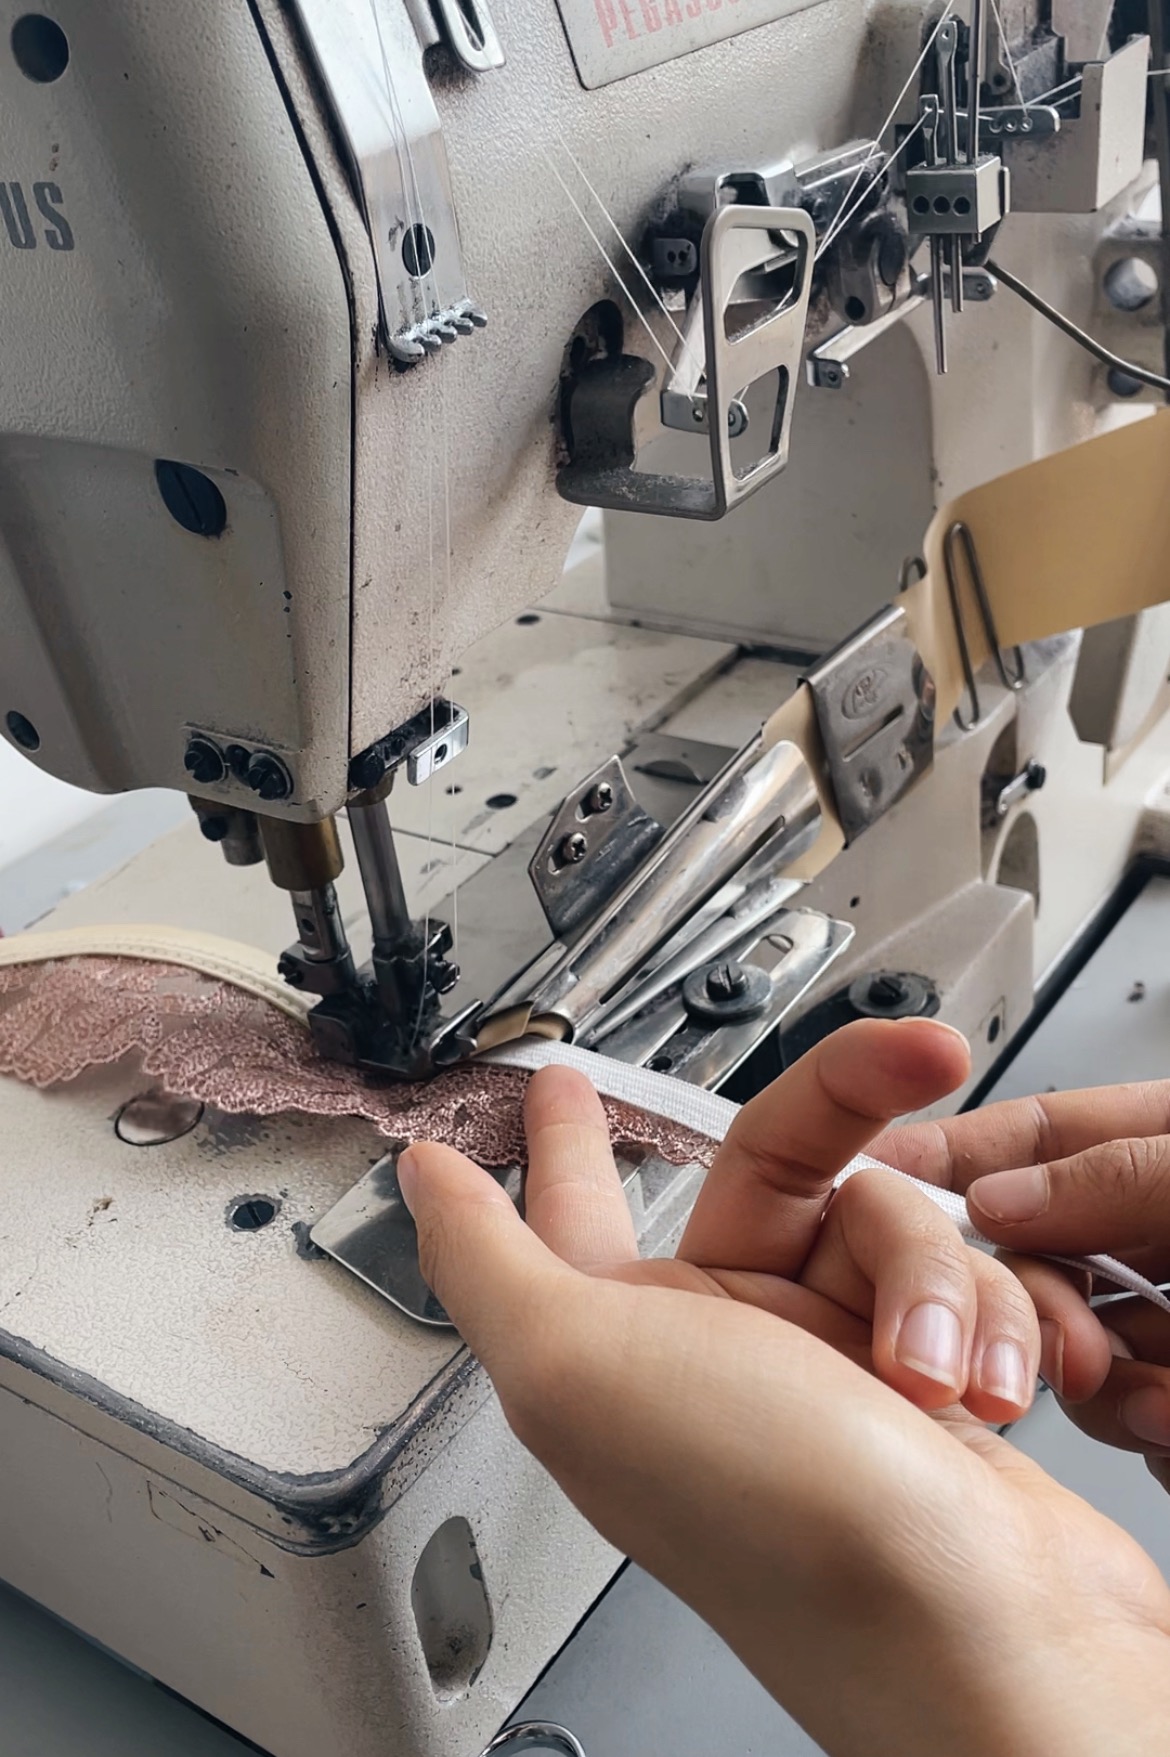
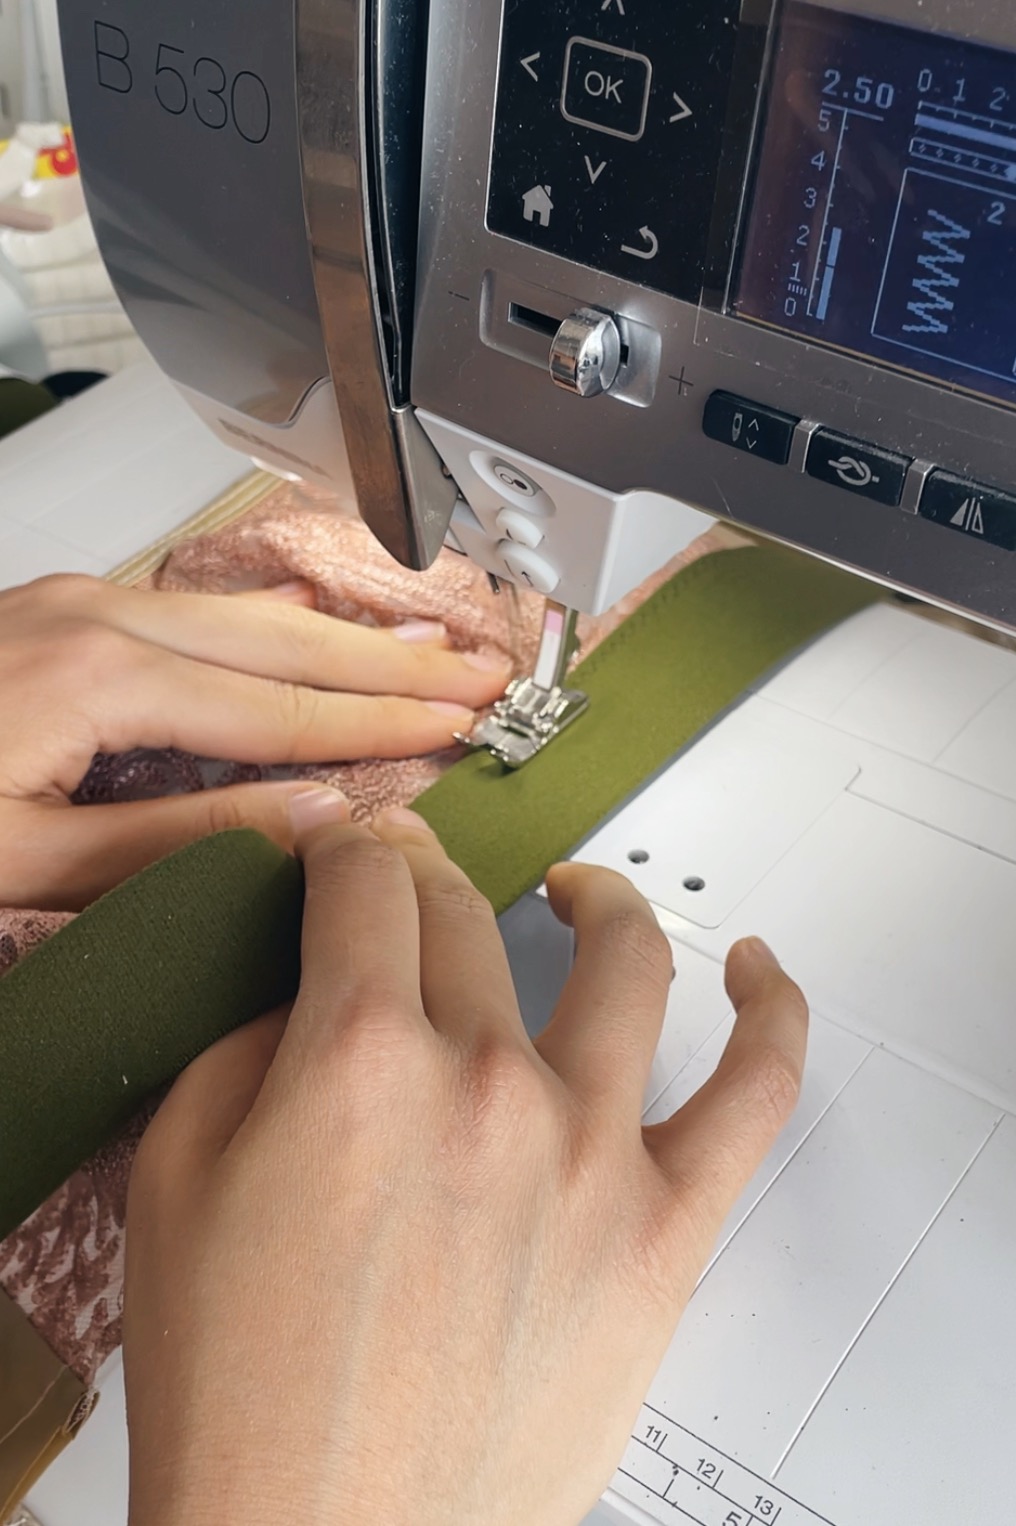
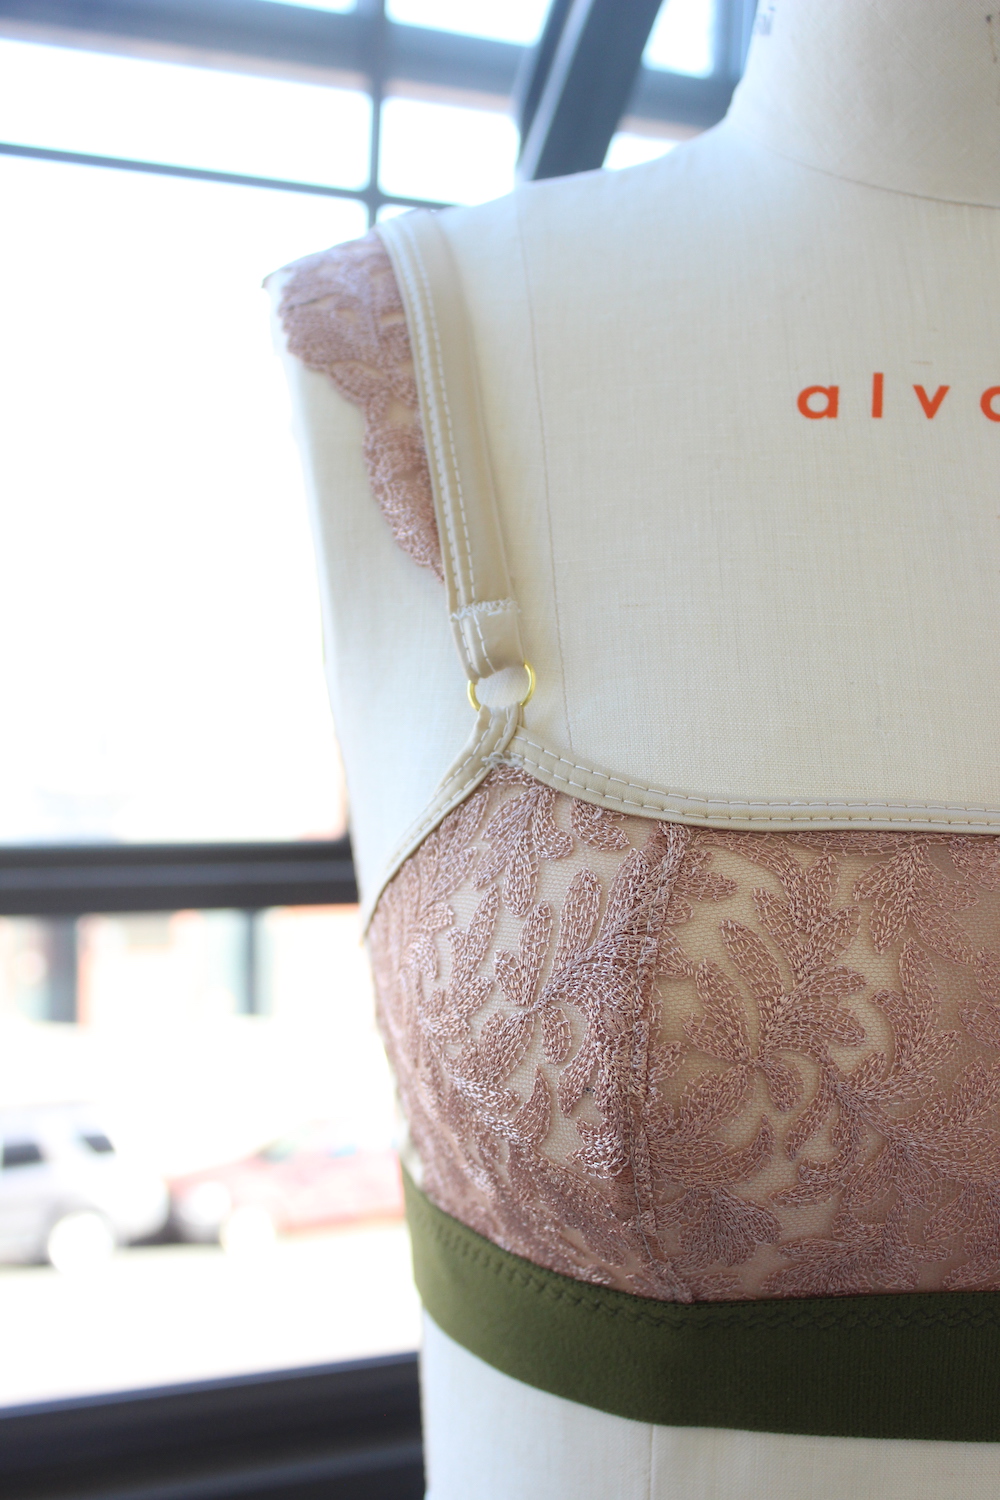
I then took the straps over to my industrial coverstitch machine and encased the flat elastic and the raw edge of the lace using a double fold binder that yields 1/2″ binding. My binding material of choice is stretch satin binding, which I’ve created by cutting binding strips from stretch satin fabric. The binding is cut in the crossgrain direction–this also happens to be the direction of the greatest stretch for the stretch satin.
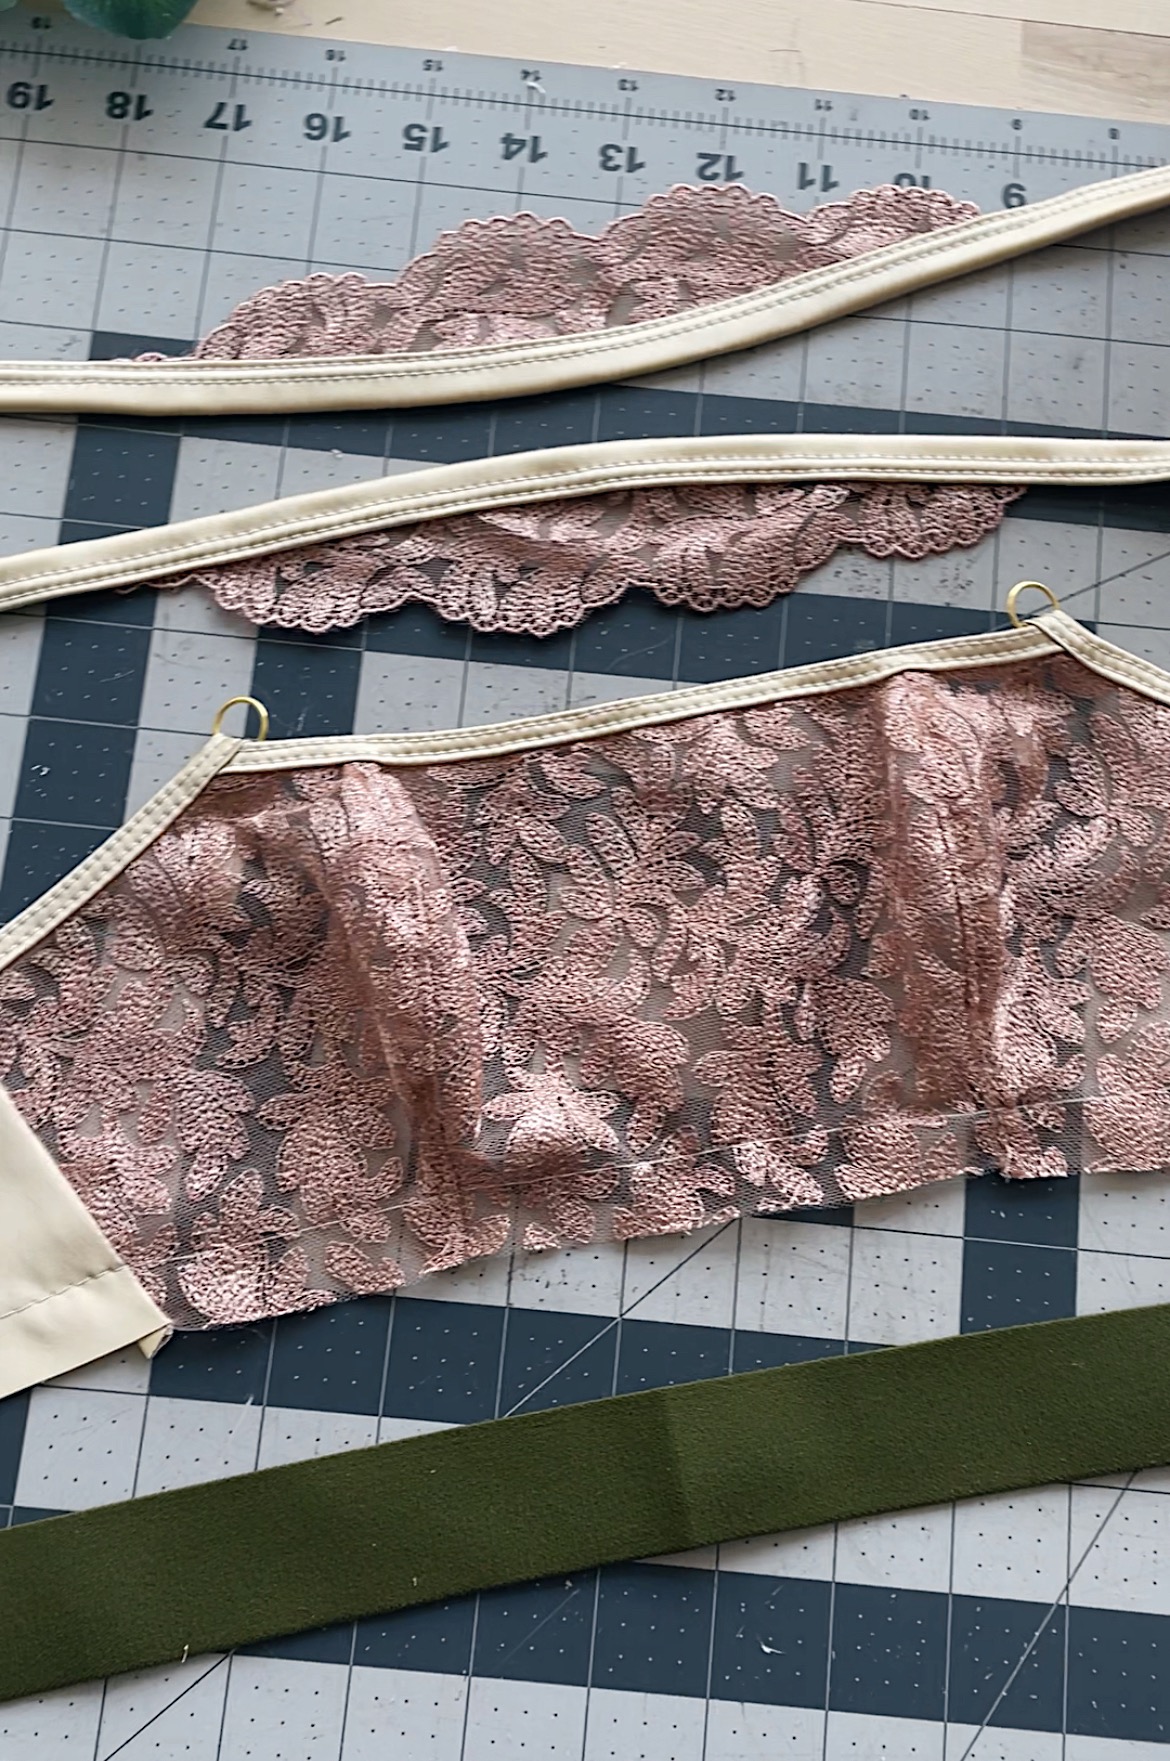
And voila! You end up with lace straps that add a fun detail to your bra project.
You can also recreate these lace straps using flat elastic or twill tape and foldover elastic. For example, if you are using a 3/4″ foldover elastic (which becomes a 3/8″ elastic once you fold over and stitch it close), I recommend using 1/4″ twill tape or 1/4″ flat elastic.
I find that when you are encasing flat elastic or twill tape with binding or fold over elastic, the sweet spot is to use a filler material that is about 1/4″ narrower than the finished width of the binding or fold over elastic.
Here’s an example of lace straps created using twill tape and foldover elastic:

Black Beauty Bra in View B with Ruffle Lace Straps 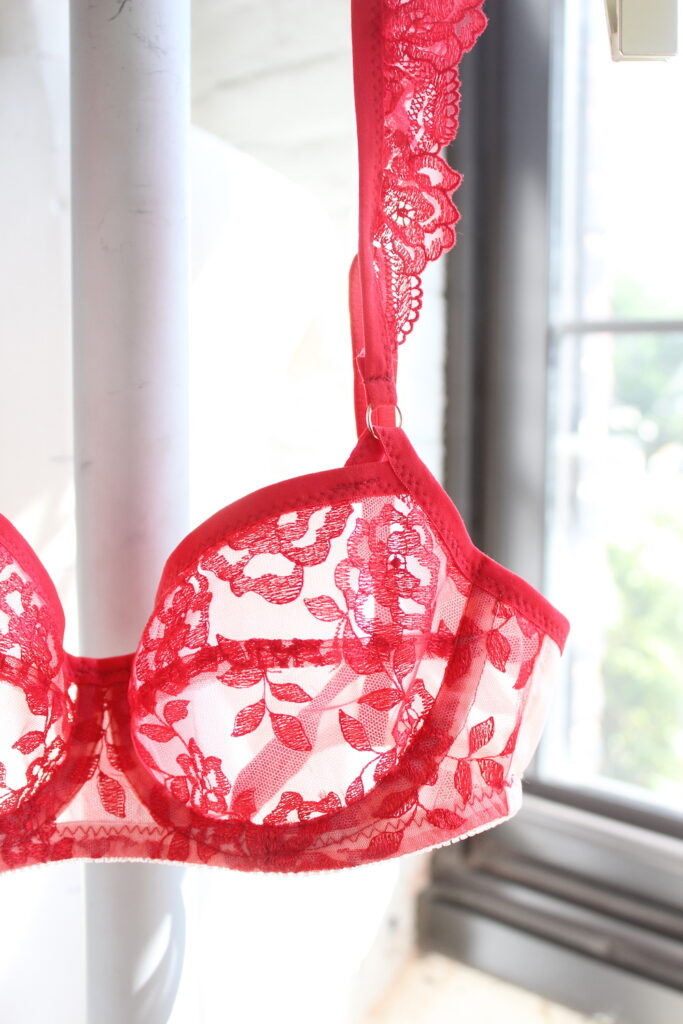
Close up shot of the bra.
I made this Black Beauty Bra in View B sans power bar with ruffle straps and the raw edge of these lace straps were finished with 3/4″ Foldover Elastic and 1/4″ twill tape filling. I actually gathered the raw edge of the lace in this instance, so you end up ruffle straps.
Wide Band Elastic
Another change I made to the pattern is to use wide band elastic instead of 5/8″ picot plush elastic as called for by the pattern designer. I’ve seen other makers incorporate wide band elastic in their Belgravia Bralette projects and I’ve been inspired to do the same! I chose the Willow Wide Band Elastic to work with the earth tone palette that I have going on.
To apply the Wide Band Elastic, I simply overlapped the elastic by 5/8″ on the bottom edge of the bra (since the original elastic allowance is 5/8″). I also ended up using a 3-row hook and eye to accommodate the taller back band that resulted from using the wide band elastic.
The lace strap detail and the wide band elastic are two minor changes, but it results in a bralette with a different look! What do you guys think? Have you tried either with your bra projects?
Pattern Used: Belgravia Bralette by Contour Atelier