
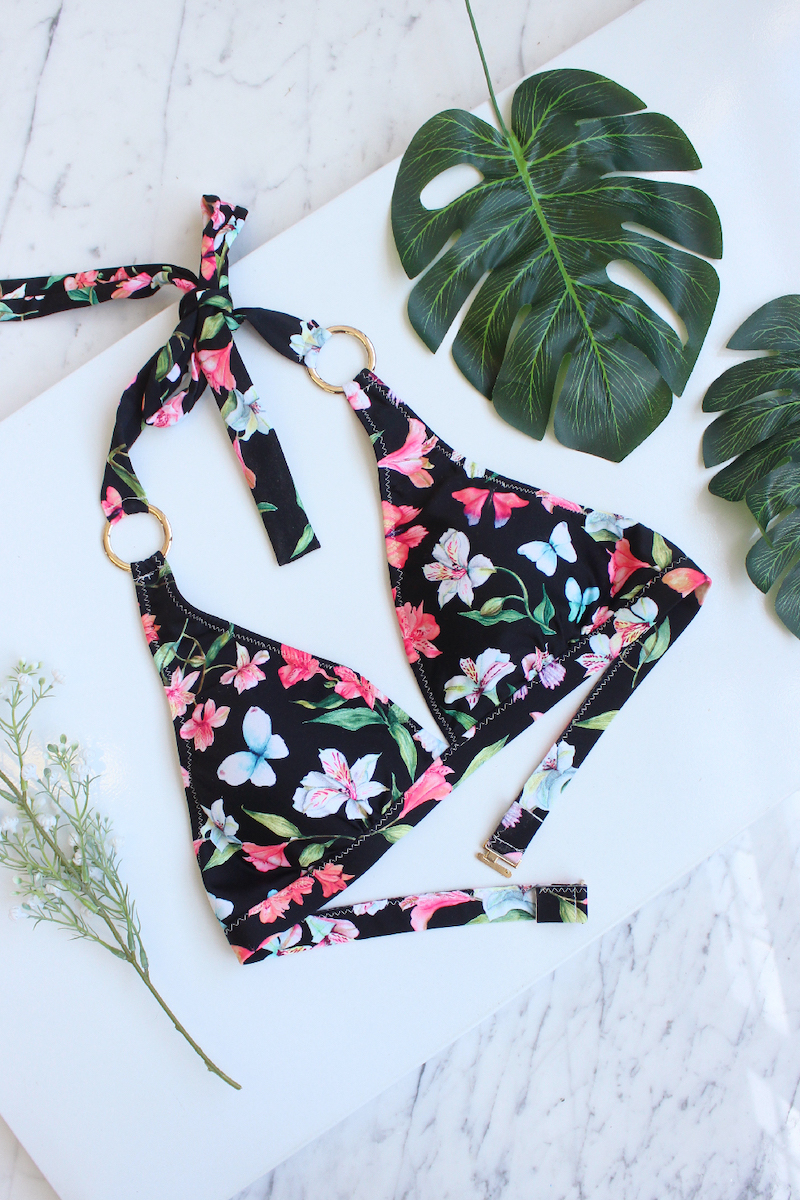
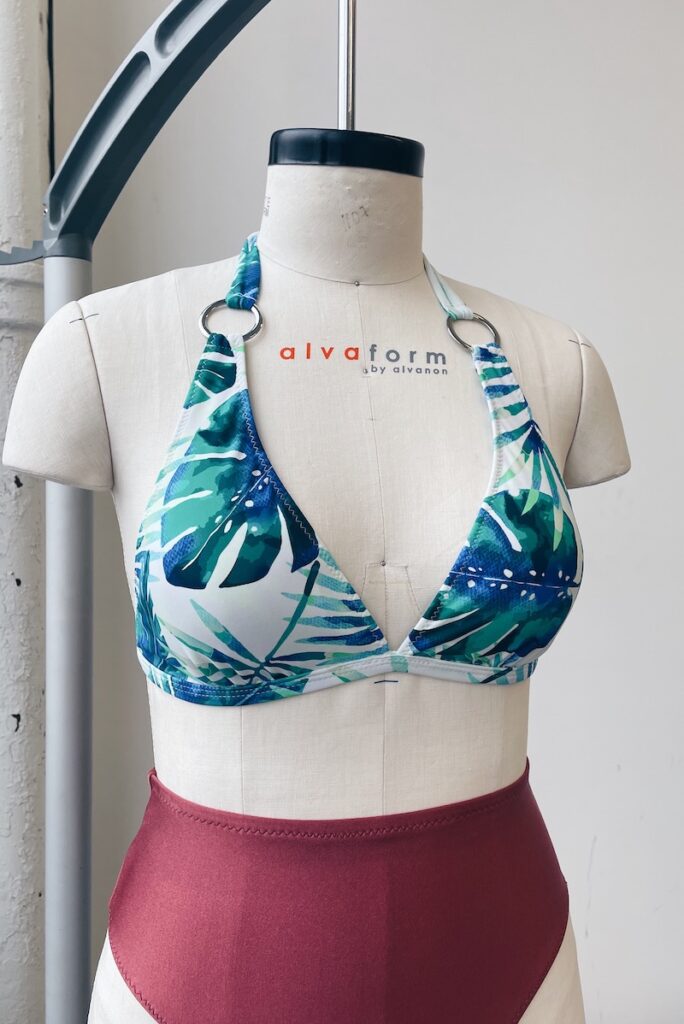
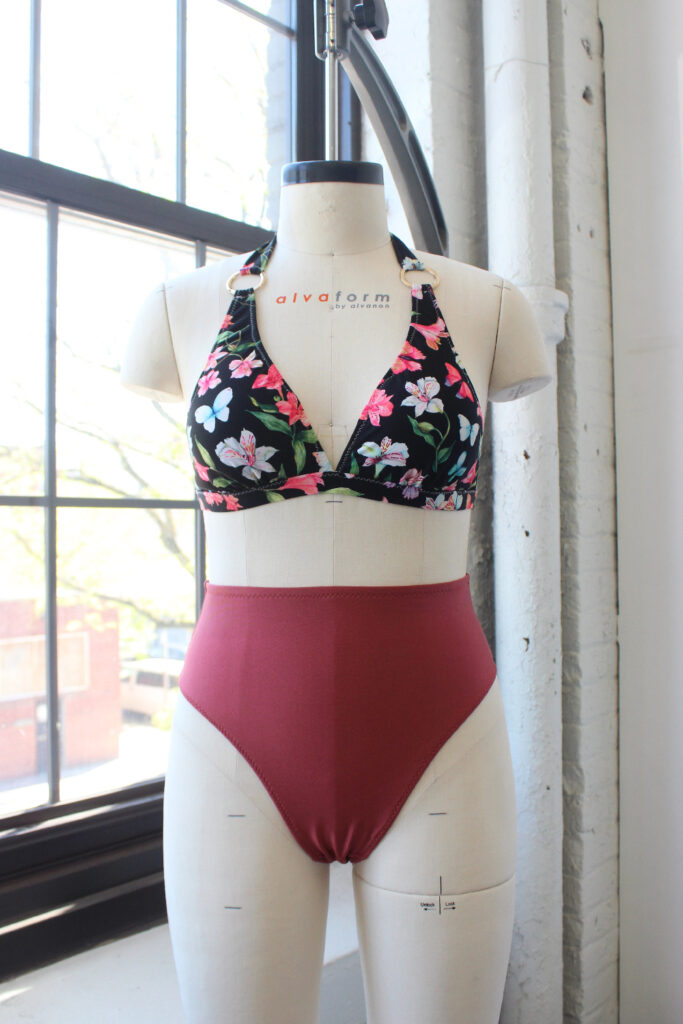
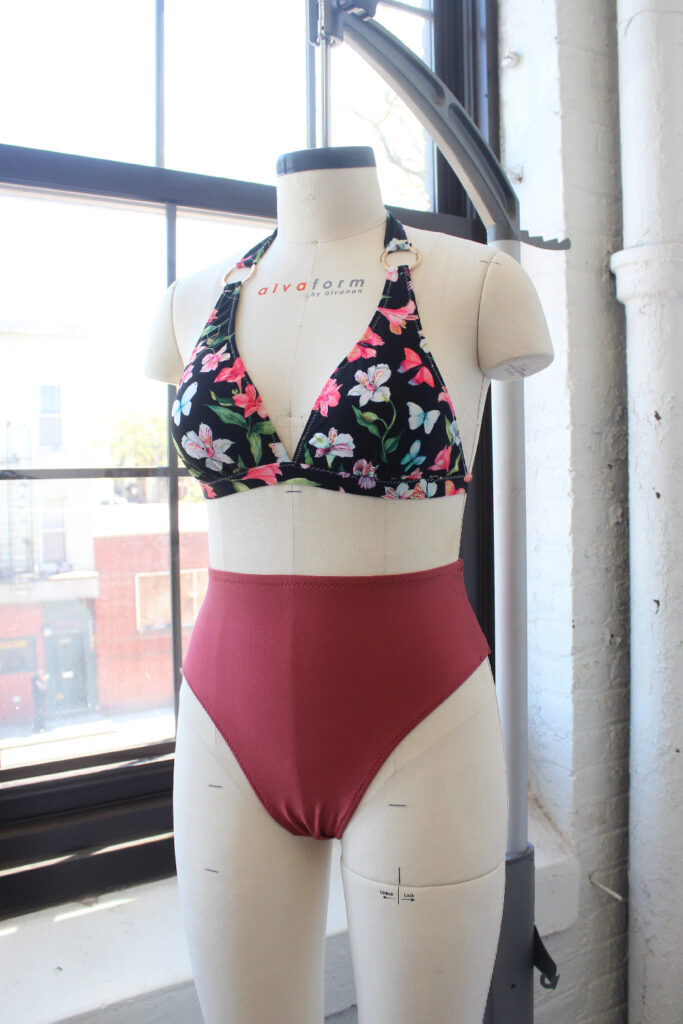
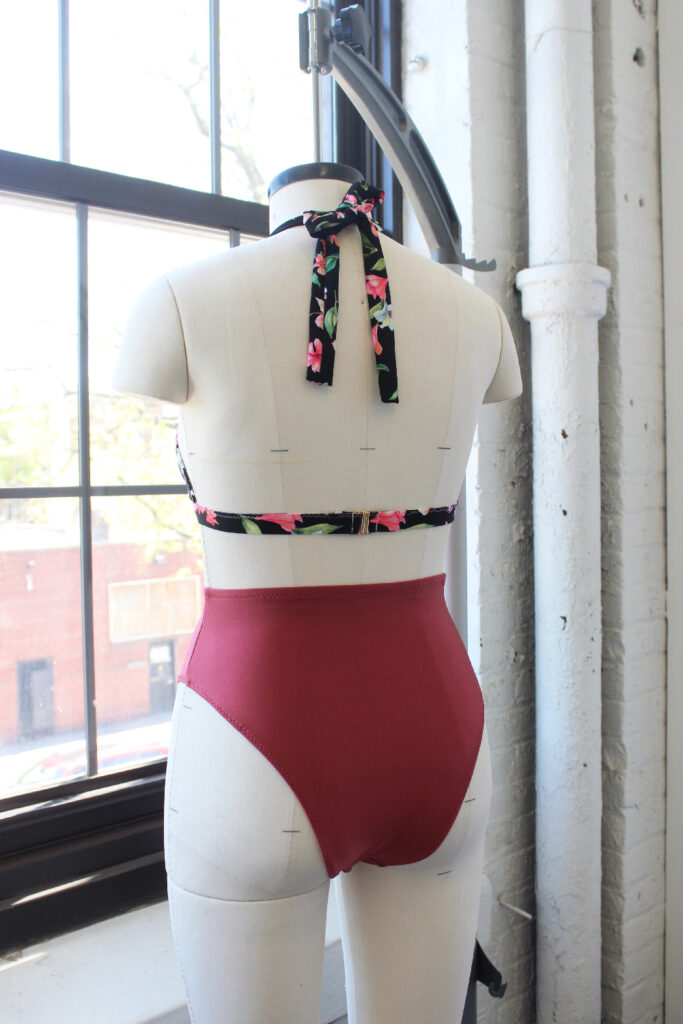
Butterfly Floral Garden Marilyn Bikini Top with Metal Rings
This post contains affiliate links.
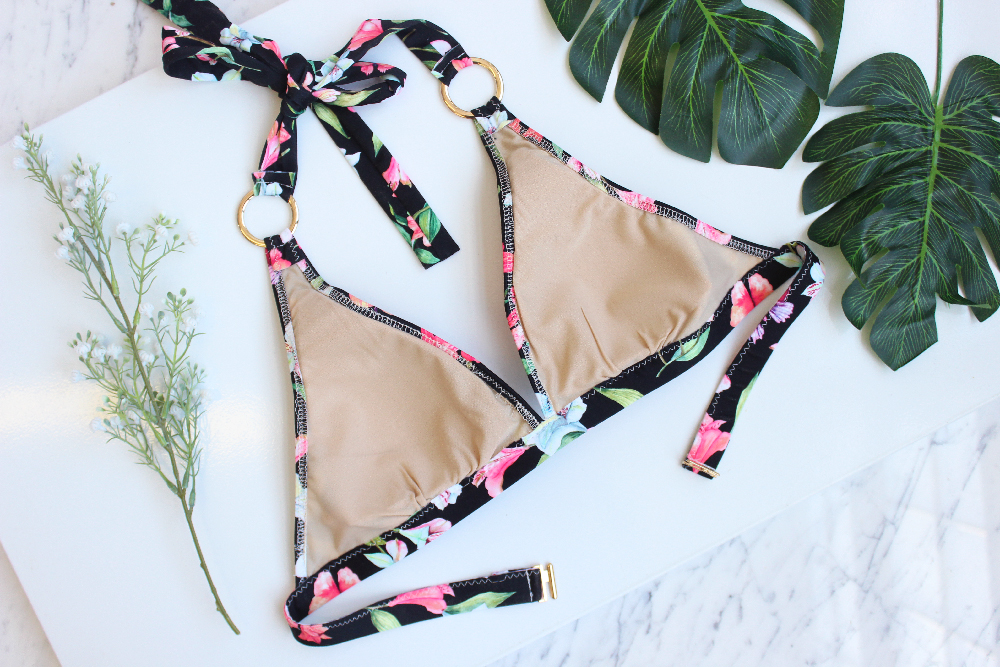
Hi guys! Today I am sharing this Butterfly Floral Garden Print Marilyn Bombshell Bikini Top by Wardrobe by Me. In this post, I will share the process of sewing up this bikini top pattern (I deviated from the pattern instructions here and there) and how I incorporated the swim rings into this swim project.
I’ve made a couple of iterations of this pattern because I LOVE the plunging neckline. The tall triangle shape design is also very flattering on my broad frame.
Let’s get started!
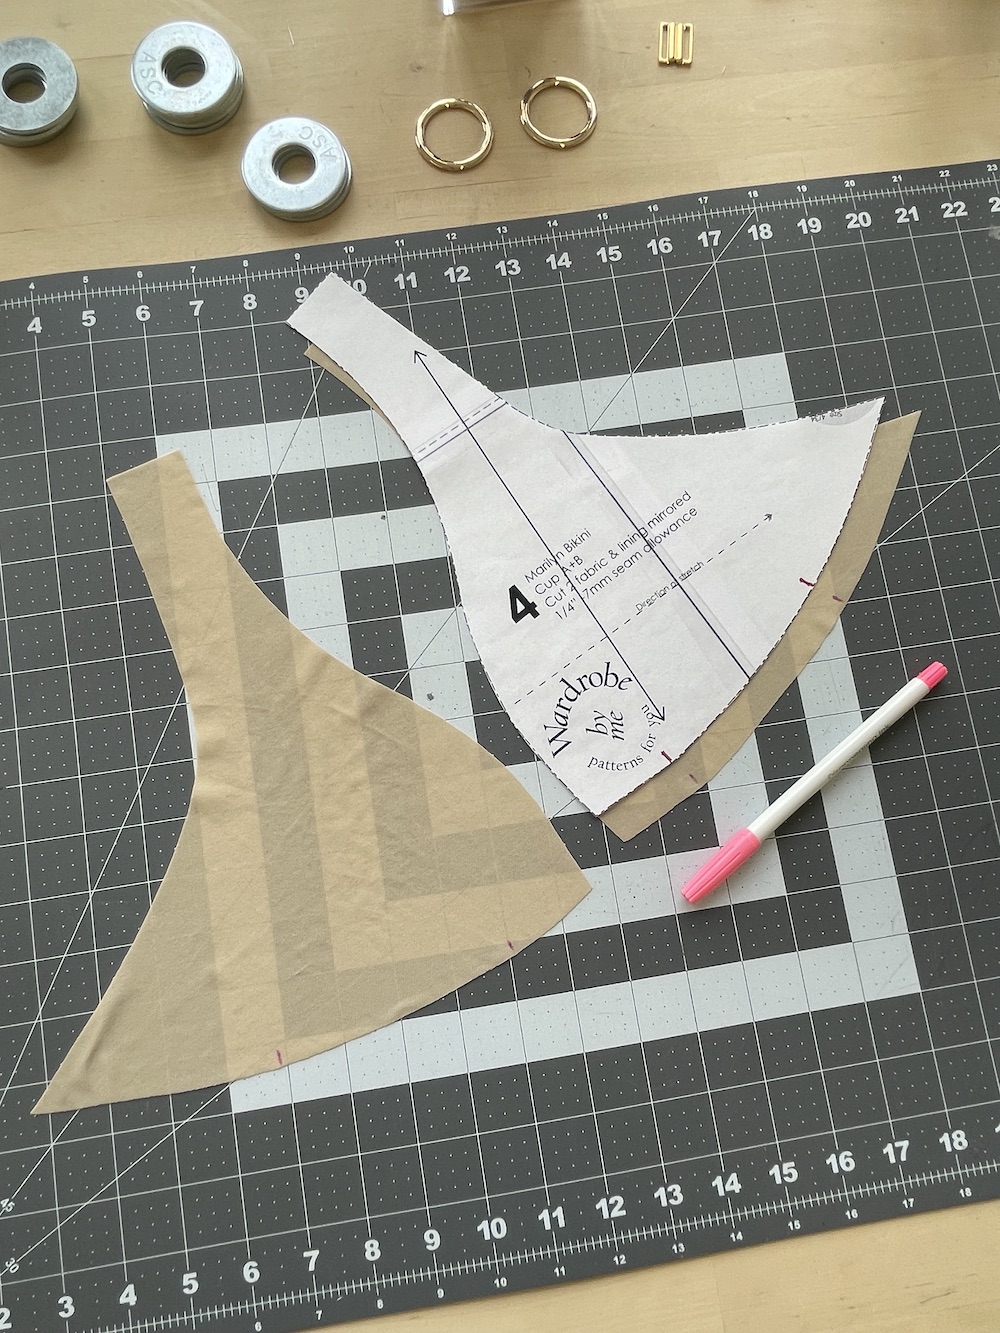
Cutting
For this project, I am using the following materials:
- Butterfly Floral Garden Printed Swim Fabric for the Self
- Beige Nylon Swimwear Lining Fabric
- Pair of preformed/premoulded foam cups (from my personal stash)
- 1/4″ Rubber Swim Elastic
- 3/4″ Rubber Swim Elastic
- 40mm Gold Swimwear Rings
- 3/4″ Bikini Clasp Closure (from Small Bobbins–now sold out)
Most of the fabrics, elastics, and hardware are from Tailor Made Shop. (Note: some fabrics may be sold out now.)
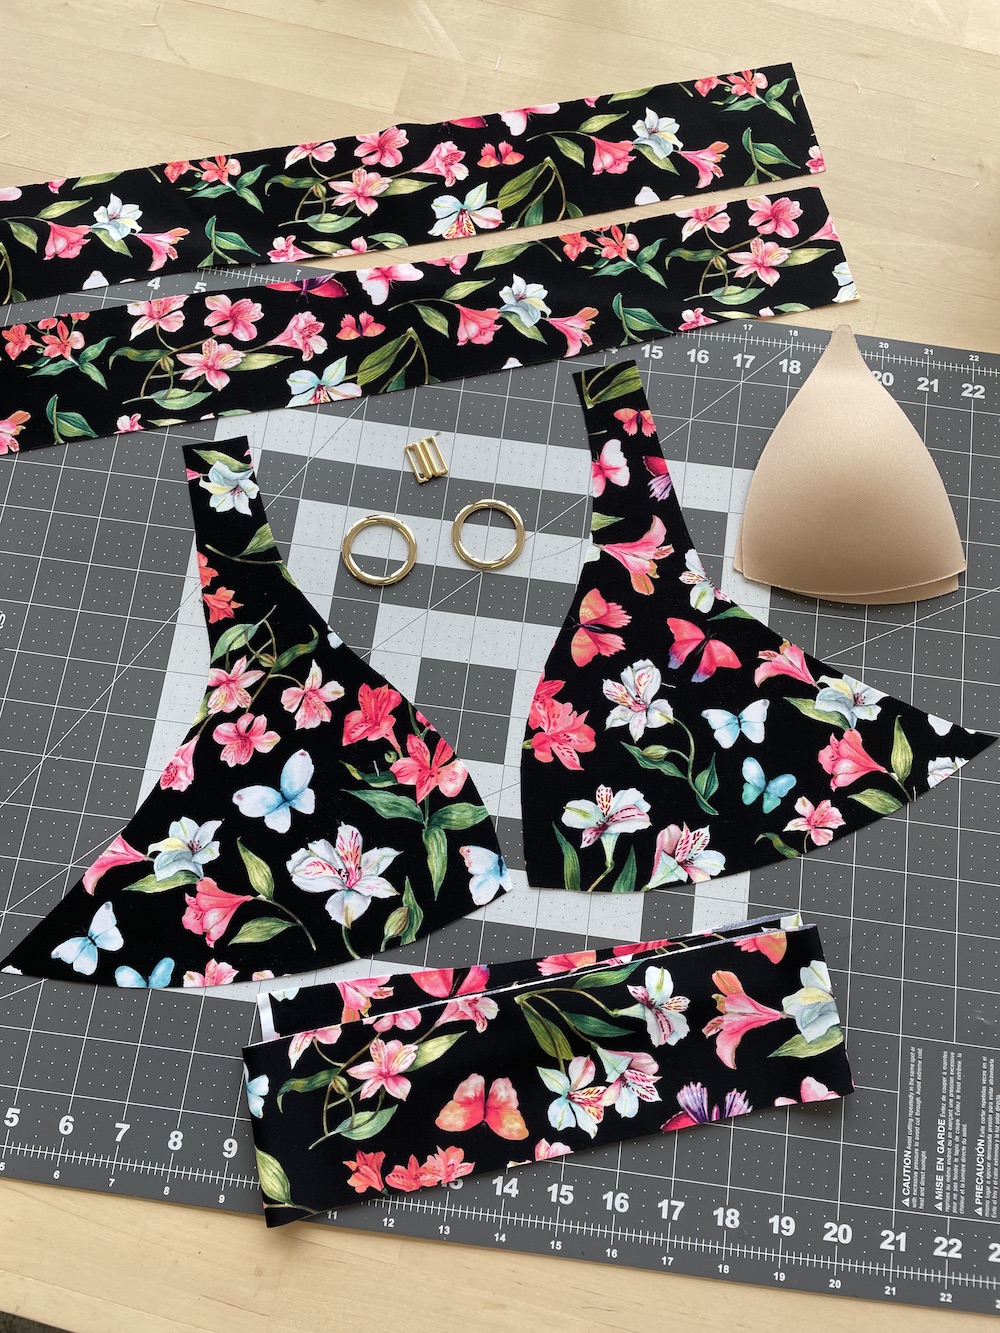
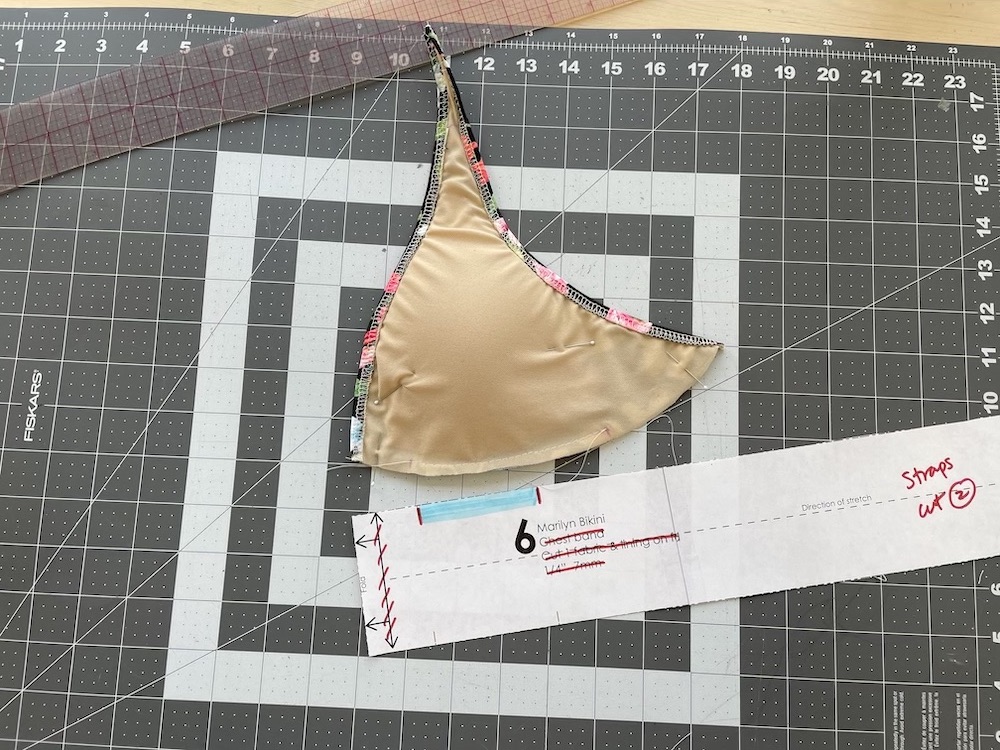
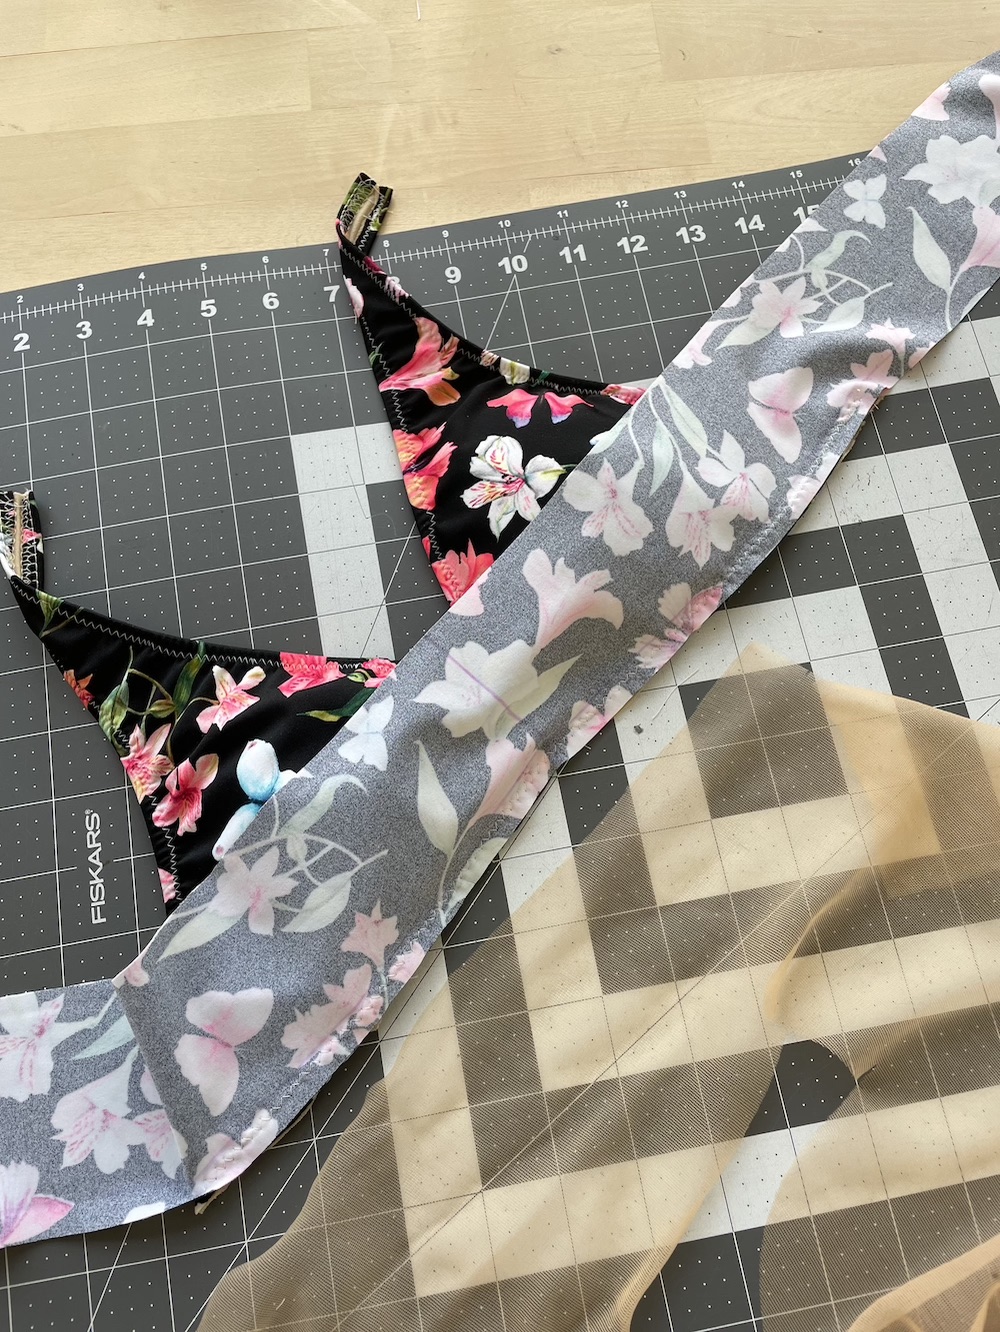
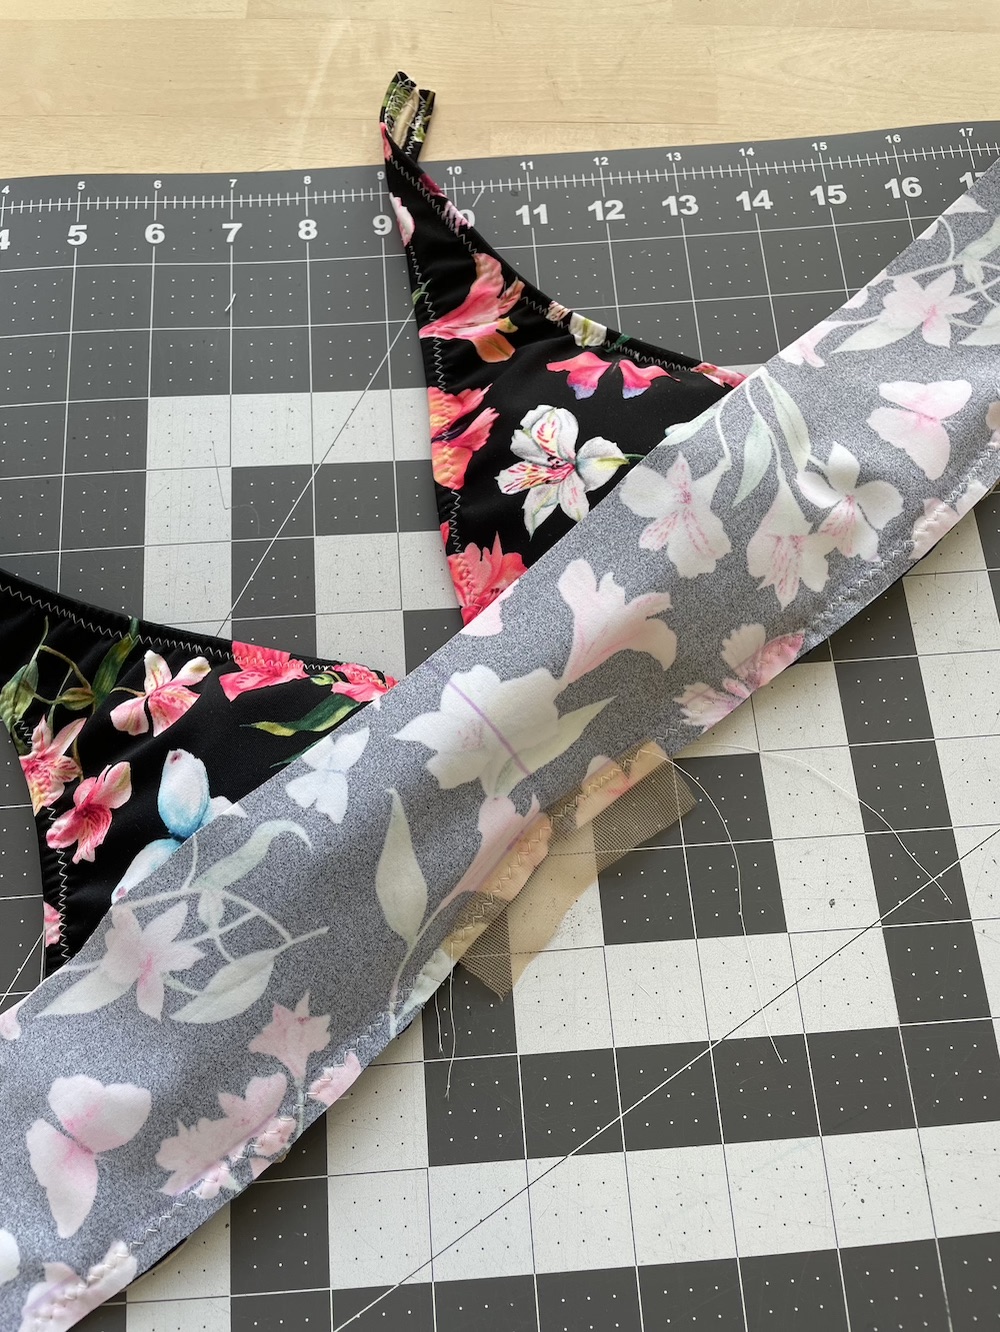
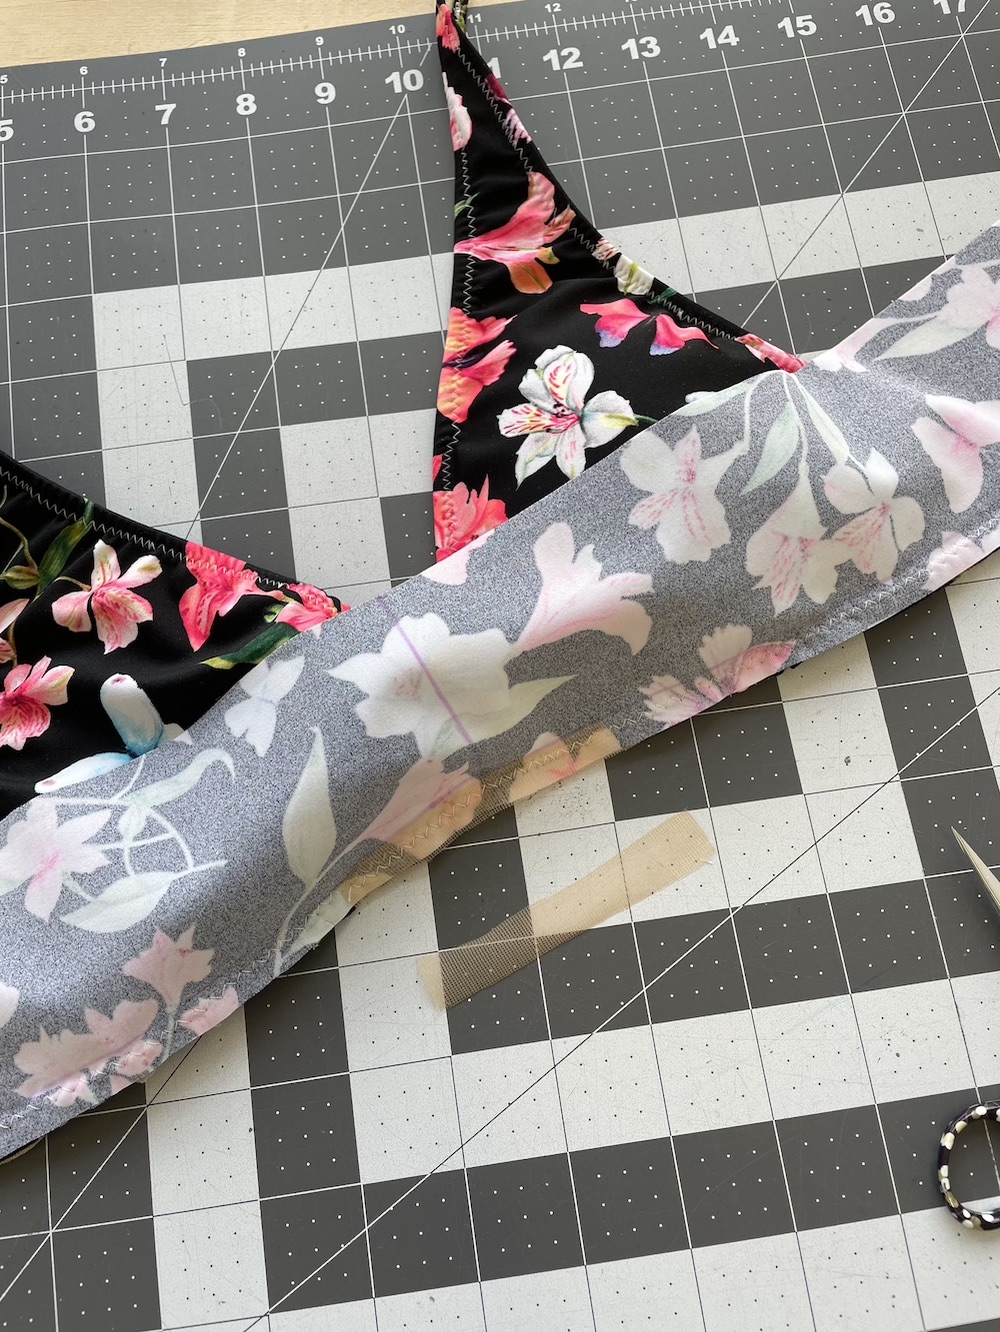
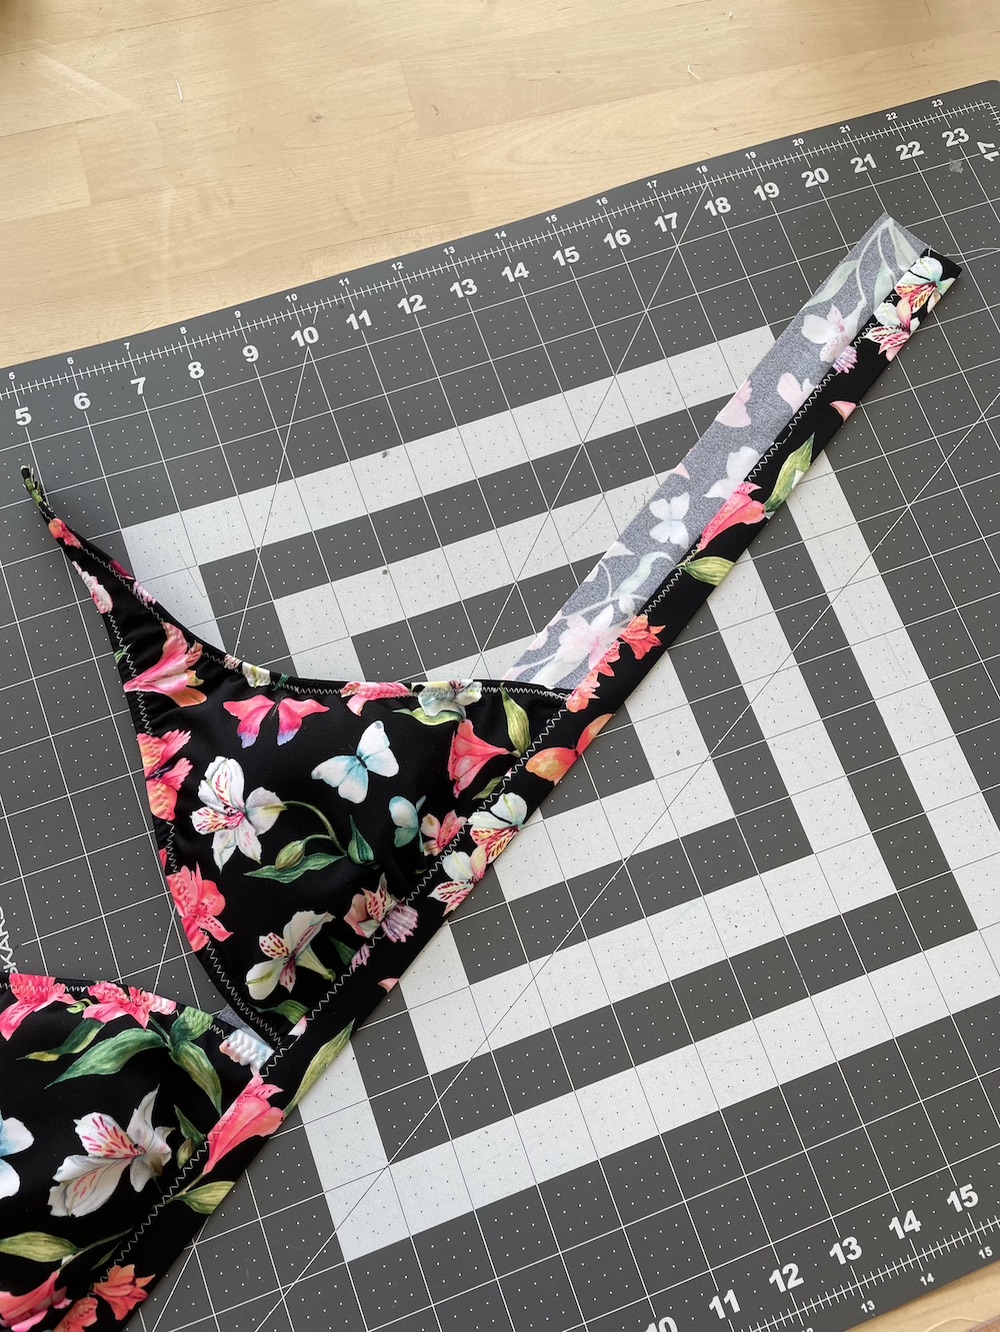
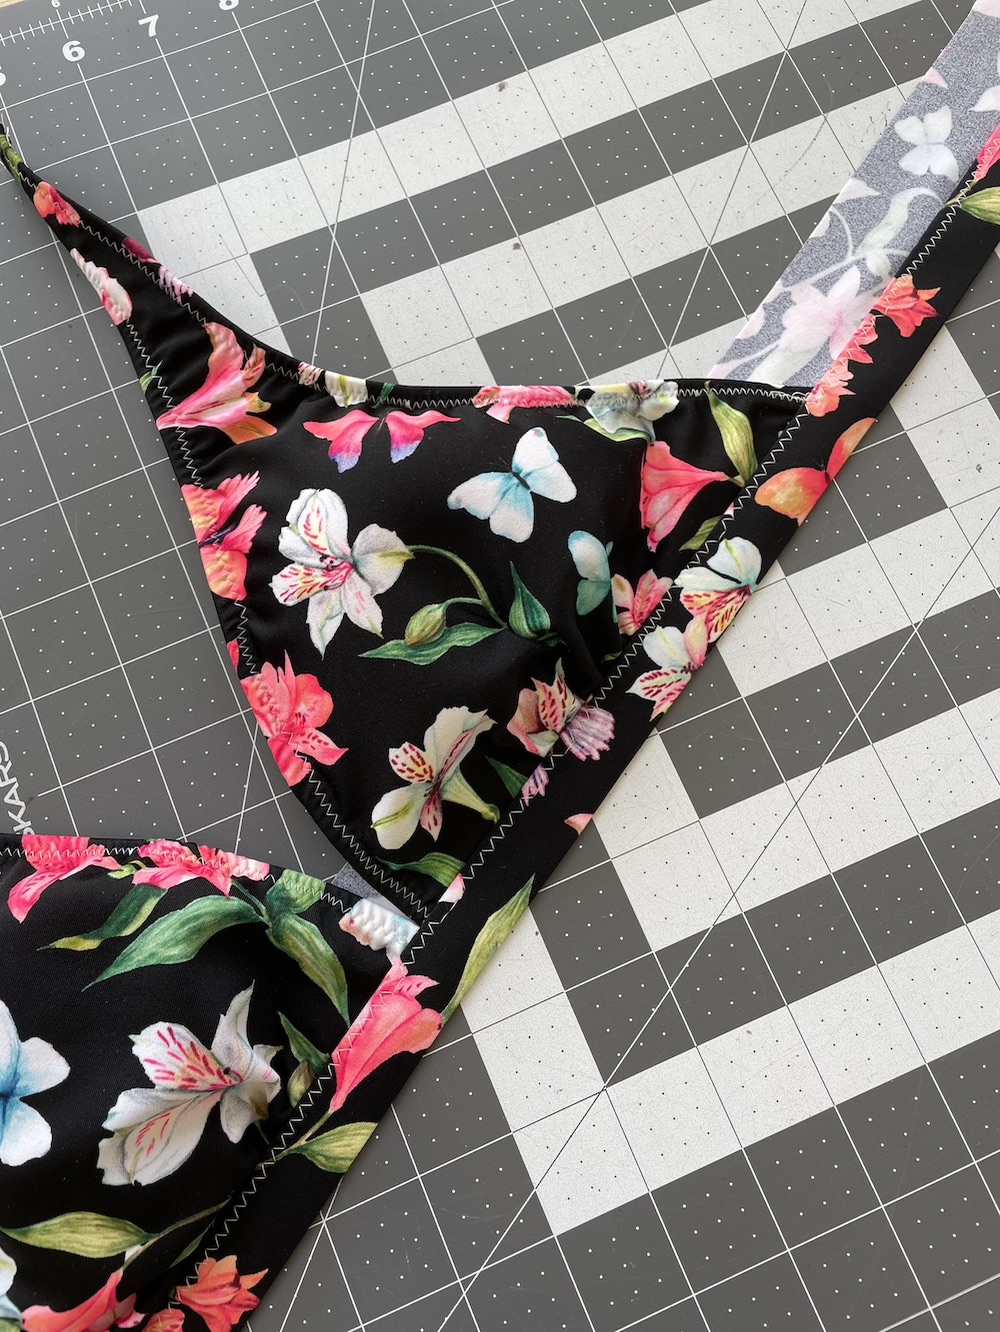
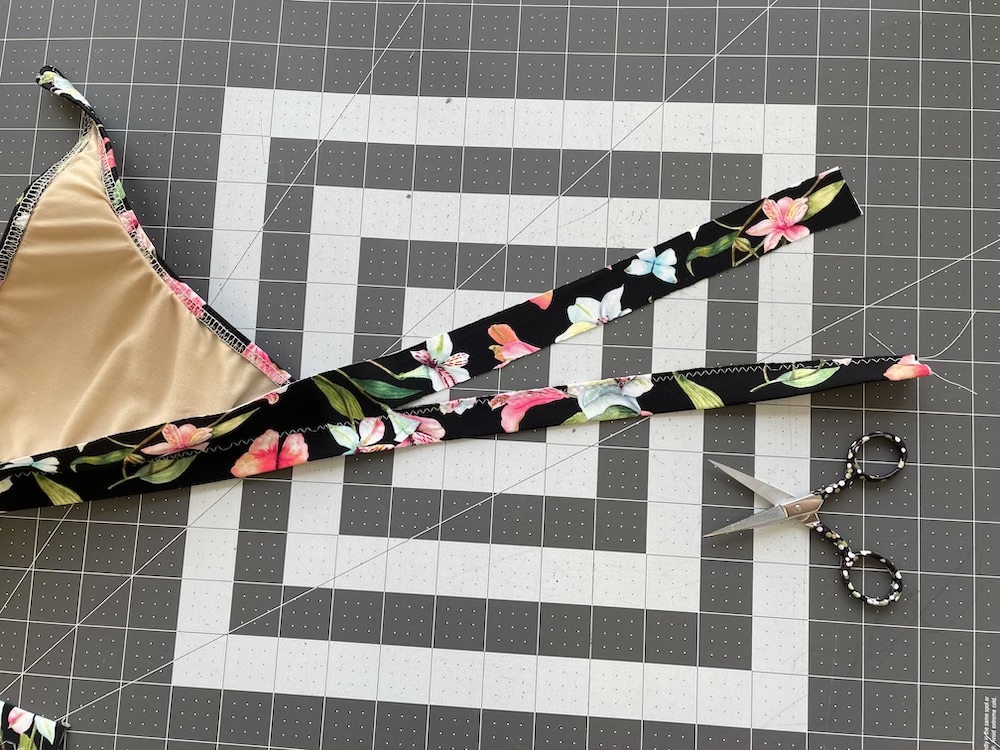
For the main fabric, I cut a pair of the A+B Cup (mirrored), two straps, and a length of 3″ binding.
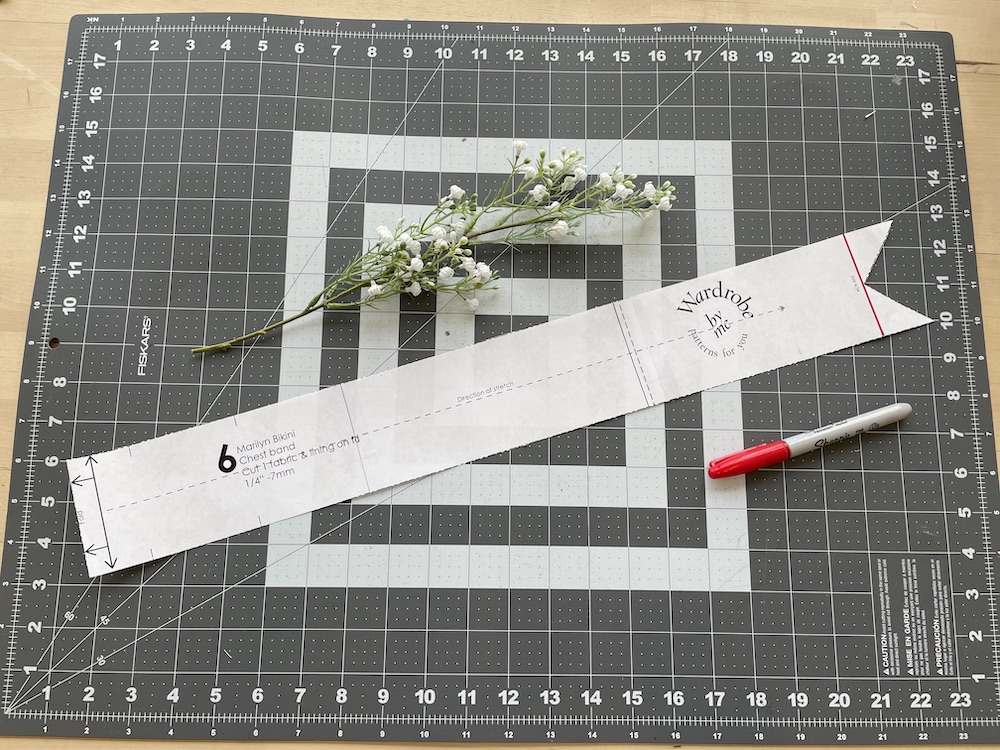

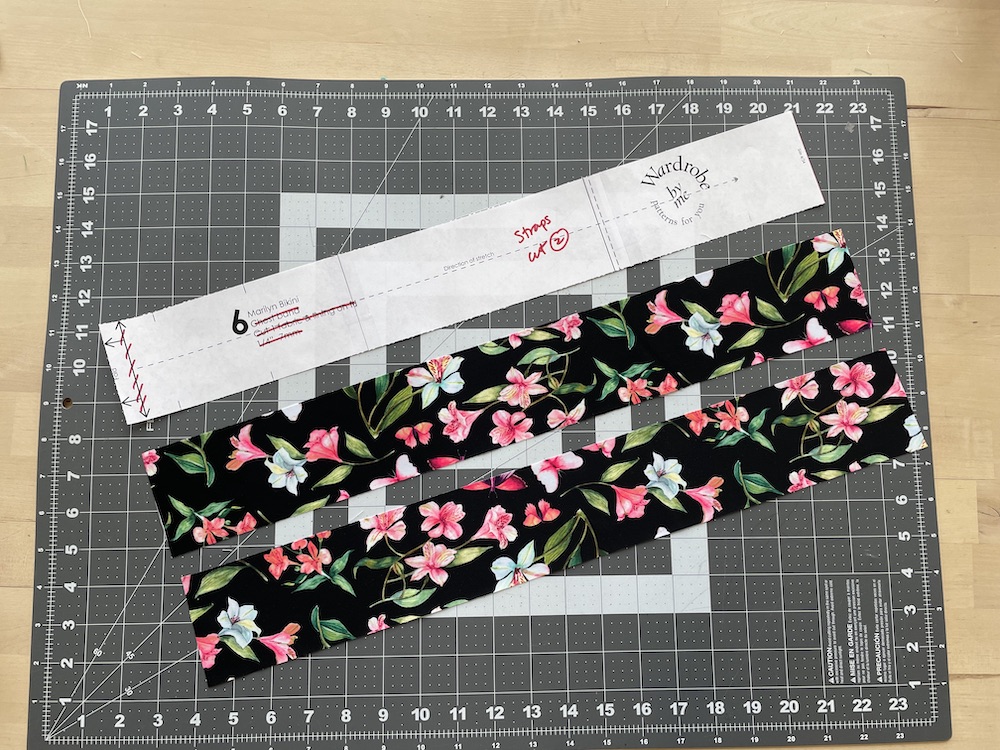
I want to point out that I am not using the default strap pattern piece that comes with the pattern. I wanted a wider strap so I am using the Chest Band Pattern Piece for the straps. I just squared off the ends of the Chest Band Pattern Piece as shown and then cut two for the straps.
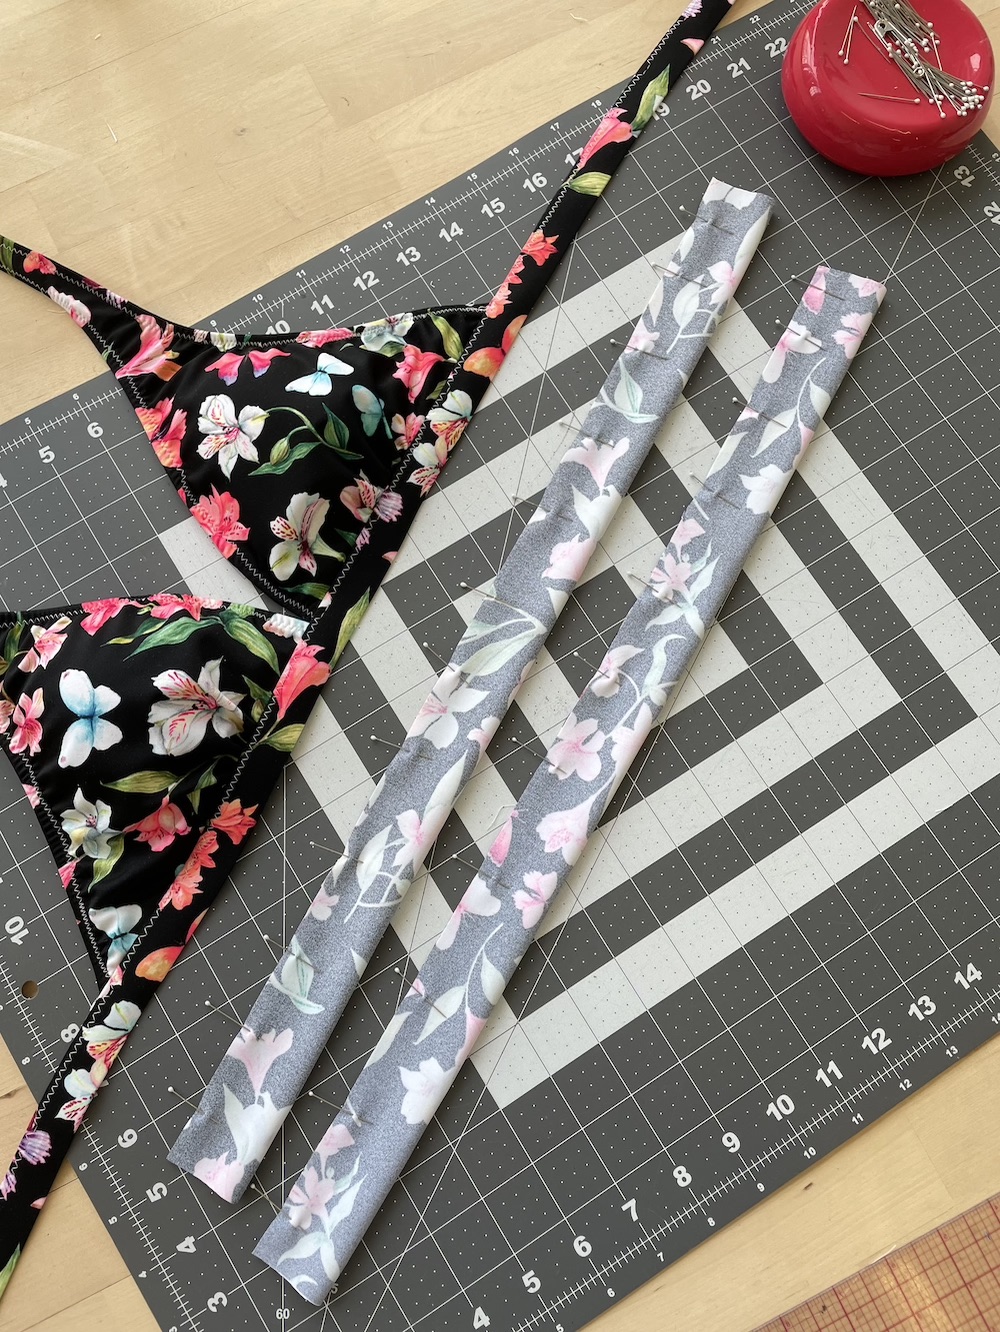
For the band, I am also not using the Chest Band Pattern Piece that comes with the pattern. Instead, I will be cutting a 3″ binding strip that’s the length of my main fabric width. I will be encasing the 3/4″ rubber swim elastic for the band.

3″ Binding + 3/4″ Rubber Swim Elastic
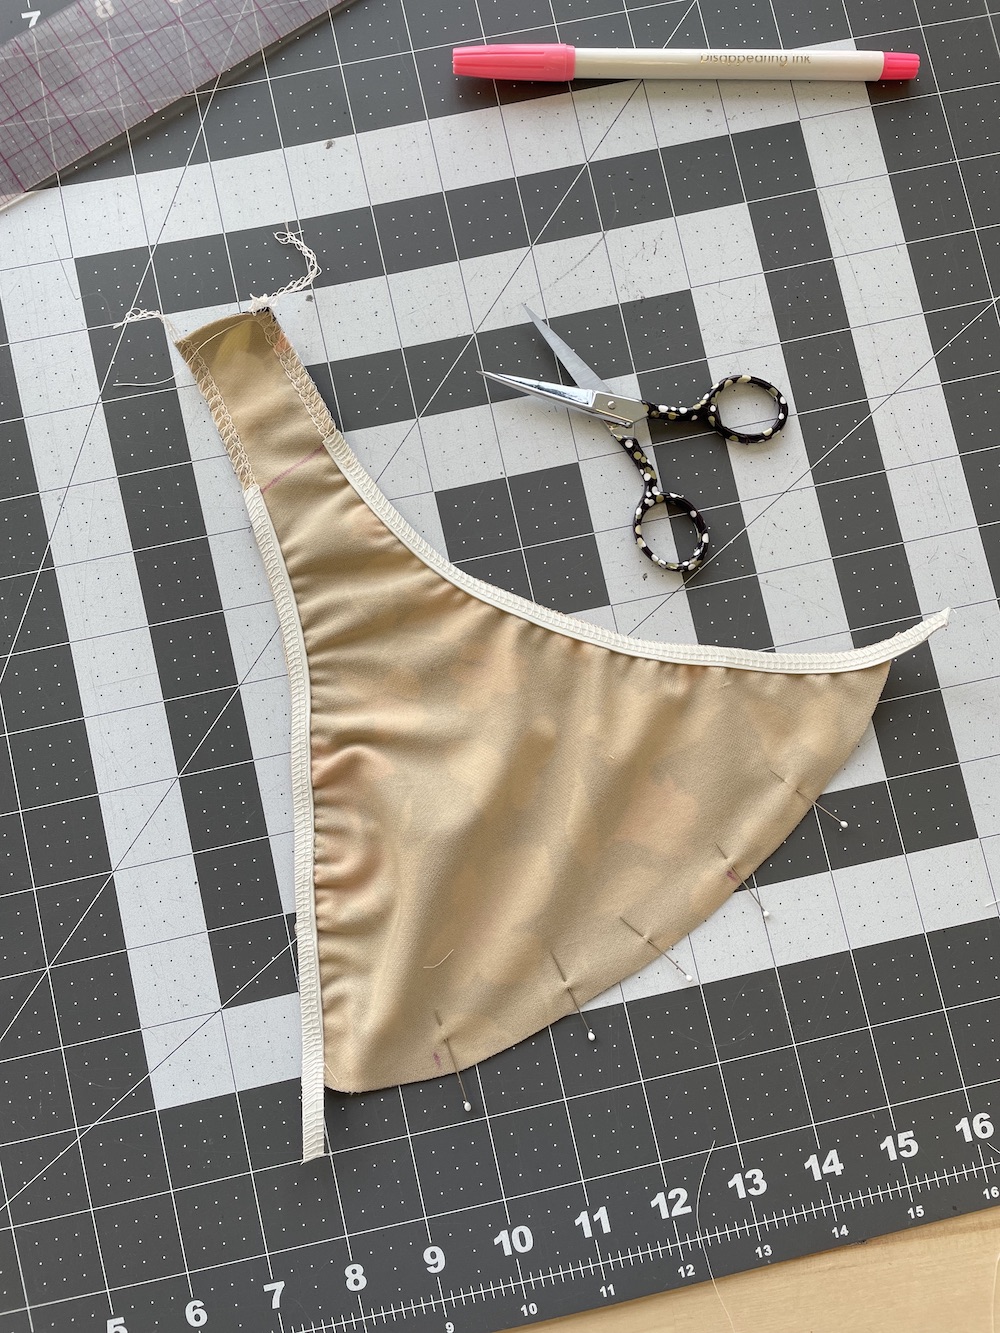
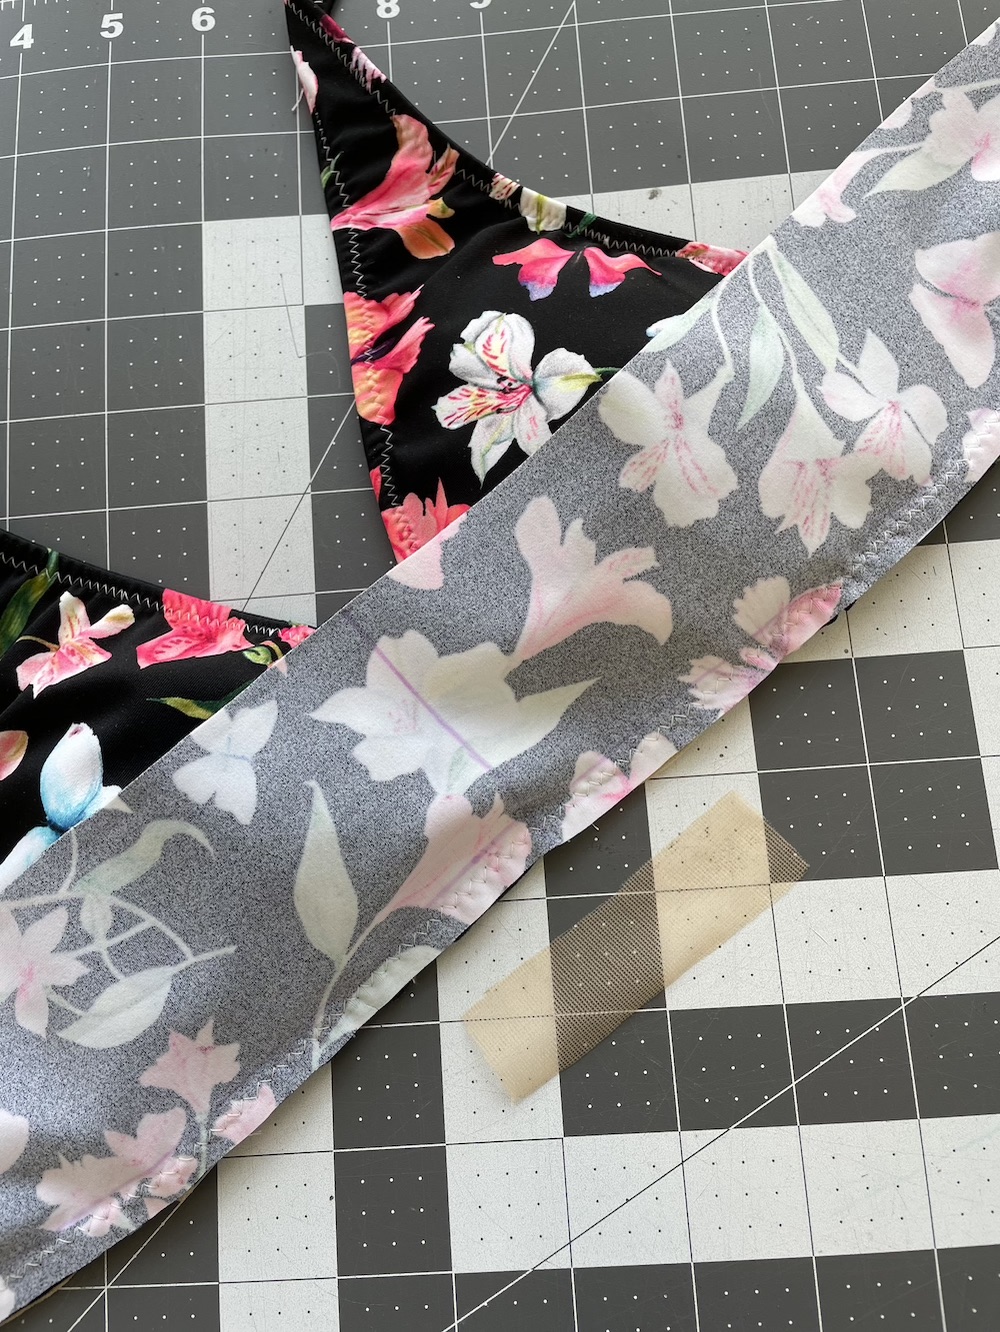
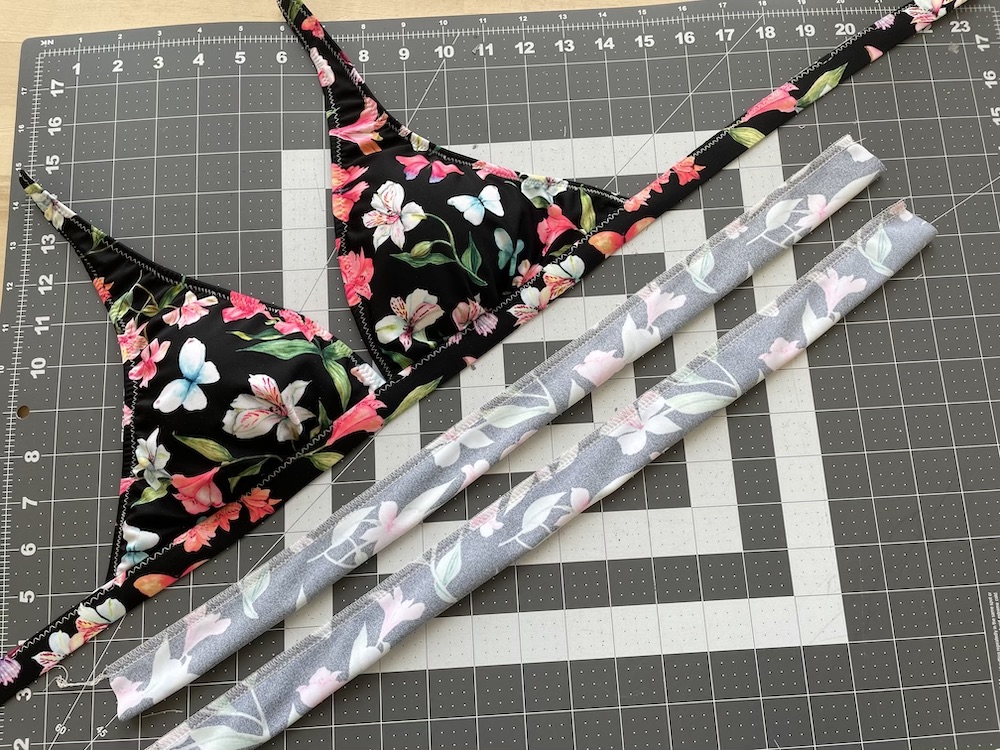
For the lining I cut a pair of A+ B Cup Pattern Piece (mirrored).

Mark the notches for the shirring/gathers using an air/water soluble fabric marker as shown.
We’re ready to sew.
Constructing the Marilyn Bombshell Bikini Top


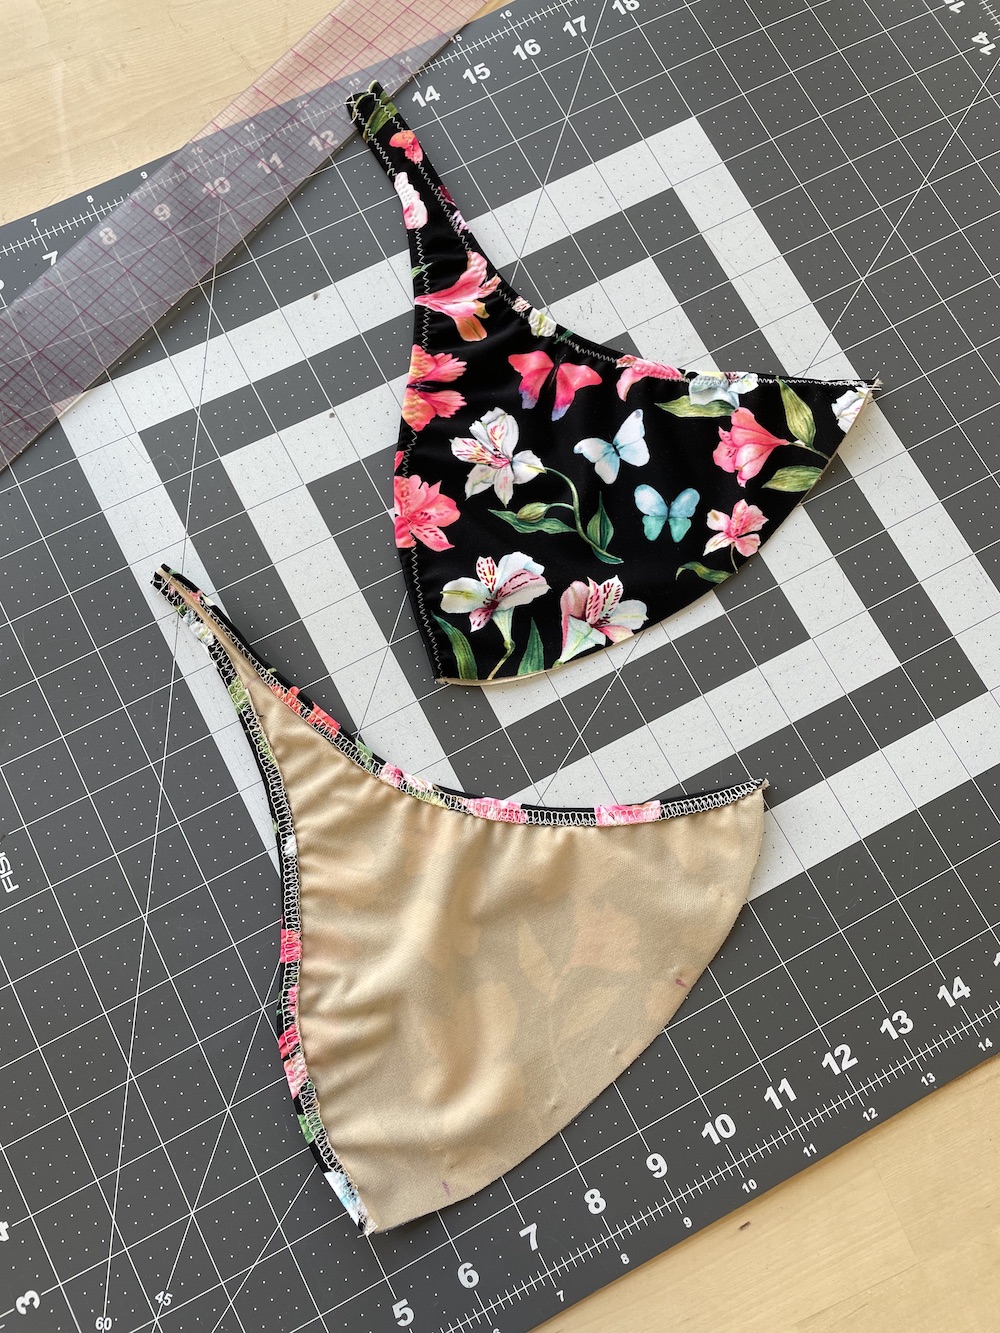
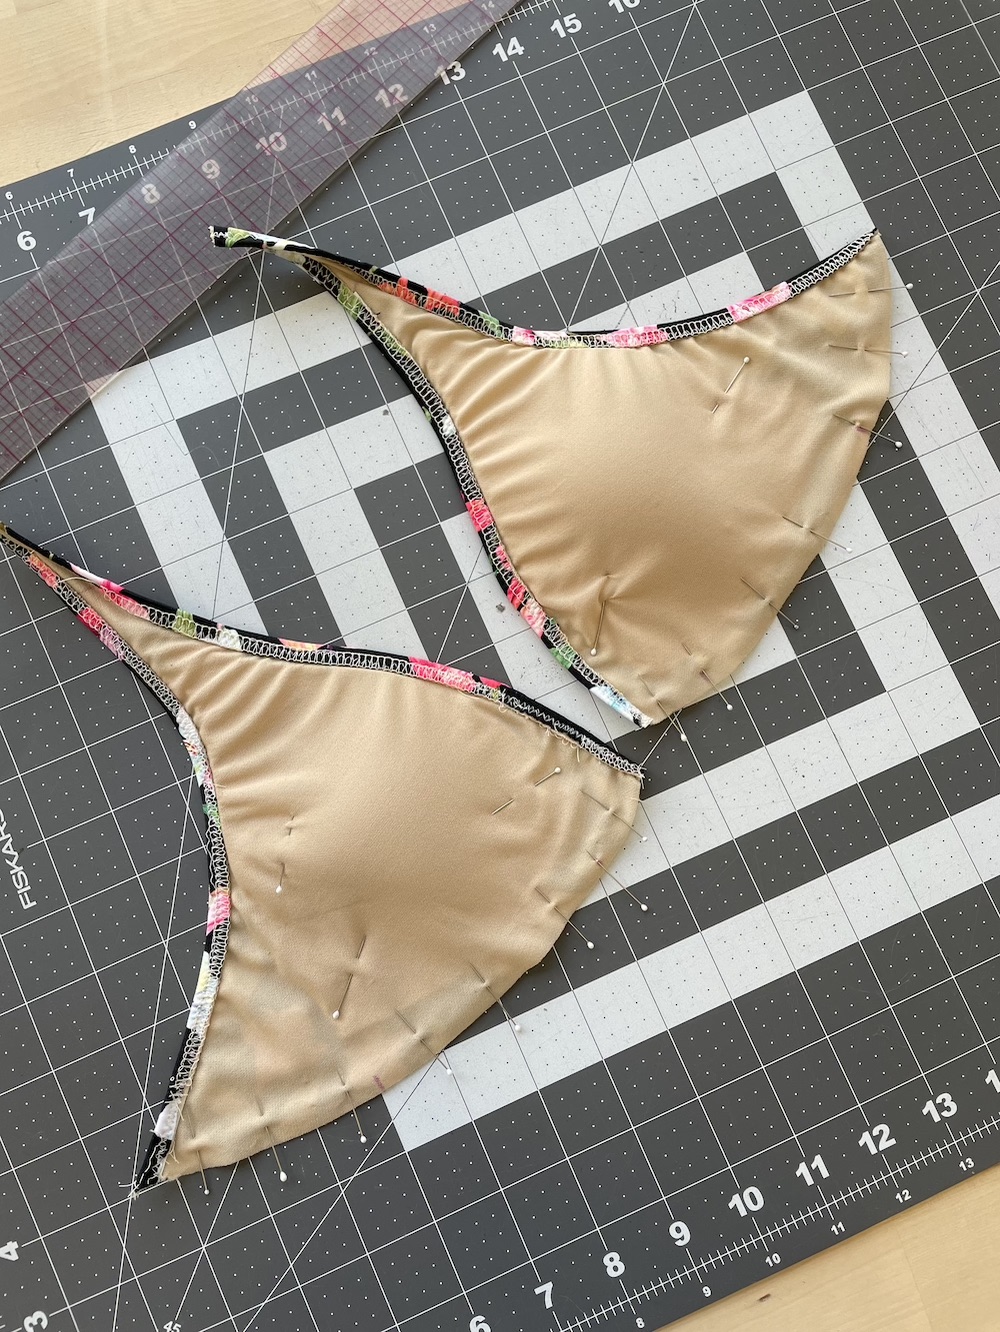
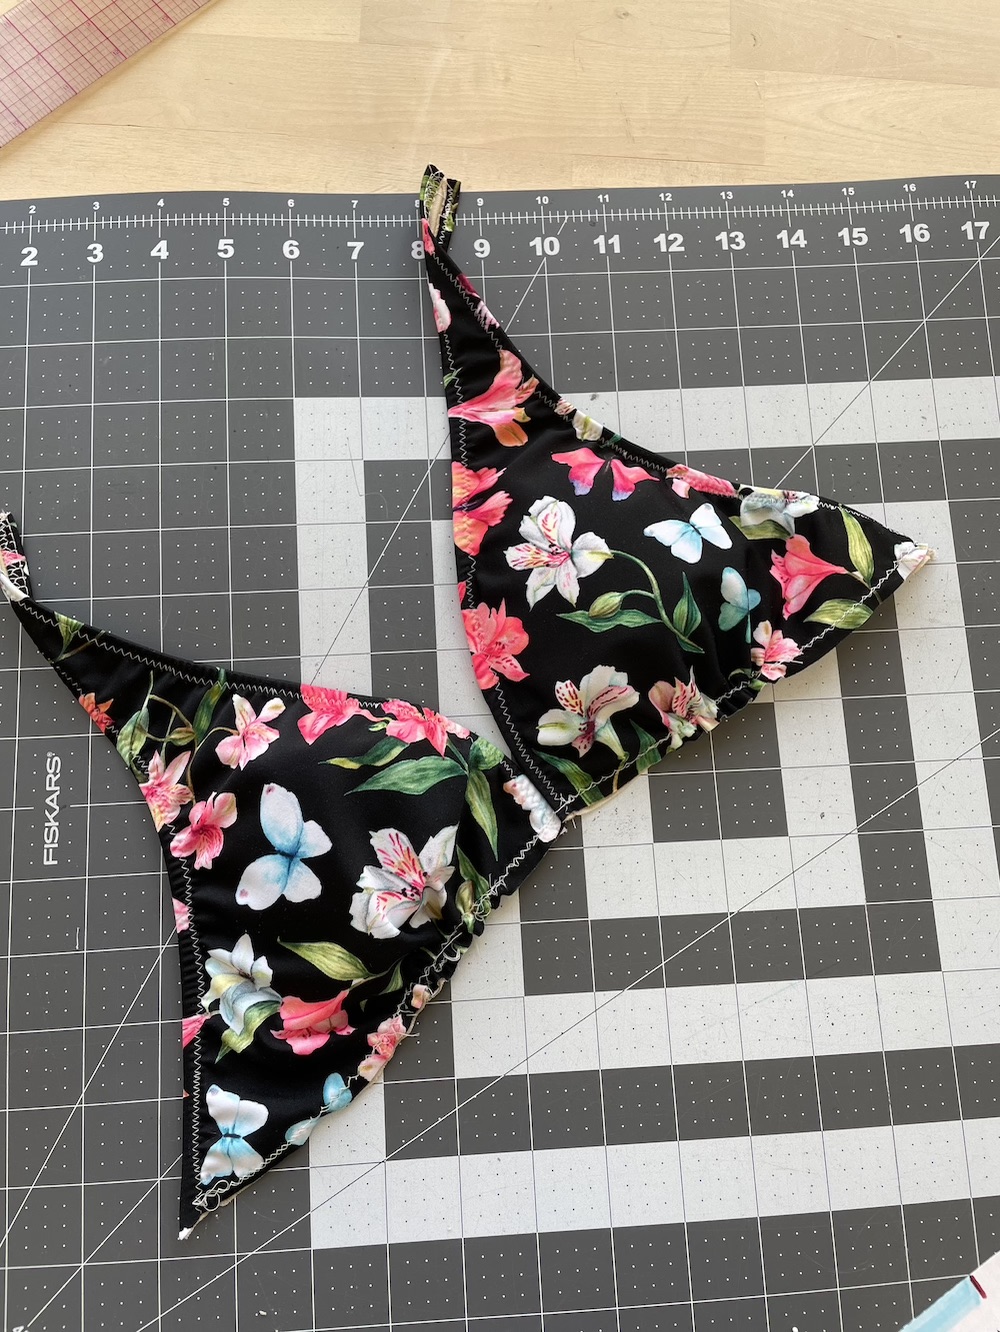
Place the self and lining cup pieces wrong sides together and pin.
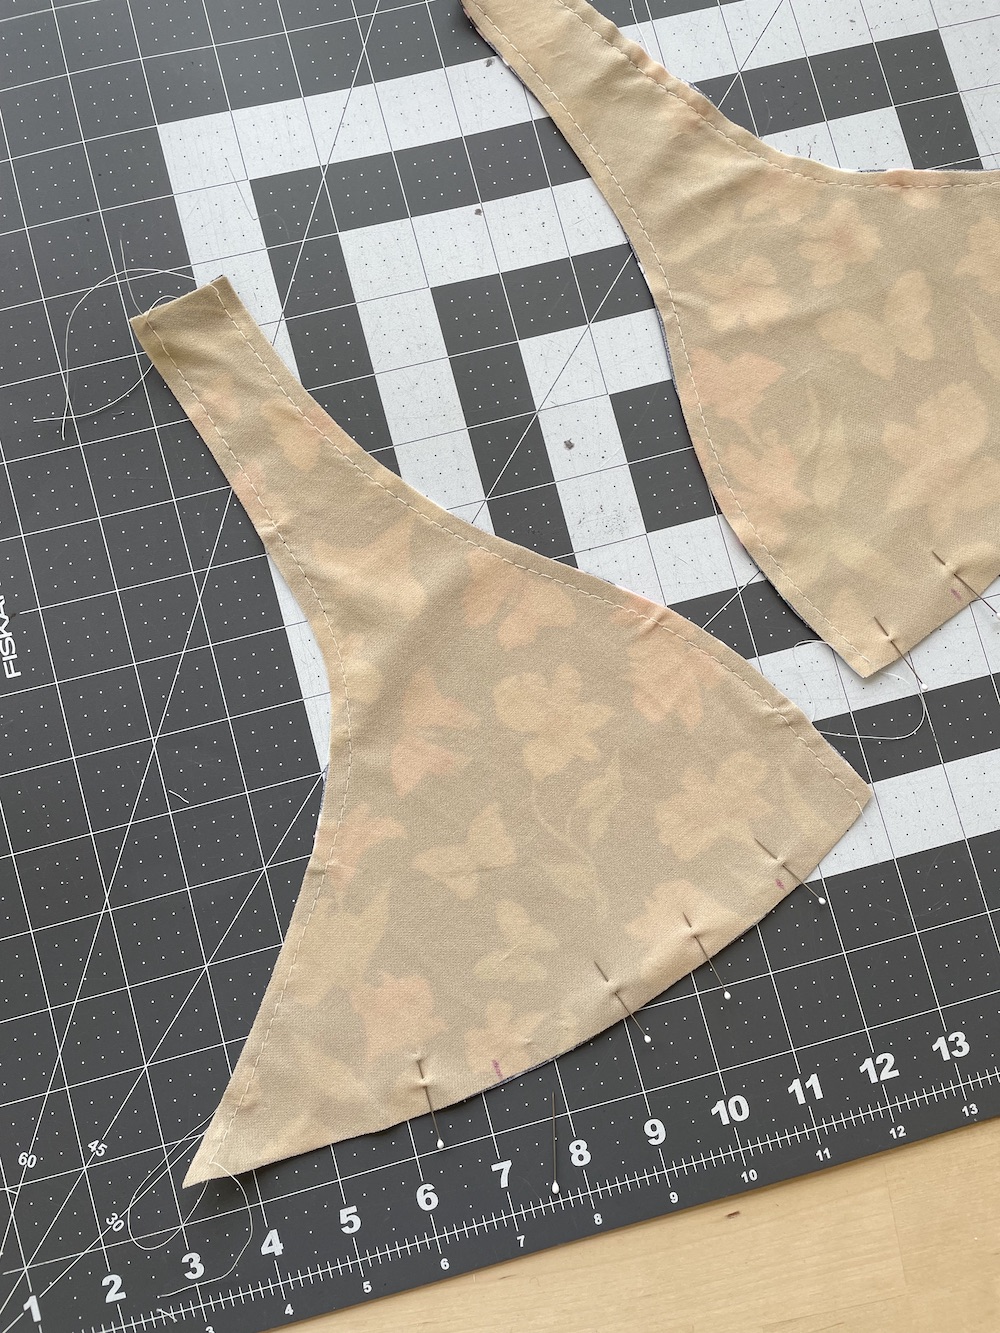
Baste the self and lining cup pieces together using a long straight stitch along the underarm and neckline areas.

Using an air/water soluble fabric marker, I measured 2″ down at the armhole edge and 2 3/8″ down at the neckline edge and drew a reference line.

These measurements are totally based on your preference. I’ve made this pattern a couple of times before so I know roughly where I the rings situated. These reference lines also indicate where to stop applying 1/4″ elastic along the neckline and underarm areas. This is to reduce bulk when you bend the strap extension back on itself to attach the swim rings.
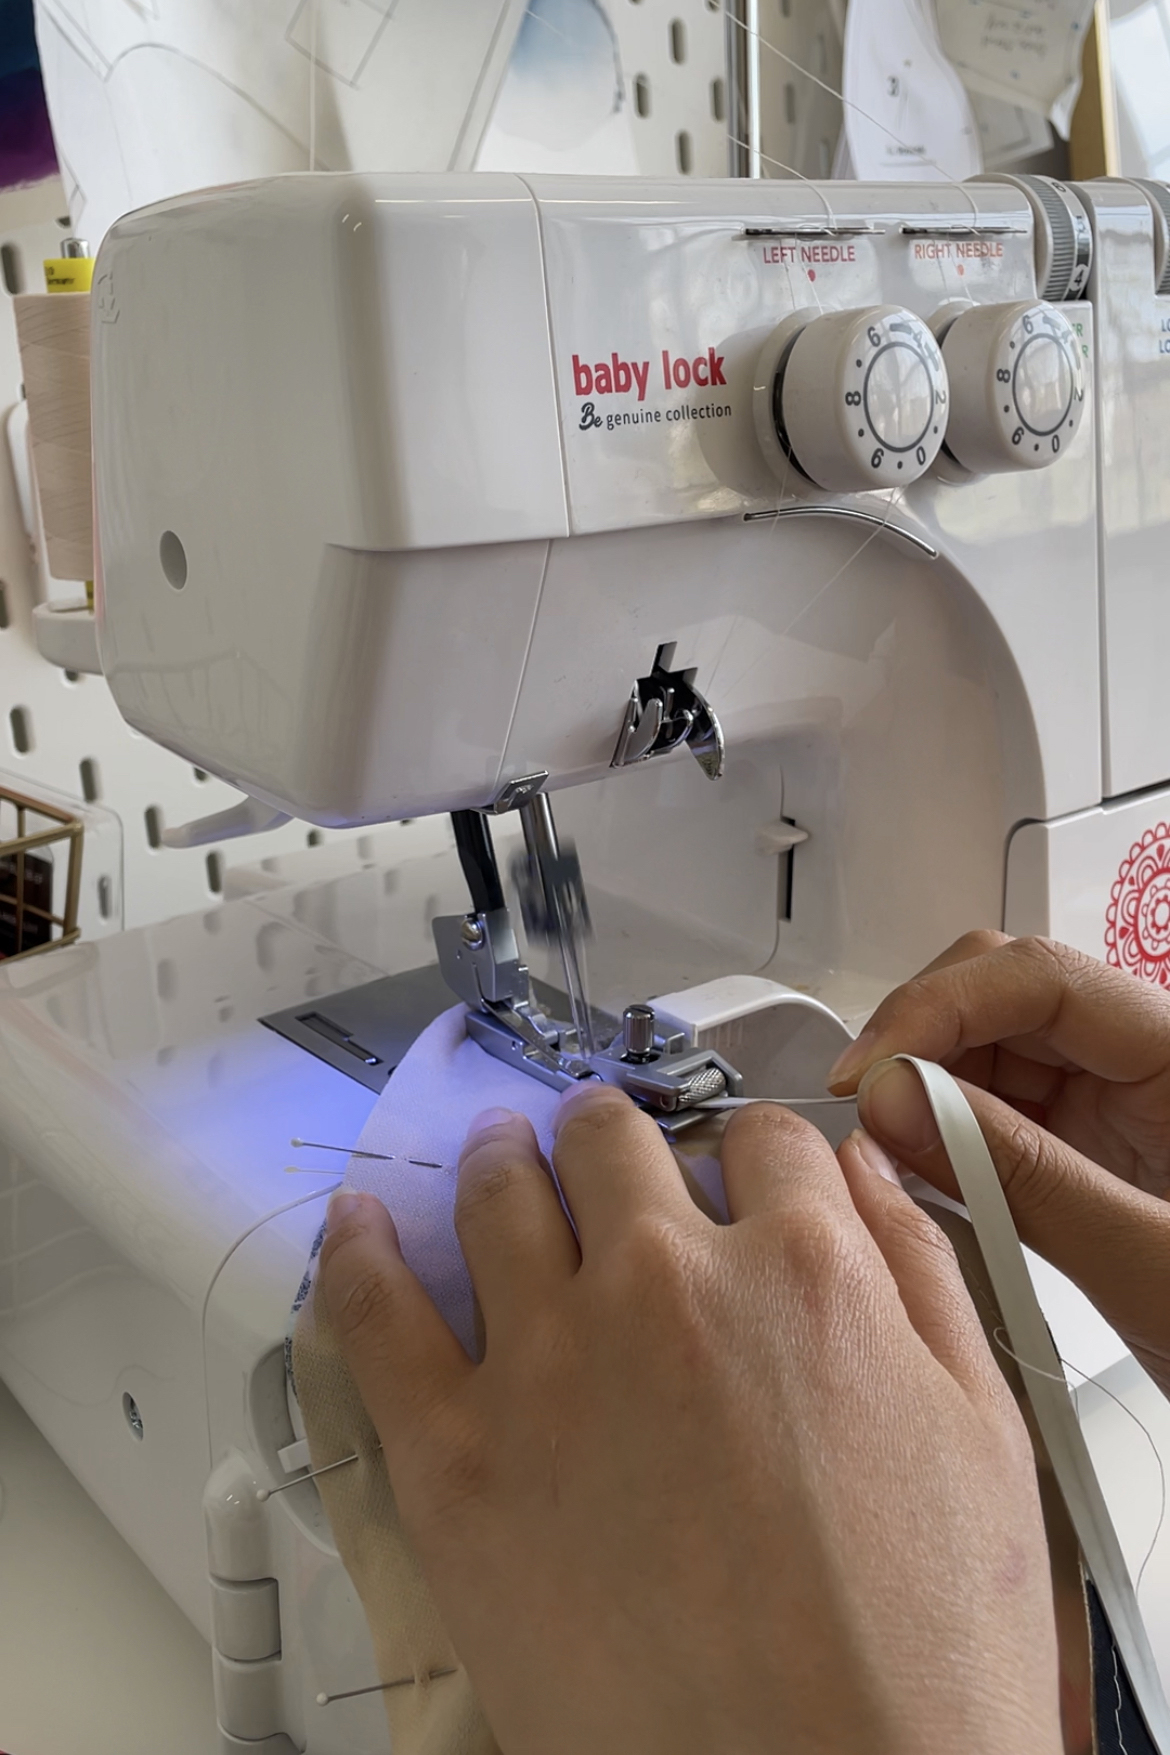
The next step is to apply the first pass of 1/4″ swim elastic along the armhole and neckline areas. I recently acquired the elastic foot for my Babylock Vibrant Serger so I’ve been practicing swimwear elastic application by way of the elastic foot and serger.
If you don’t have a serger, you can apply the elastic with a zigzag stitch on a domestic sewing machine. Stretch the swim elastic slightly as you are applying it. The elastic is applied on the inside and you are lining the elastic up with the armhole and neckline edges as you are applying it.
As mentioned above, only apply elastic up to the reference lines you drew to reduce bulk later.
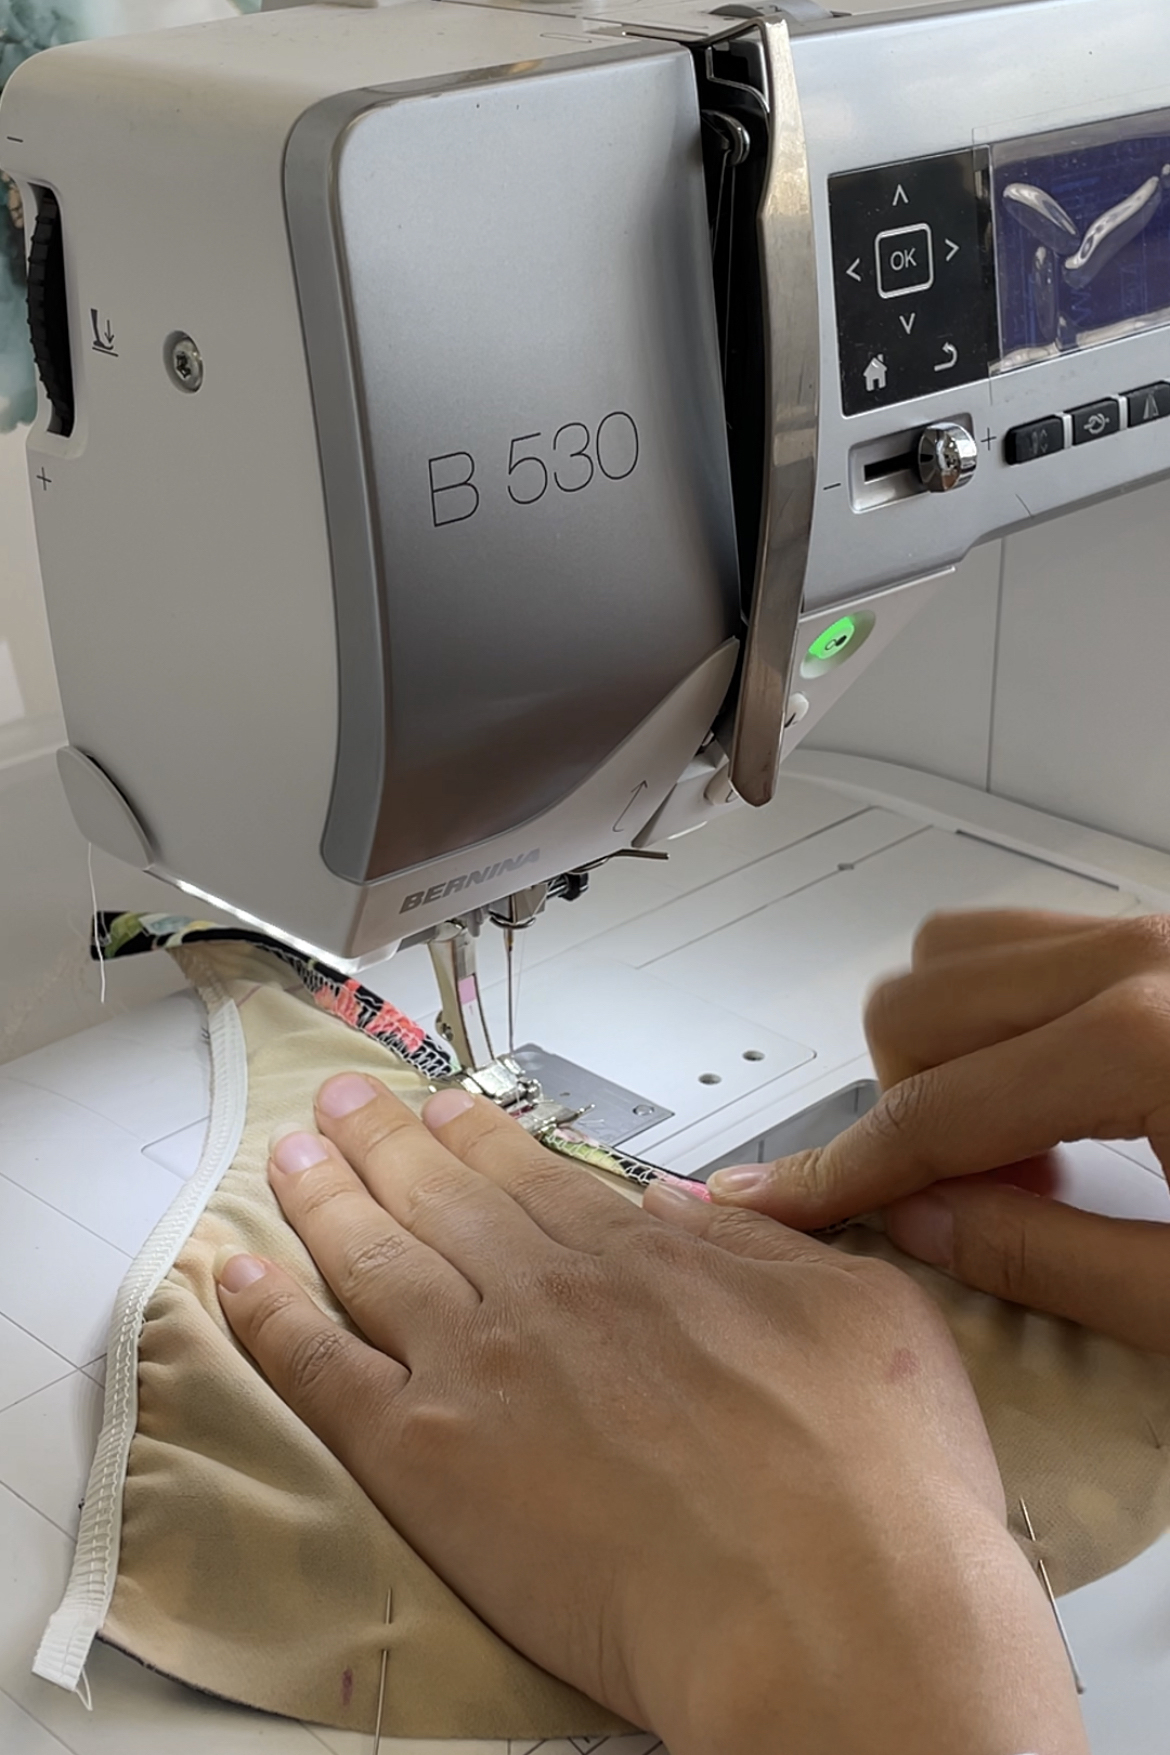
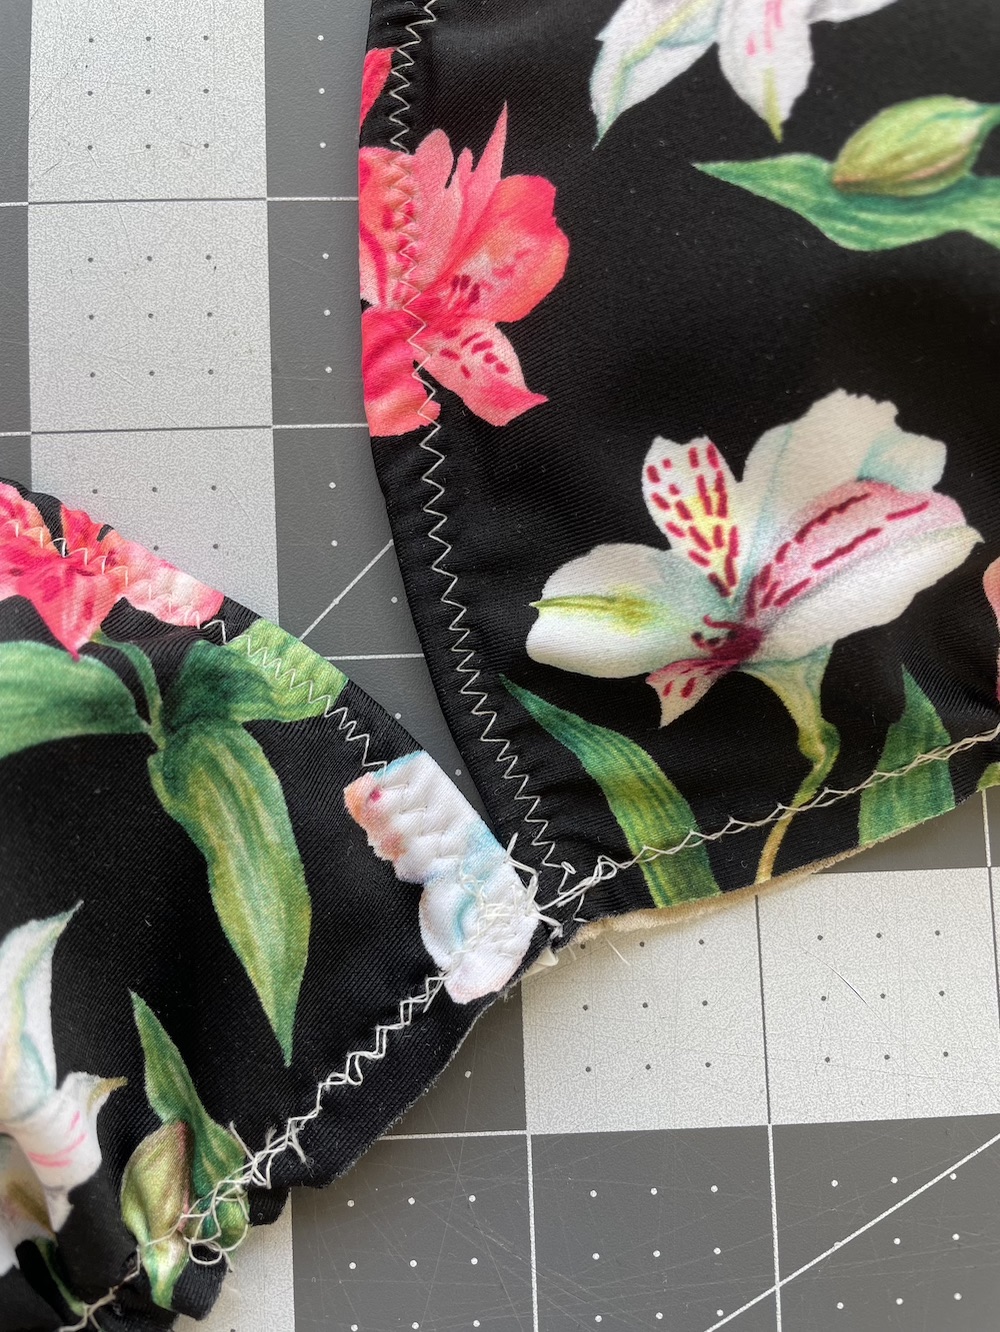
Sew the second pass of swim elastic by turning it inwards. Pull the elastic until the fabric is flat as you zigzag stitch. Make sure the elastic is encased tightly during this step.
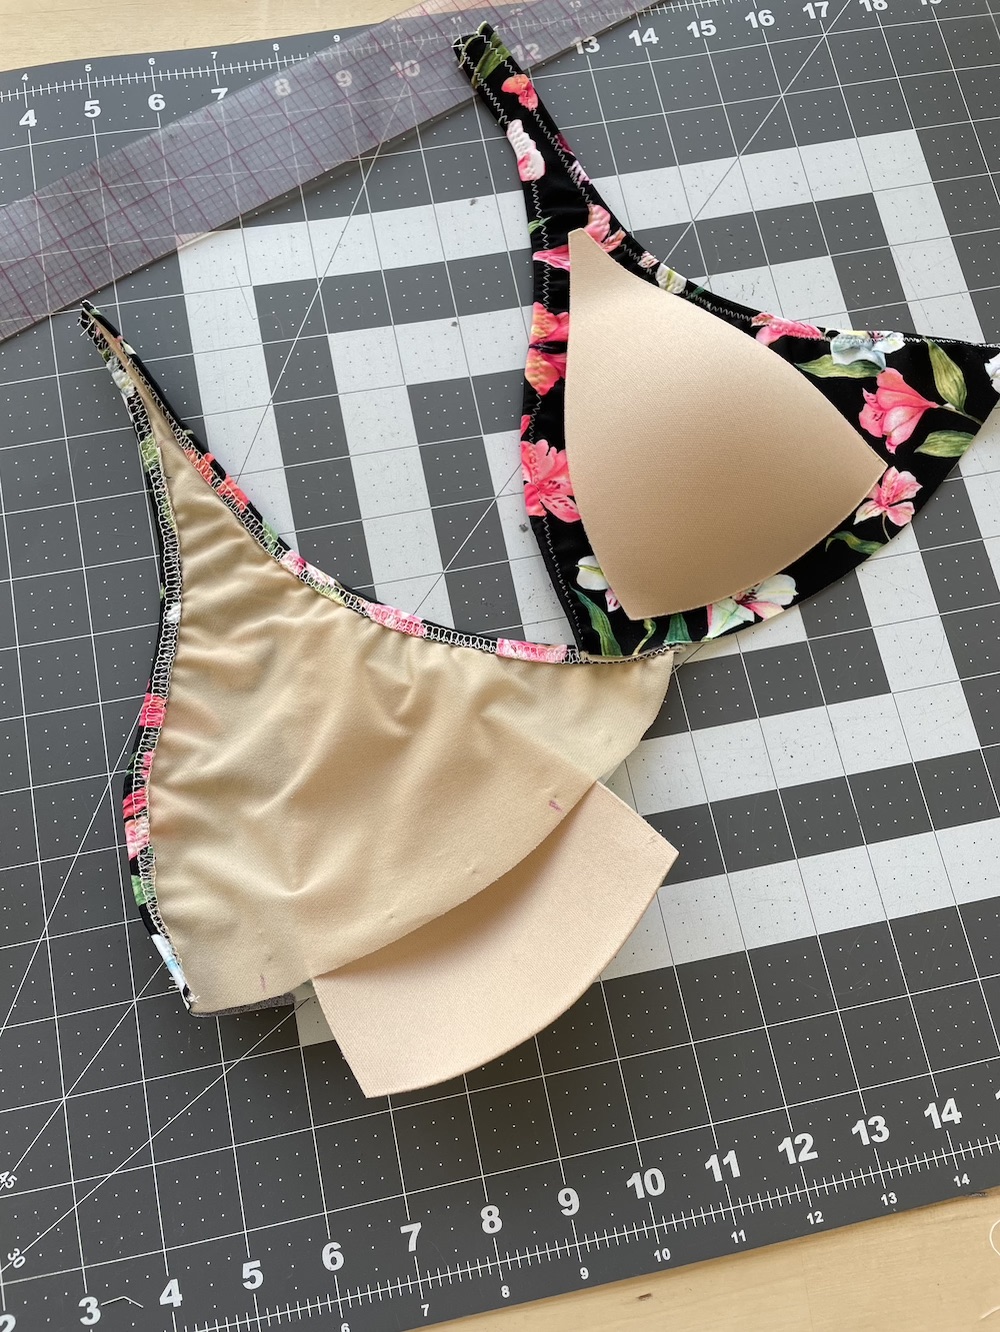
At this point, you can put in the preformed foam cups if you wish to add them to the bikini top.
Pin the bottom edge and sew a long basting stitch between the marks we made earlier for the gathers.
Pull on the basting stitch to form the gathers. Pull until the notches on the Cup Pattern Pieces match the notches on the Chest Band Pattern piece.
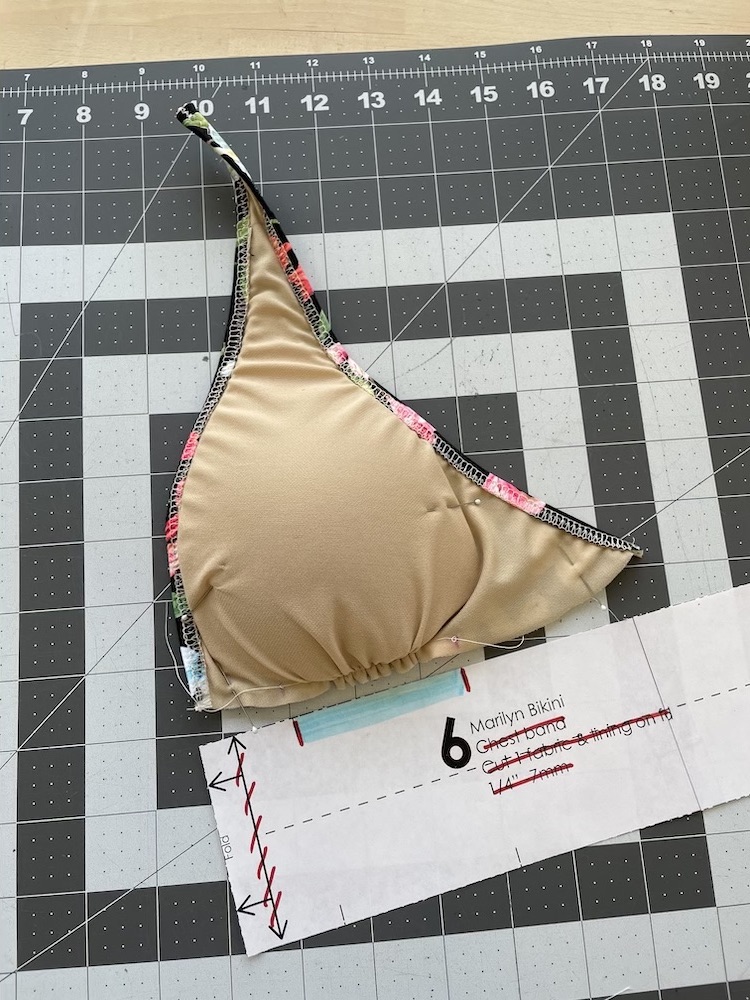
Baste the bottom edge with a zigzag stitch to keep the gathers in place.
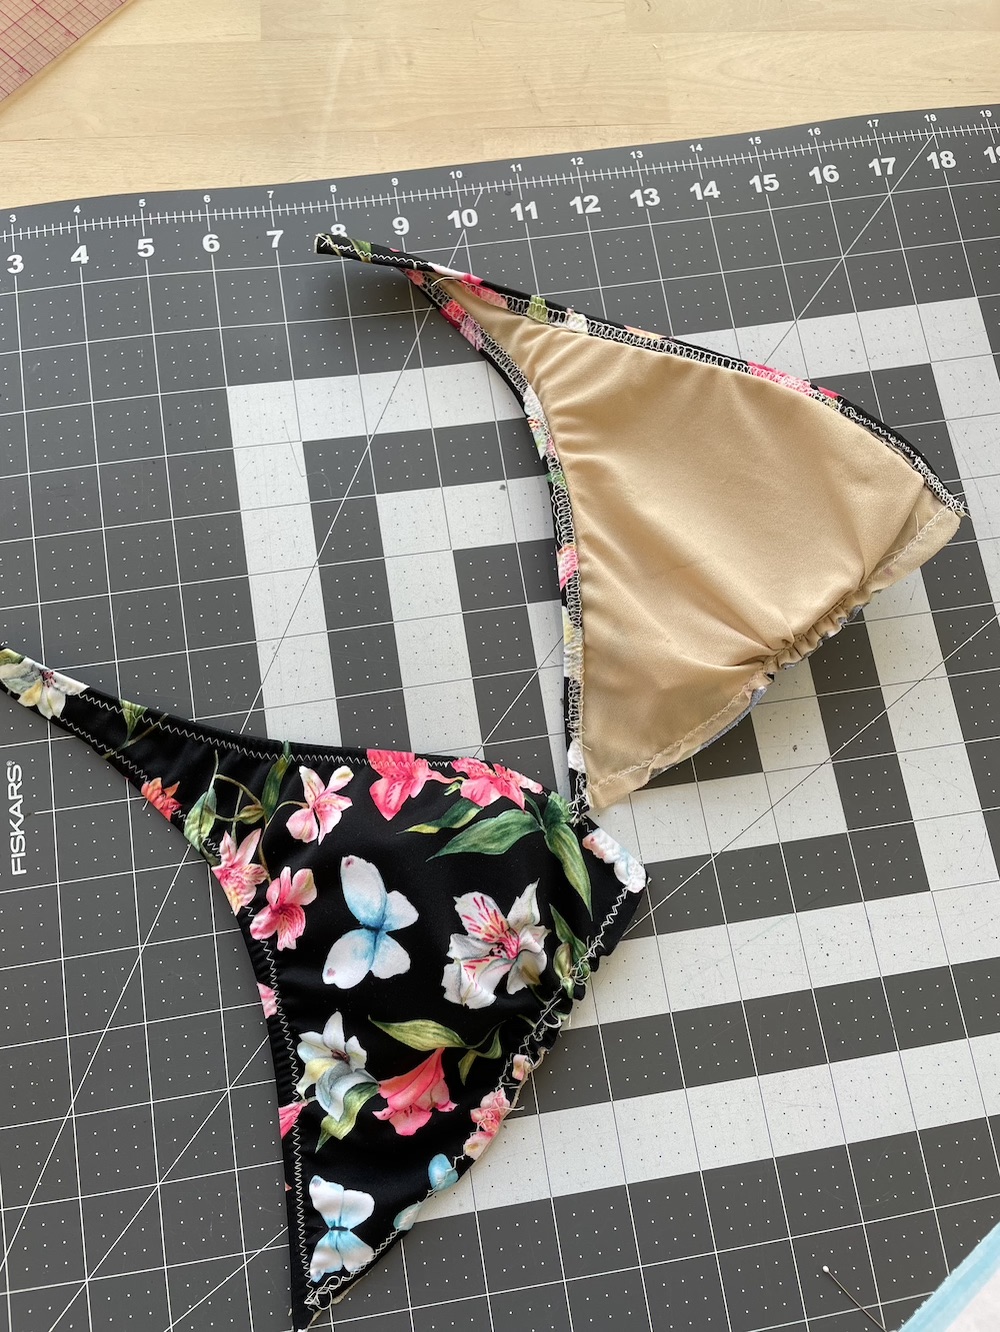
Next, butt the cups together at the center front and stitch together using a zigzag stitch to keep everything in place for band application
To determine the band length, take your rib cage measurement and add 5-6″. This is so you have some wiggle room/extra. It’s easier to cut off the excess length than to magically add length.
For example, my rib cage measurement is 29″. I cut the 3″ binding strip that we cut earlier to 35″ (29″ + 6″). I also cut a length of 3/4″ rubber swim elastic that is 35″ long.

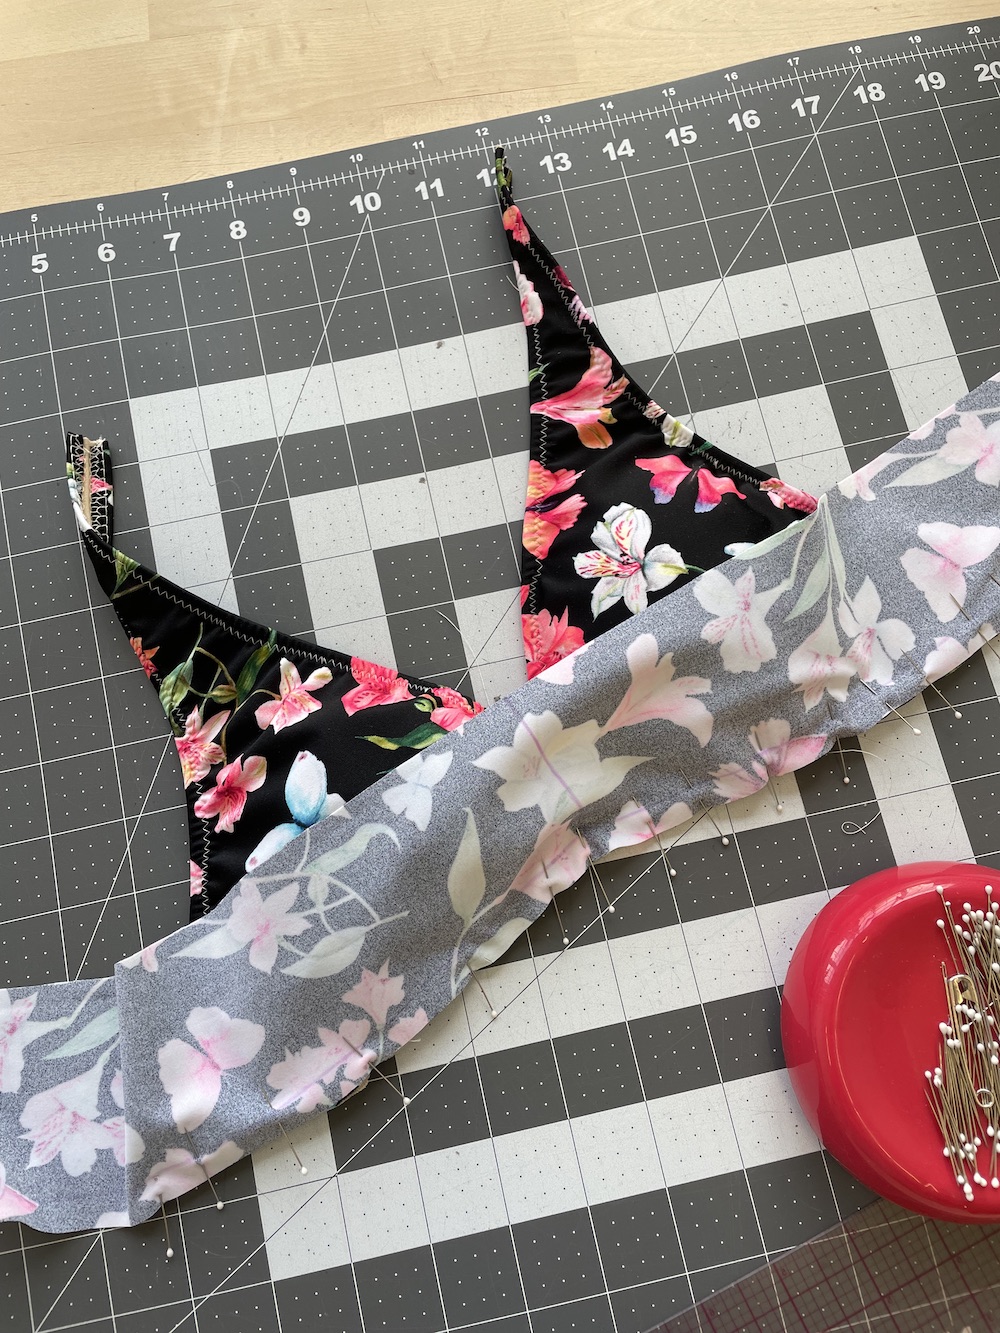
Mark a line that is 3/8″ from the bottom of the binding with a air/water soluble fabric pen.

Also take the time to mark the center of the binding strip.

Line the binding strip up with the bottom edge of the cups making sure that the center of the binding strip is lined up with the center front. Pin in place.
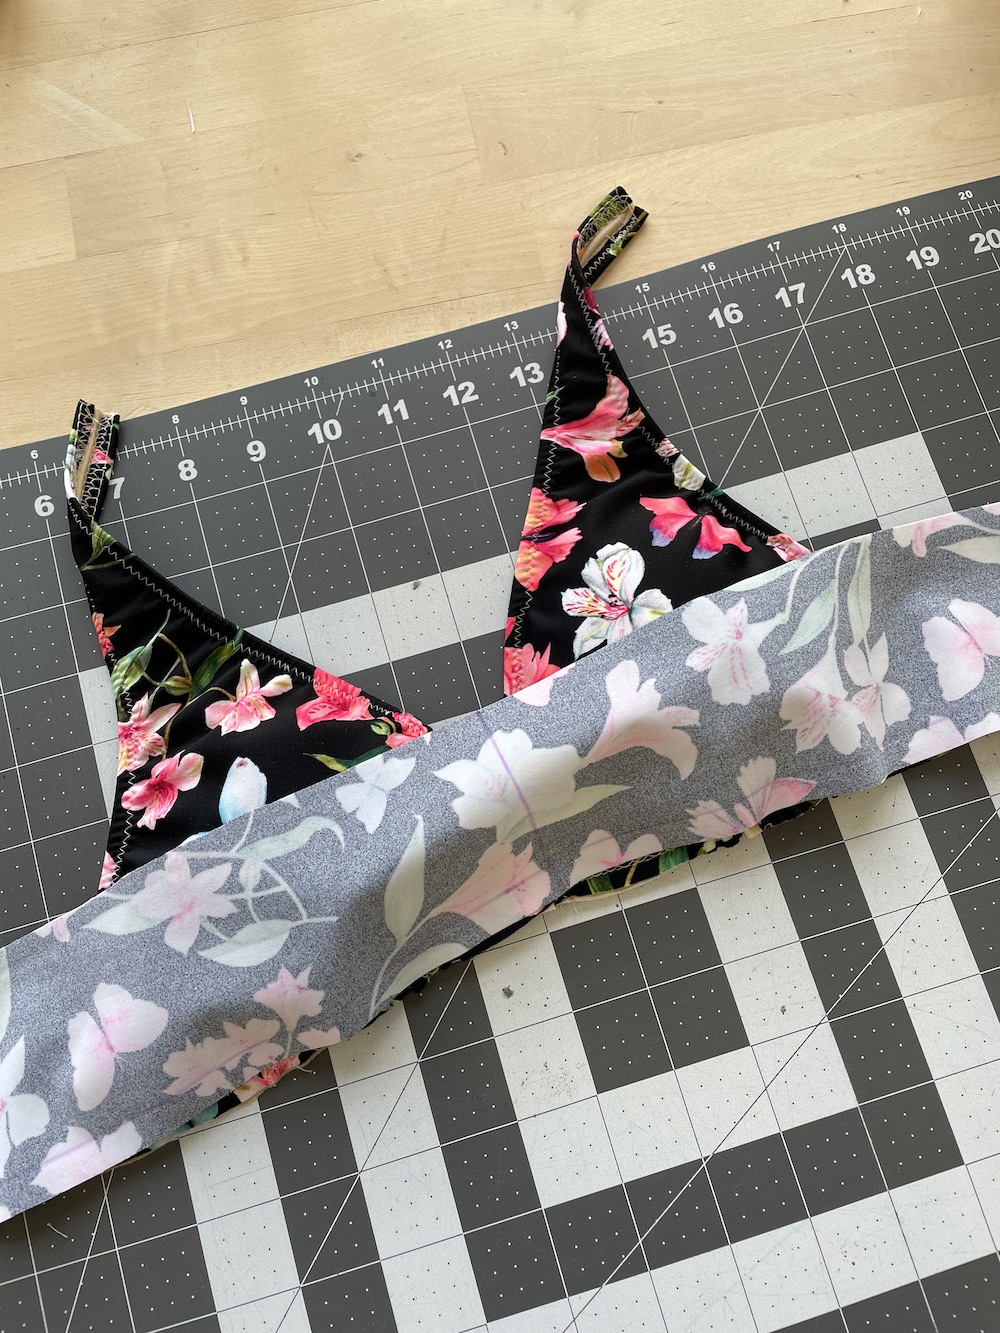
Stitch the binding to the bottom edge of the cups with a zigzag stitch. Do not pull on the binding as you are stitching–it’s being applied flat.
After, we will be applying a small piece of non/low stretch fabric at the center front to help stabilize the area. This is as per the pattern instructions and I think this is completely brilliant as the center front is a high stress area. I am totally stealing this tip for other projects.
Cut a short length of non/low stretch fabric. I’m using stabilizer tricot in this instance.
Stitch to the binding and bottom edge of the cups at the CF area so it doesn’t go pass the 3/8″ line that you marked earlier. Trim off the excess.
Next, overlap the 3/4″ rubber swim elastic with the bottom of the binding by 3/8″ and stitch in place using a zigzag stitch. This is why we marked the 3/8″ reference line earlier. It makes it easy to overlap the elastic by 3/8″ consistently. As with the binding before, don’t stretch the elastic as you are stitching it. Just apply it flat.

This is how it looks once the elastic has been applied.

To encase the elastic, fold the binding downwards over the elastic and turn it under.
This is how the inside looks like once you’ve wrapped the elastic in the binding completely.

To secure the binding and elastic together, ensure the elastic is wrapped tightly and stitch with a zigzag stitch near the top edge of the band. To prevent shifting, you can also pin everything in place before stitching.

This is how it looks after stitching.
Next, cut off the excess binding by trimming close to the zigzag stitch.
I’m using my embroidery snips for this, but you can use duckbill scissors or any sharp fabric scissors you are comfortable with.
Tada! You wow have an encased elastic band.

Now it’s time to assemble the straps.

Fold the straps in half lengthwise with right sides touching and pin.
Stitch with a 3/8″ seam allowance with a straight stitch. I went in and serged the seam afterwards but serging is totally optional.
Twist the seam allowance so it’s centered and give the straps a press.
Then stitch one end close with a straight stitch.
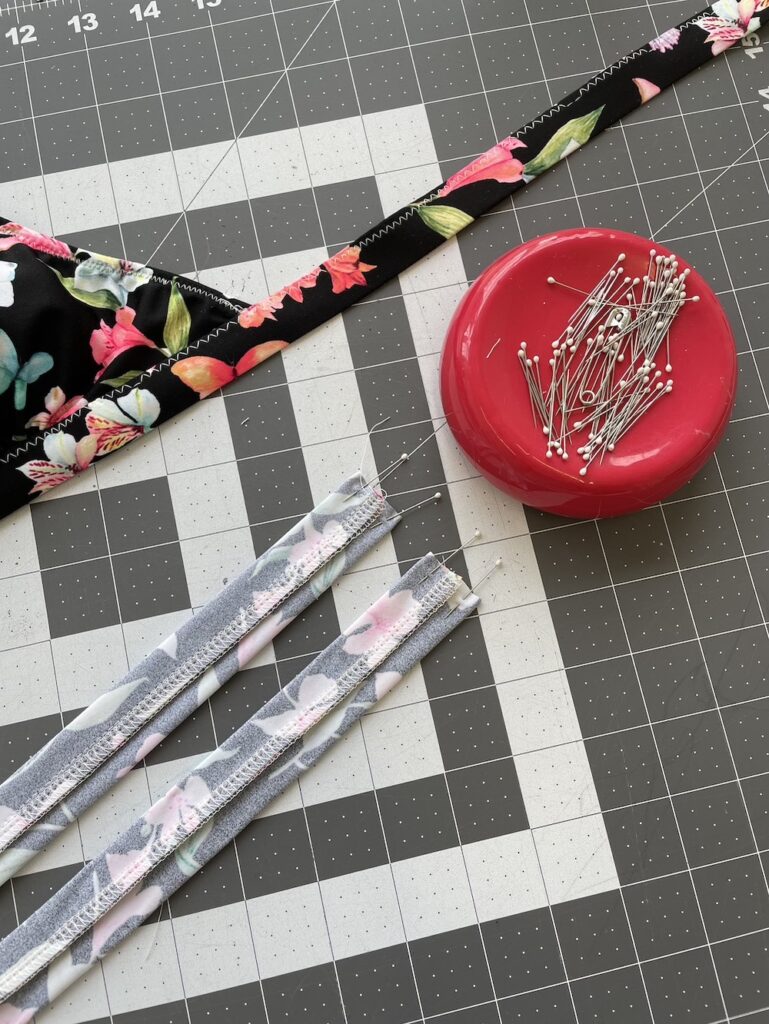
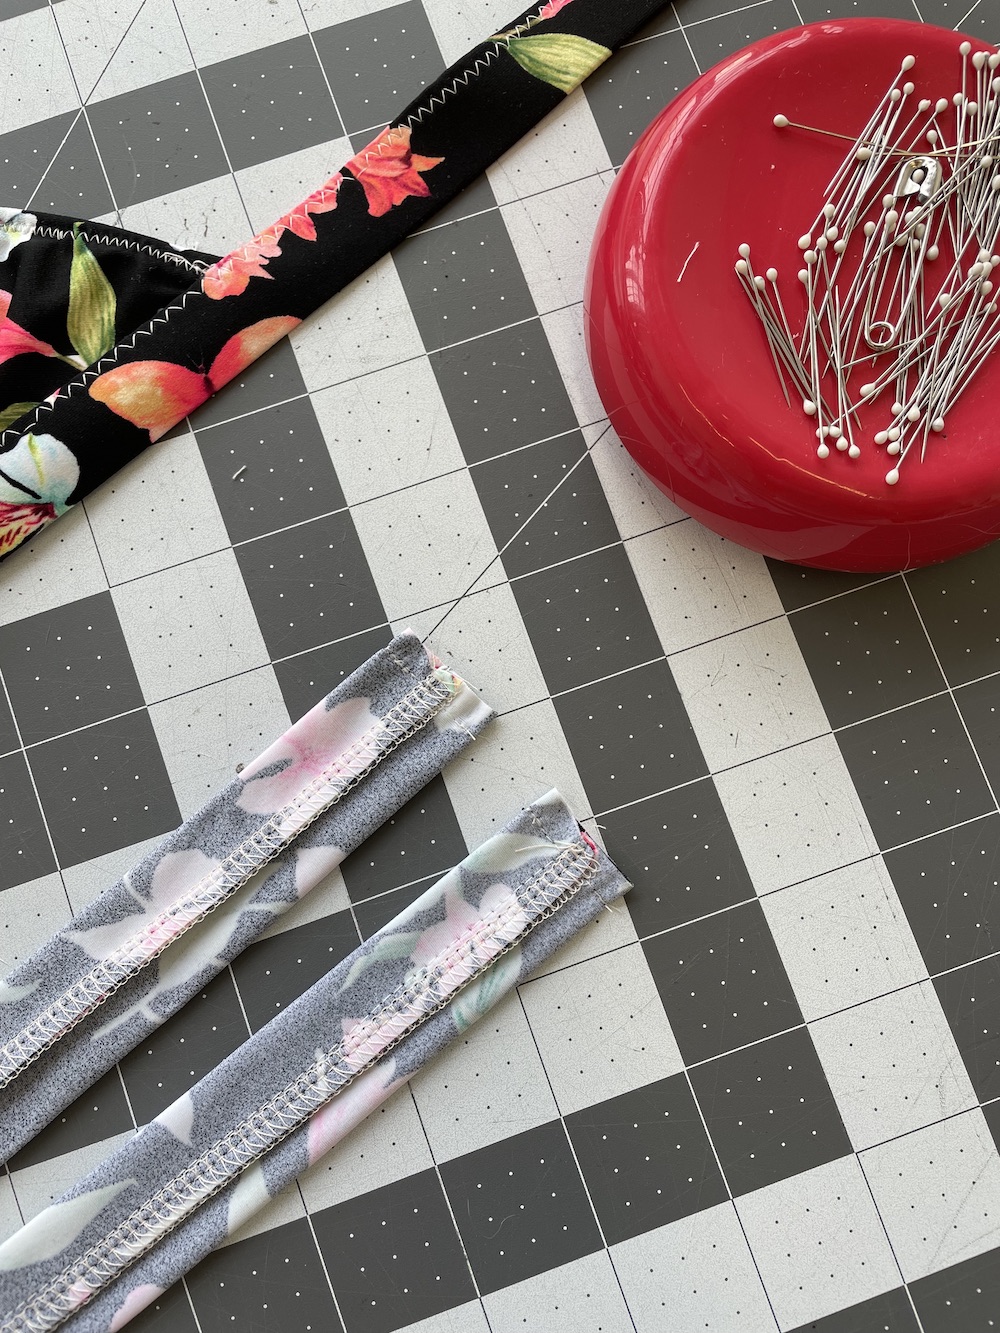
Turn the straps right side out and….tada!
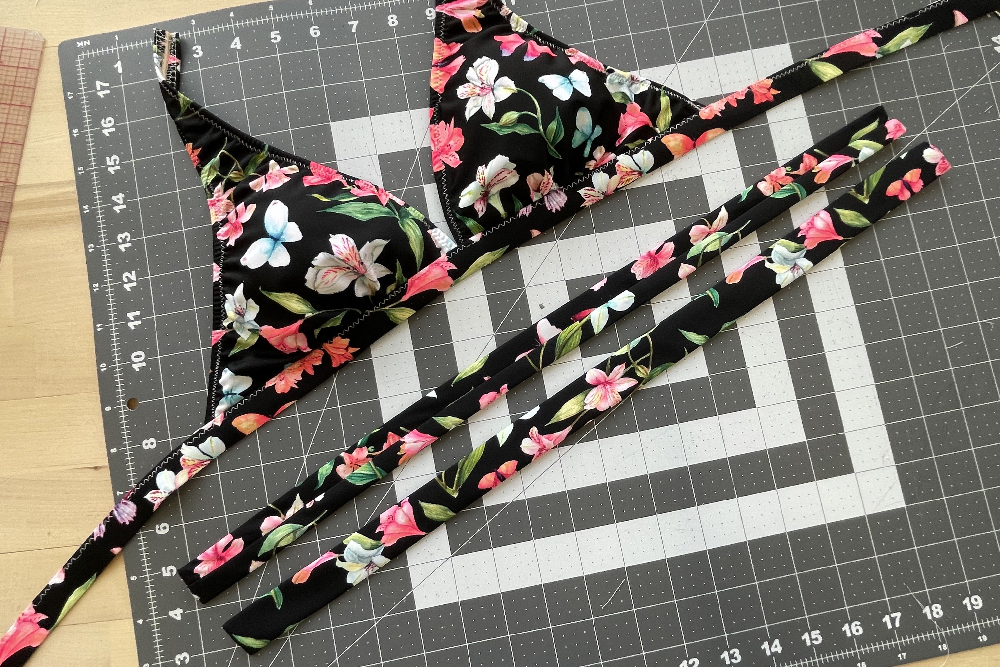
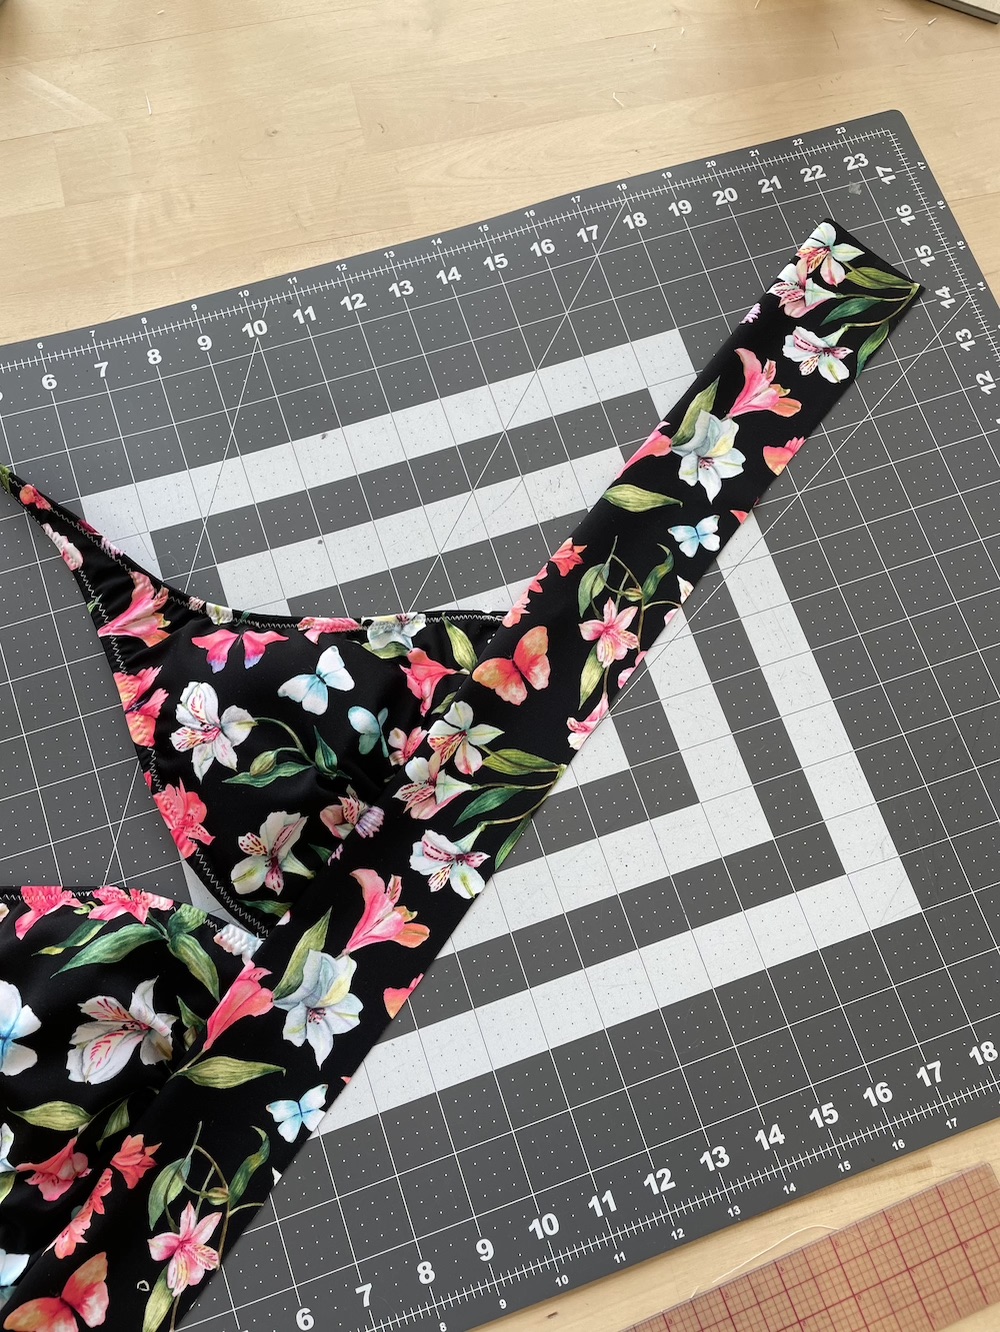
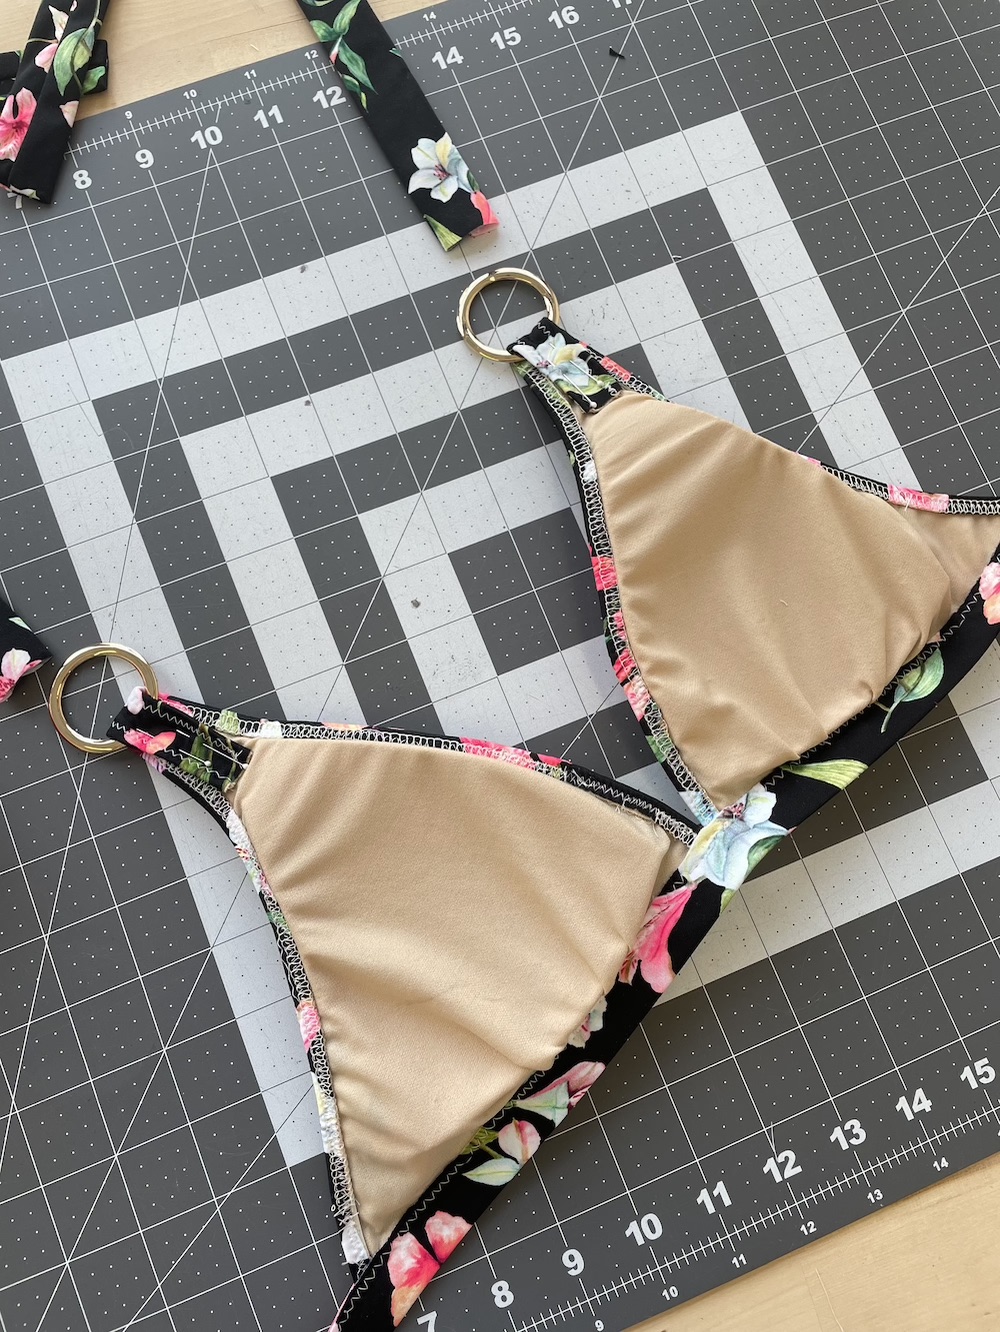
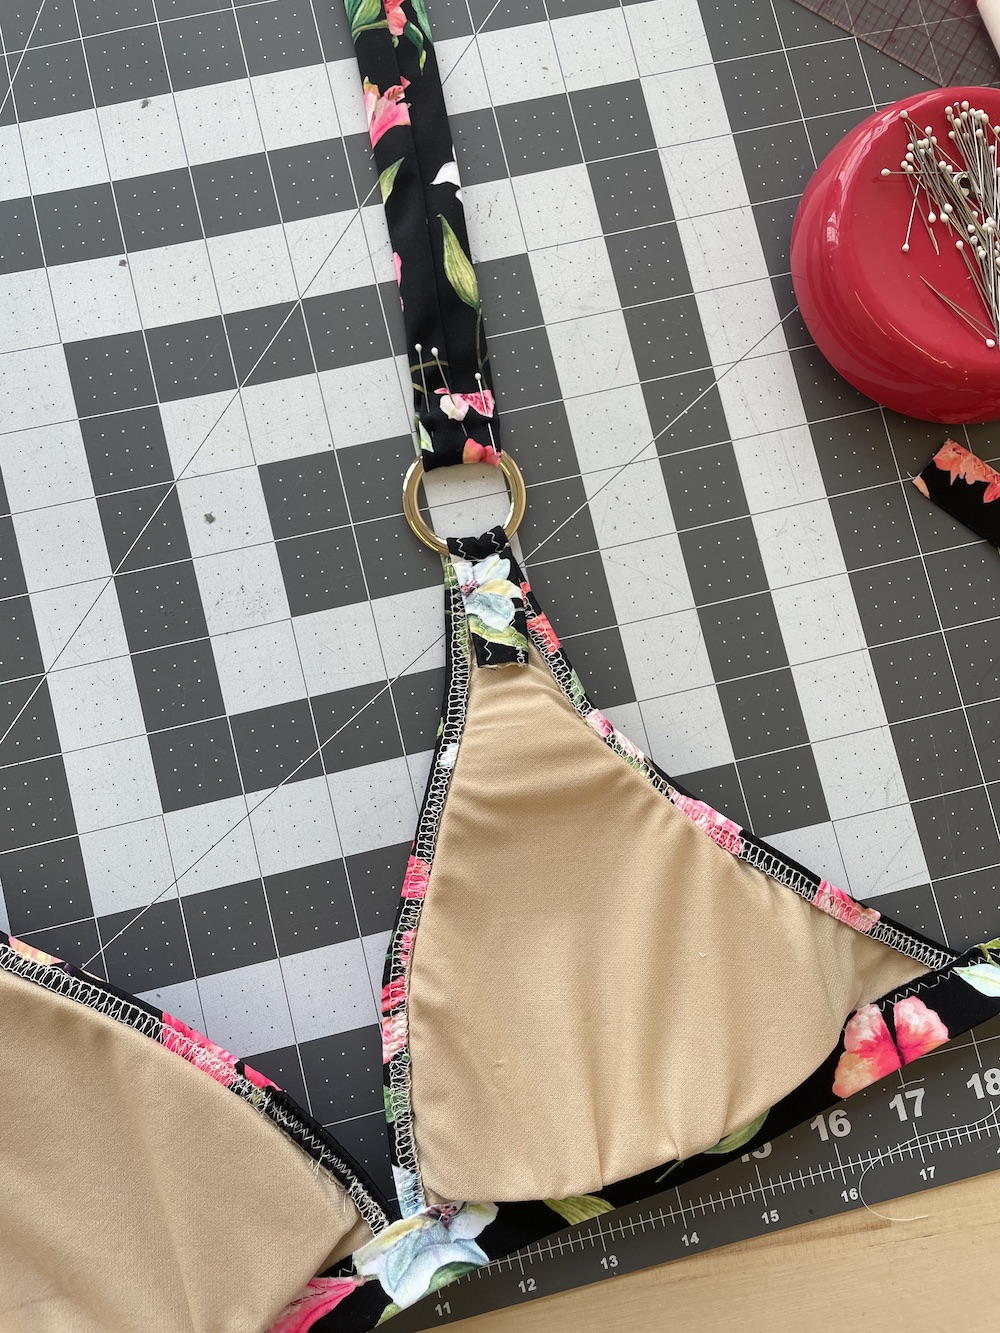
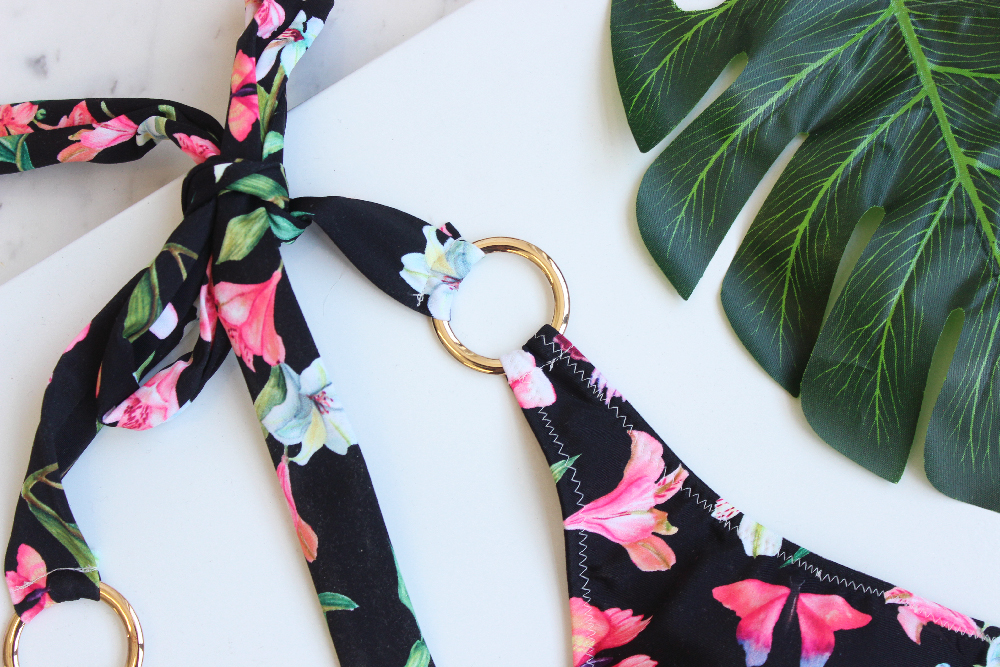
Time to add in the swim rings.
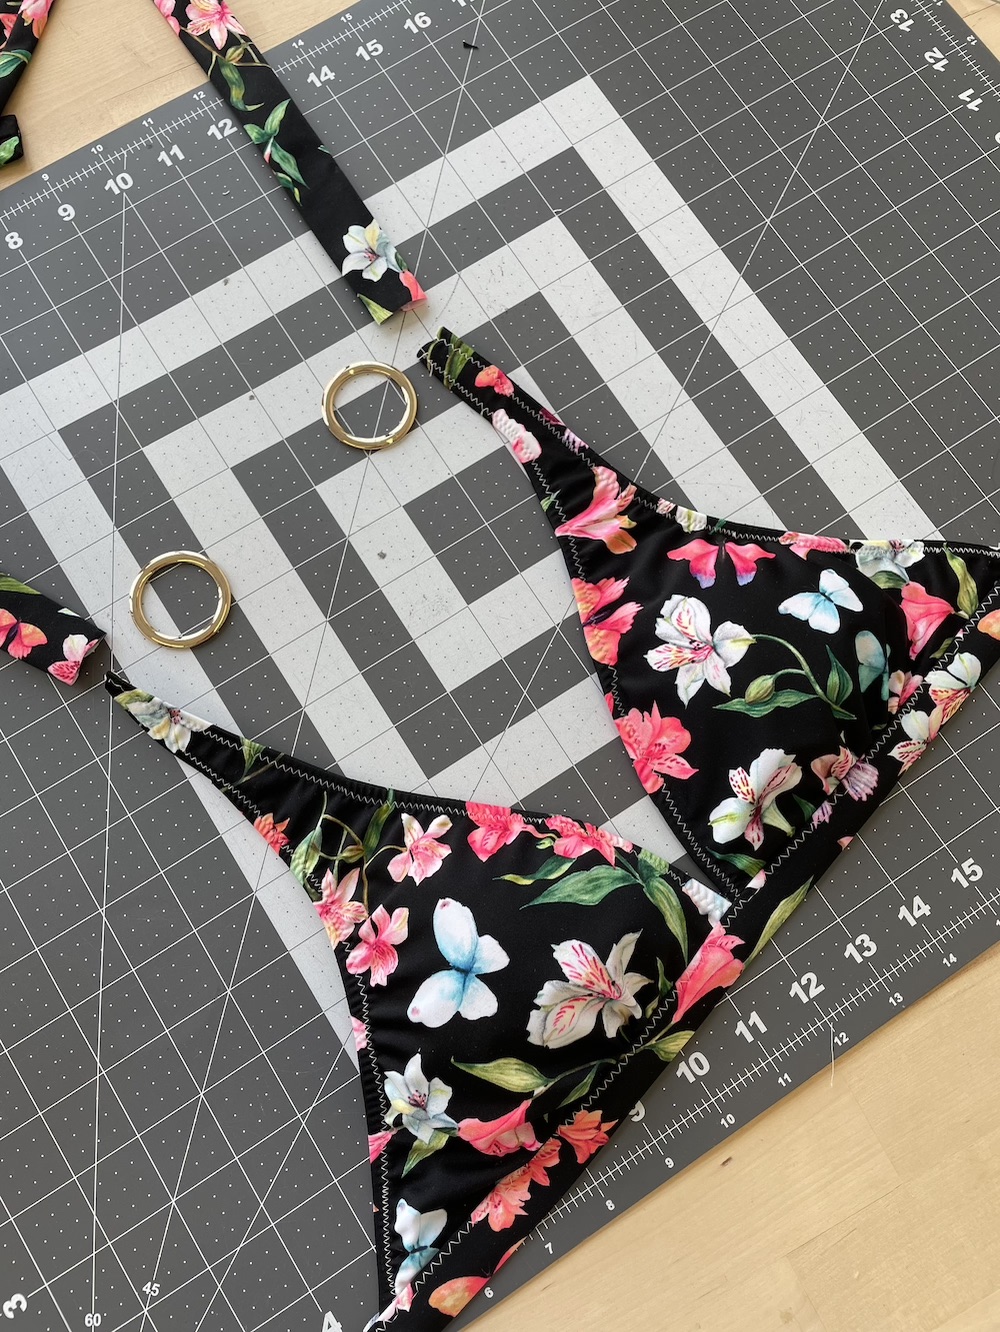
Thread the strap extension through the swim ring. Slide the swim ring until it meets the reference line we drew earlier. Bend back the strap extension and pin.
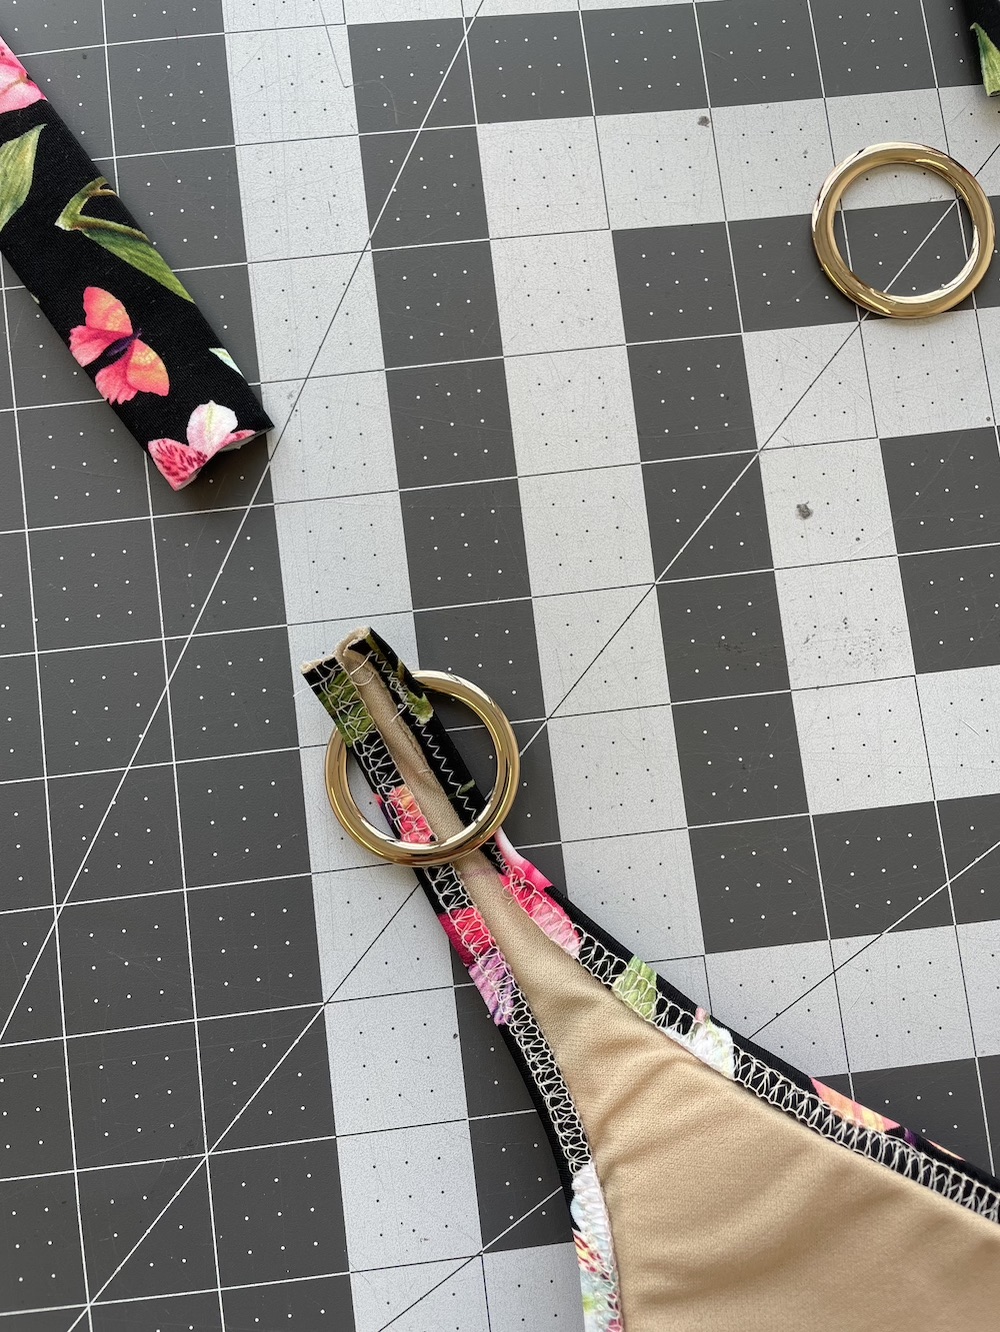
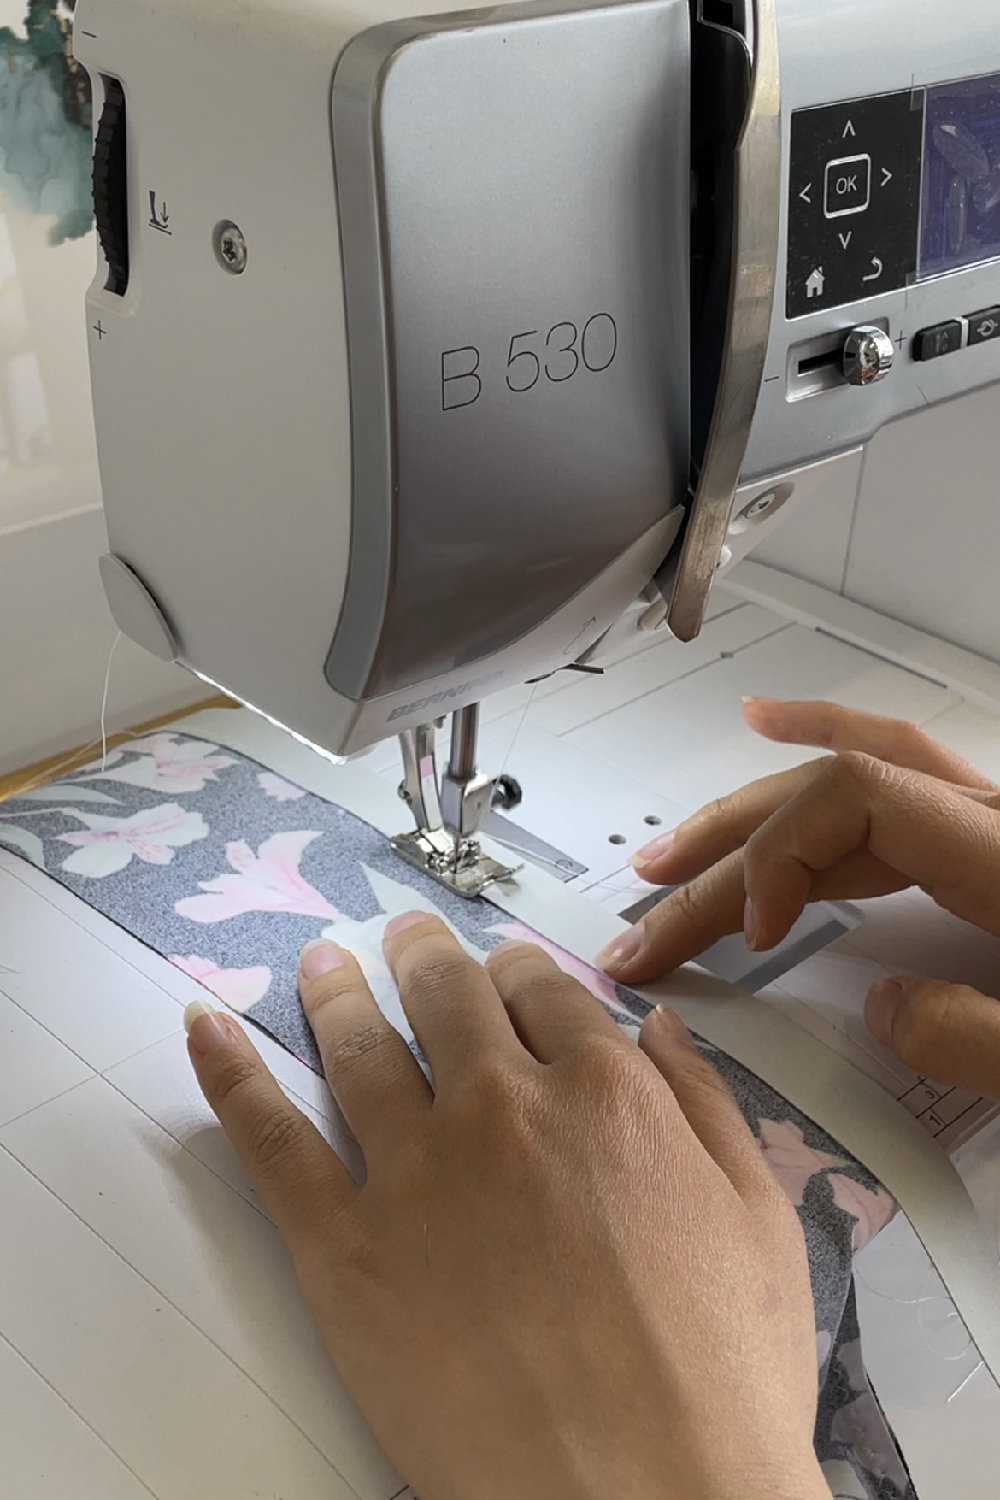
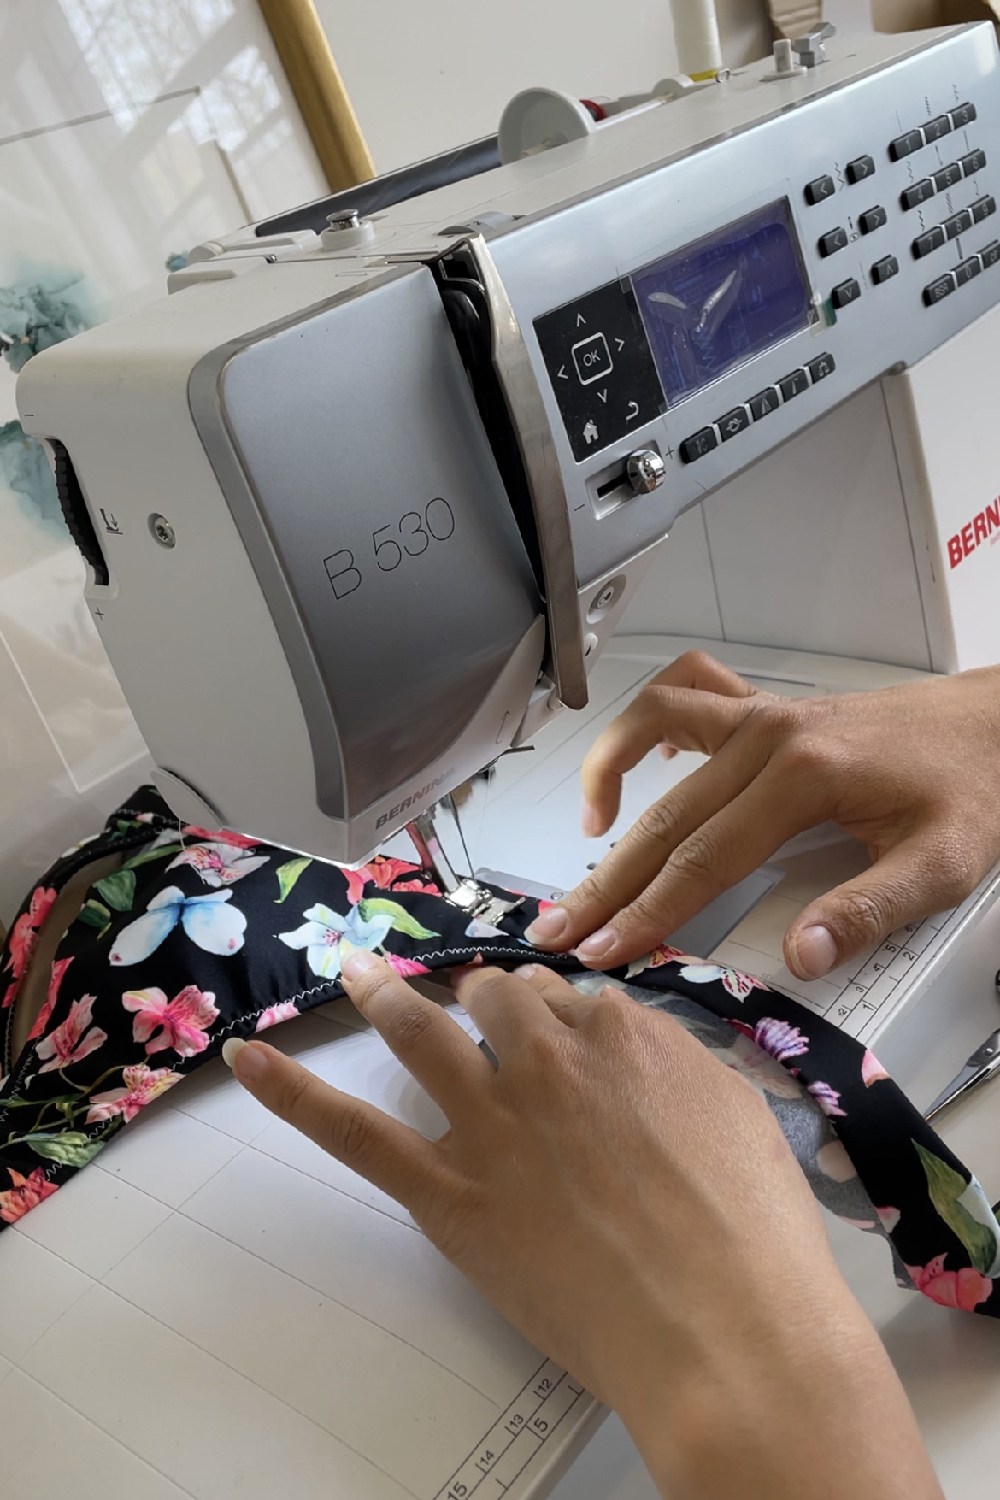
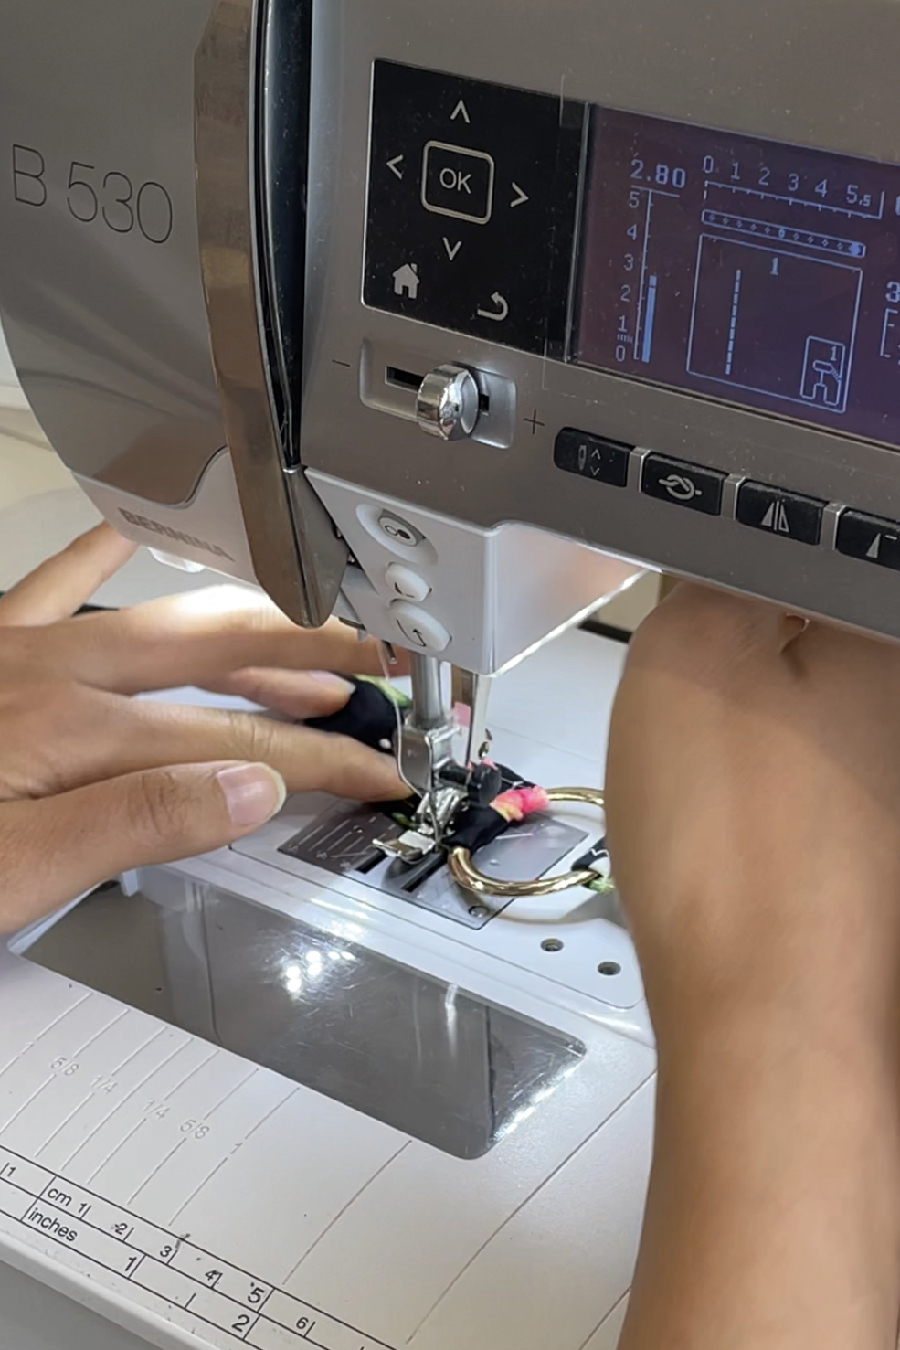
To sew close to the swim ring, I am using the No. 4 Zipper foot that comes with my Bernina B530 machine. It’s really the MVP for stitching close to any bulky hardware that you can’t get under a standard sewing machine foot.
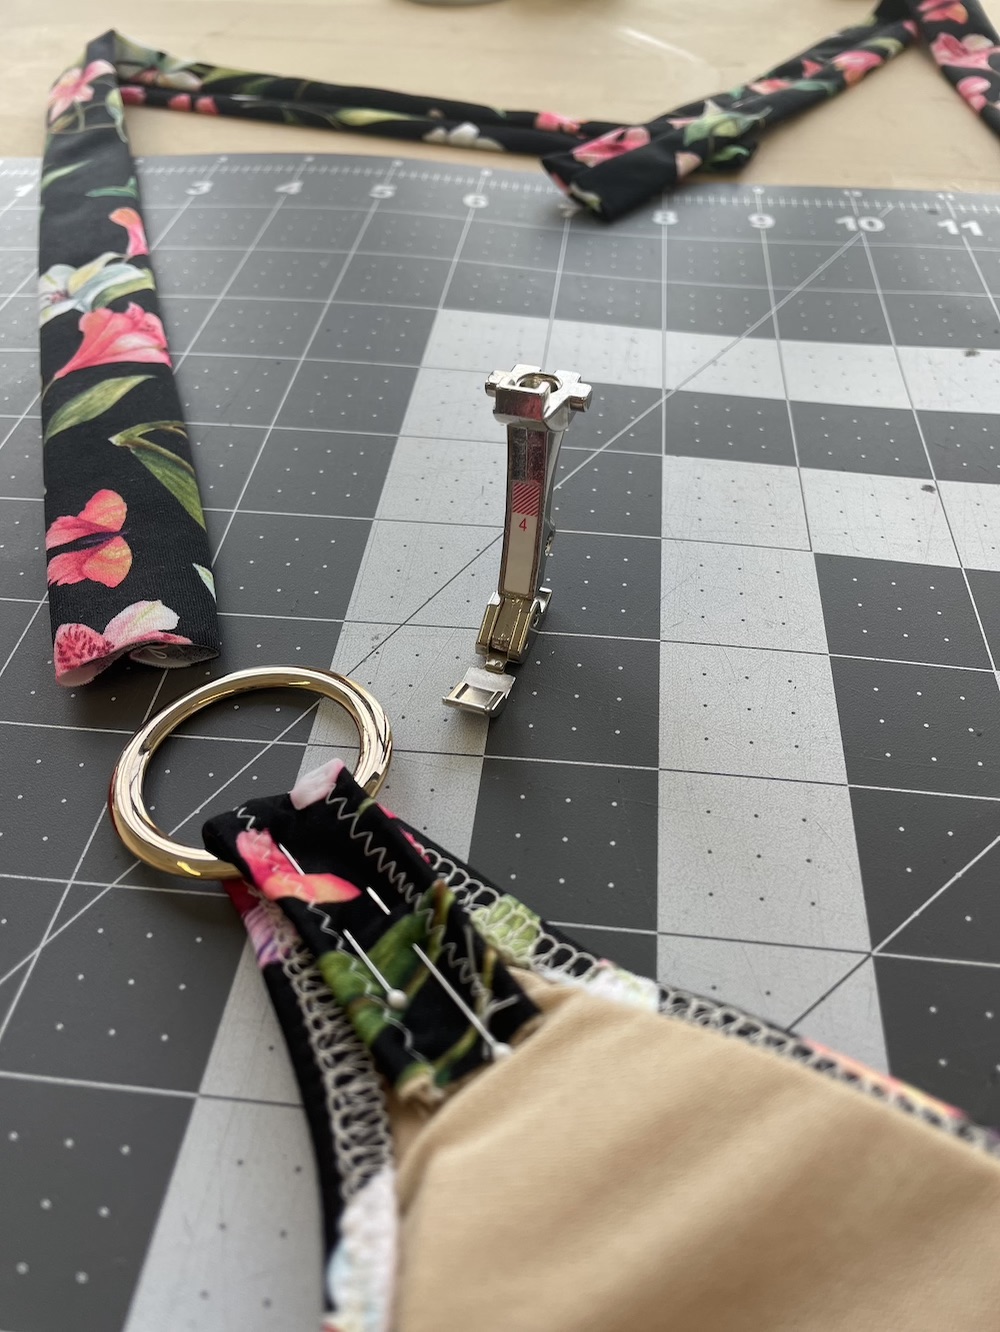
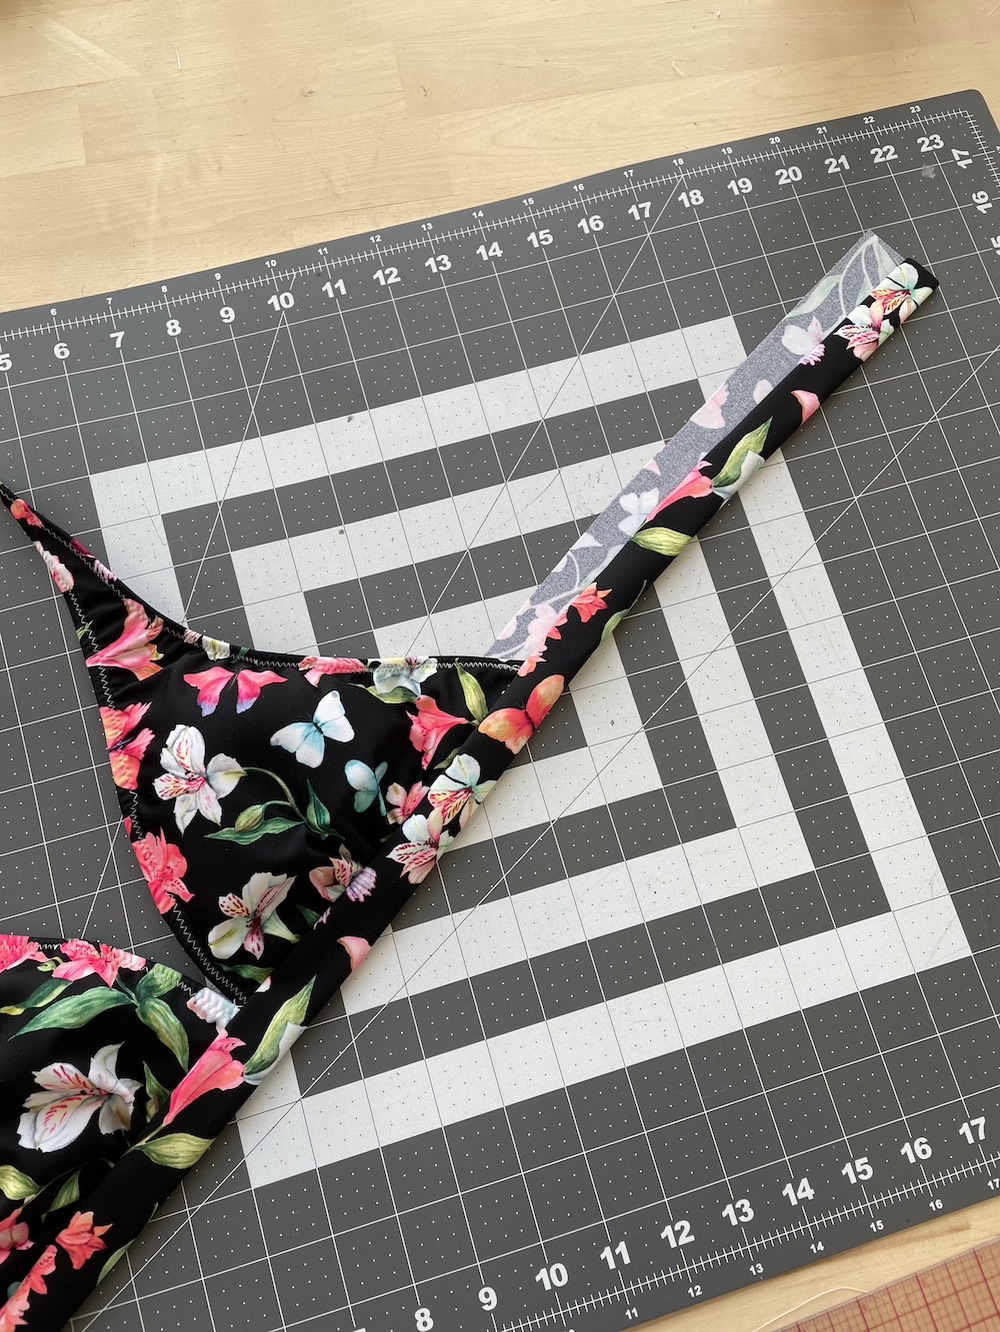
After attaching the swim rings at the strap extensions, it’s time to add the straps. Thread the strap through the swim ring and bend back about 1″.
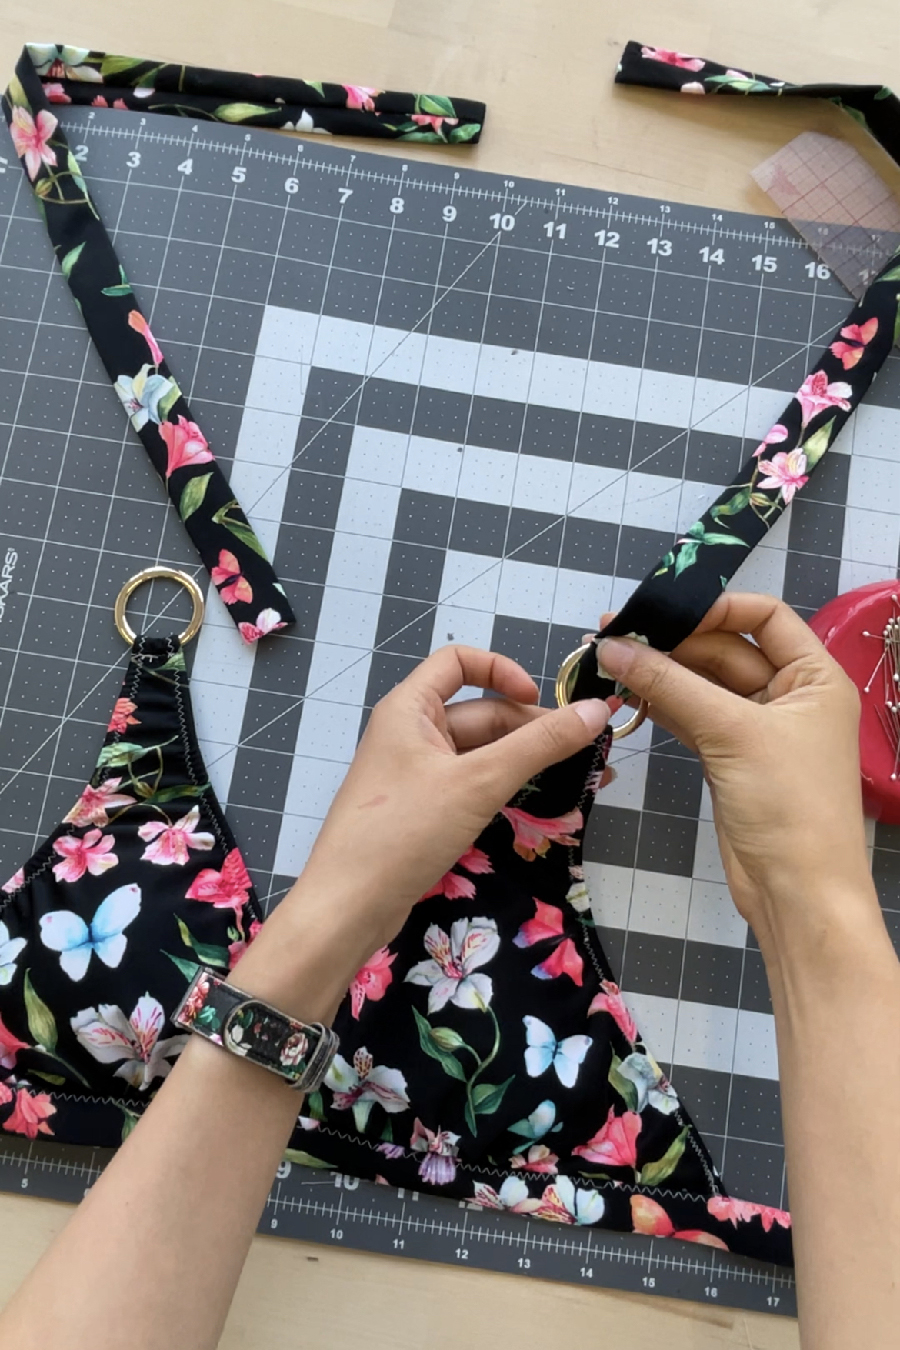
Pin and then stitch using a straight stitch and zipper foot.
Trim off the excess strap extension and strap.

Okay, we’re almost done! Now is the time to try on the bikini top and determine how much you need to shorten the band. When trimming off the excess, leave about 1″ extra at both ends for bending back when applying the bikini clasp closure.
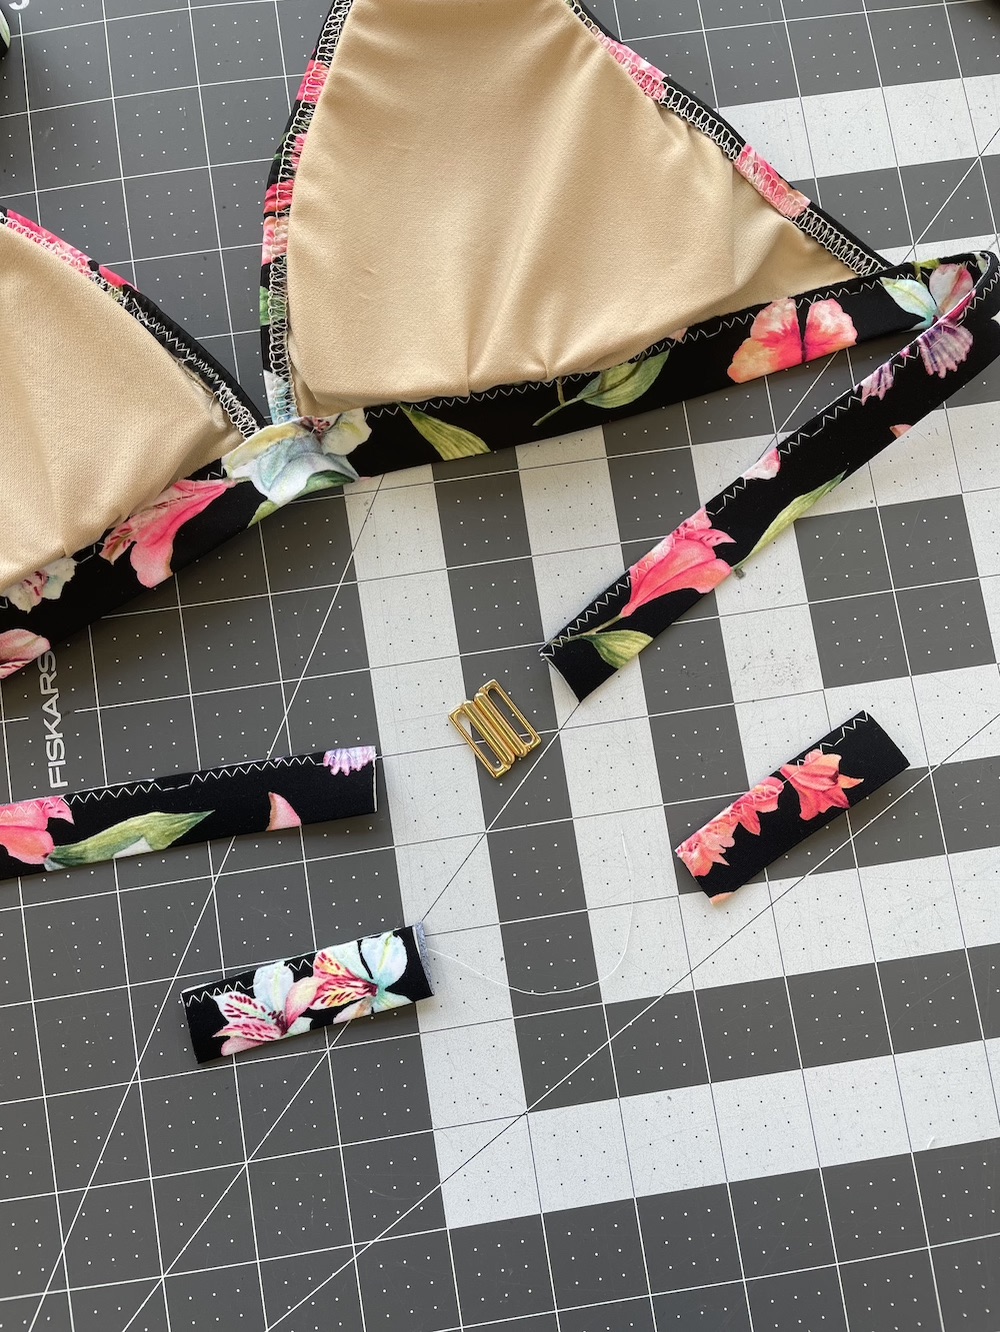
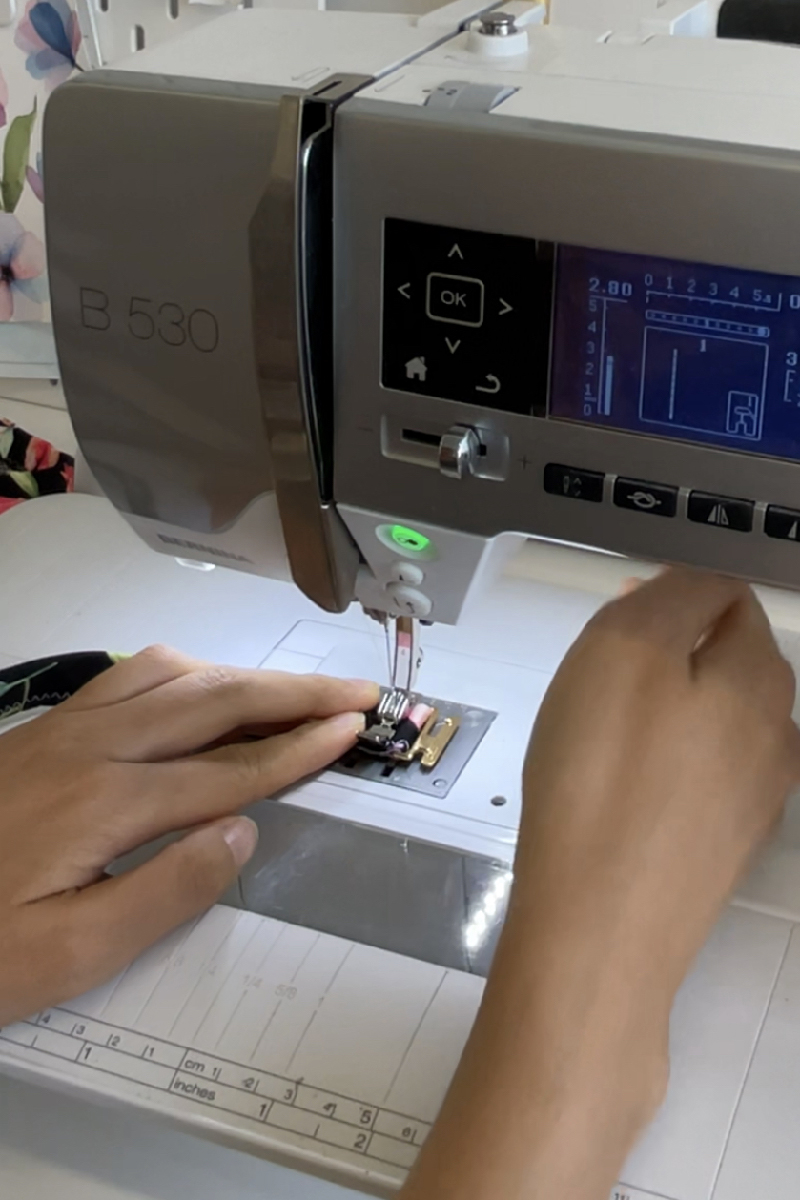
Open up the bikini clasp and thread each end of the band through the opening of each half of the clasp and bend back by about 1″.


Stitch close to each half of the bikini clasp closure using the zipper foot once again.
Et voilà. The Marilyn Bombshell Bikini Top is complete!

Final Words
I love how summery this bikini top looks! I’ll leave you with a few more photos of this bikini top.
I will be making matching bottoms at some point, so stay tuned for that post!
Pattern Used:
- Marilyn Bombshell Bikini by Wardrobe By Me
- Peachy Undies by Cool Stitches (modified to be a swim bottom)